
Prelude L4-2056cc DOHC (1990)
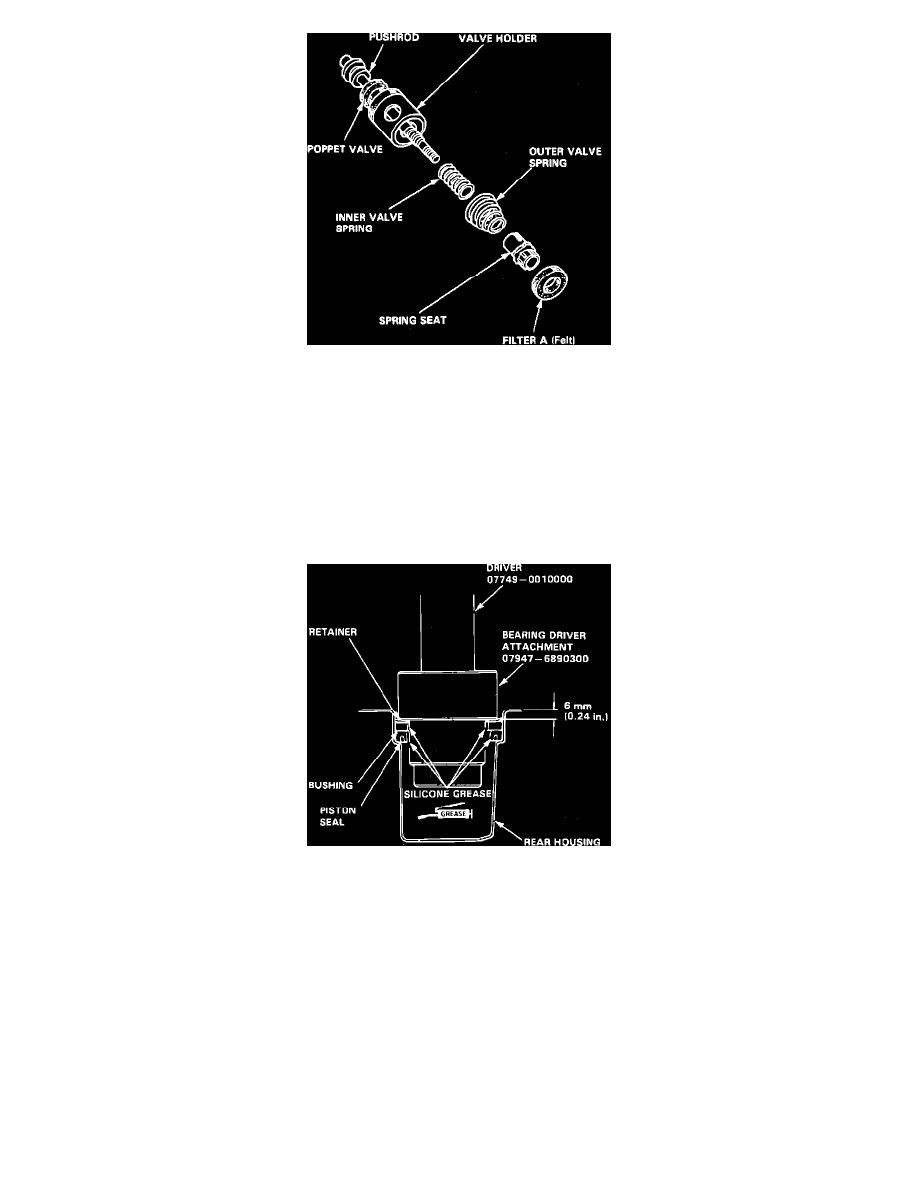
Fig. 10 Pushrod & Related Components
14.
Remove E-clip from pushrod, then filter ``A'', spring seat, outer valve spring, inner valve spring, valve holder, poppet valve and pushrod, Fig. 10.
Assembly
1.
Install new poppet valve on valve holder.
2.
Install valve holder, inner valve spring, outer valve spring and spring seat on pushrod.
3.
Install new filter ``A'' on pushrod and secure with new E-clip.
4.
Apply silicone grease to inner and outer surface of valve holder tube, then install pushrod assembly and secure with snap ring.
5.
Install new filter ``B'' on pushrod, then loosely install adjuster and star locknut.
6.
Apply silicone grease to piston seal, then position piston seal, bushing and bushing retainer on rear housing. Ensure lip of seal is facing in.
Fig. 11 Installing Piston Seal & Retainer
7.
Using special driver tool No. 07749-0010000 and bearing driver attachment tool No. 07947-6890300 or equivalents, drive bushing retainer in
until it is six millimeters below the edge of rear housing, Fig. 11.
8.
Install O-rings and through bolts on rear housing and secure with 19 millimeter circlip.
9.
Install new diaphragm on booster plate.