
Prelude L4-2056cc DOHC (1990)
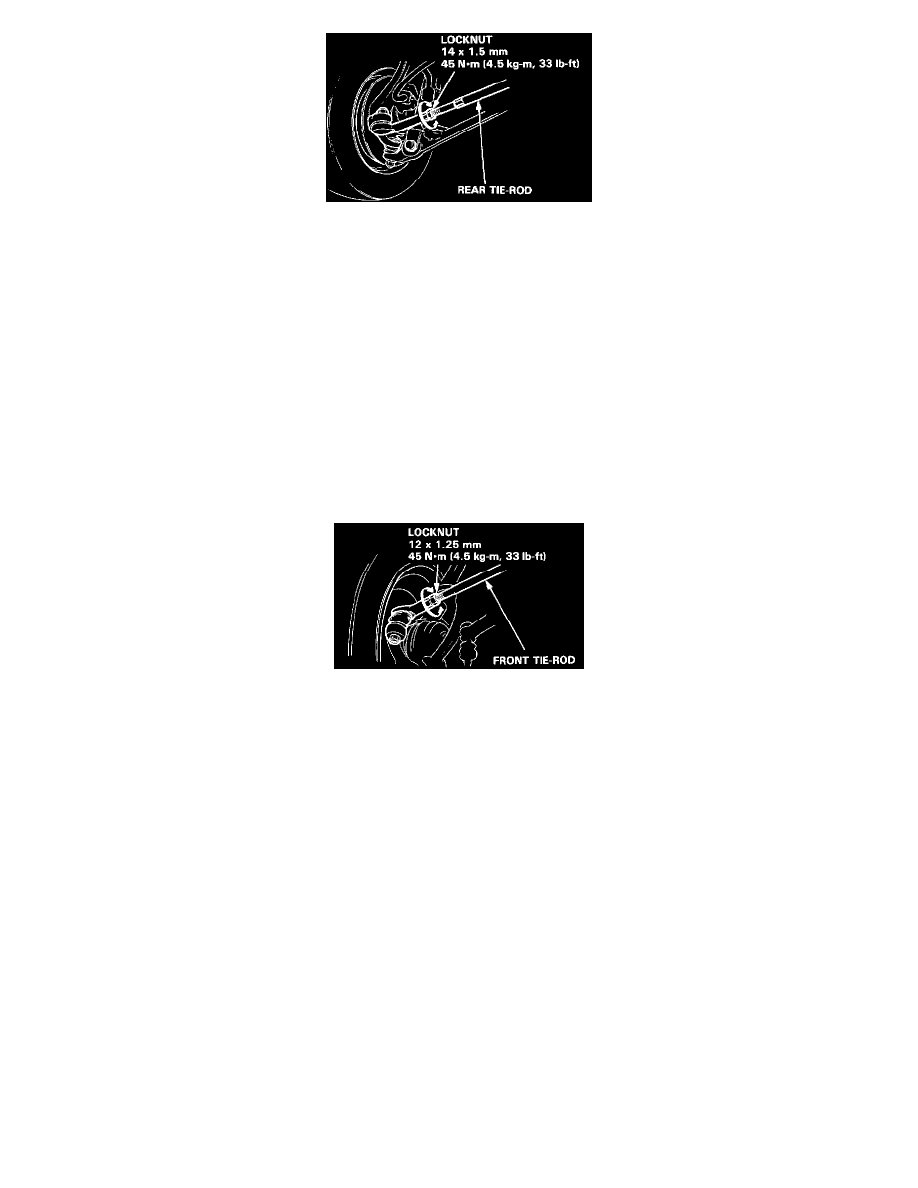
20. Loosen the tie-rod locknut and turn the tie-rod shaft until the toe setting is correct.
NOTE: One full turn of the tie-rod shaft changes the toe approximately 8.7 mm (11/32 in.).
21. After adjustment, tighten the tie-rod shaft locknut and reposition the tie-rod boot if necessary.
Front Toe:
22. Check the front toe settings.
Right front toe:
0 ± 1 mm
Left front toe:
0 ± 1 mm
Total front toe:
0 ± 2 mm
NOTE: The toe for each wheel should be the same.
^
If adjustment is required, go to step 23.
^
If adjustment is not required, go to step 25.
23. Loosen the tie-rod locknut and turn the tie-rod shaft until the toe setting is correct.
NOTE: One full turn of the tie-rod shaft changes the toe approximately 7.2 mm (9/32 in.).
24. After adjustment, tighten the tie-rod shaft locknut and reposition the tie-rod boot if necessary.
25. Recheck the final toe settings.
26. Reinstall the No.32 fuse, remove the brake pedal actuator, steering wheel holder, and the car from the alignment rack.
CAUTION: Be sure the Rear Steering Center Lock Pin was removed before moving the car off the alignment rack (step 17).
Steering Wheel Alignment - Dynamic (While the car is moving)
27. Place a strip of masking tape on the steering wheel hub and another on the upper column cover.
Draw a line across both pieces of tape with the steering wheel in the straight-ahead position.
28. Drive the car in a straight line on a flat road and check the steering wheel alignment.
29. If the steering wheel alignment is off by more than 3° (2.5 mm between the lines marked on the tape), return the car to the alignment rack and
recheck the toe settings.
If the steering wheel alignment is off by less than 3° go to step 30.