S2000 L4-2.2L (2004)

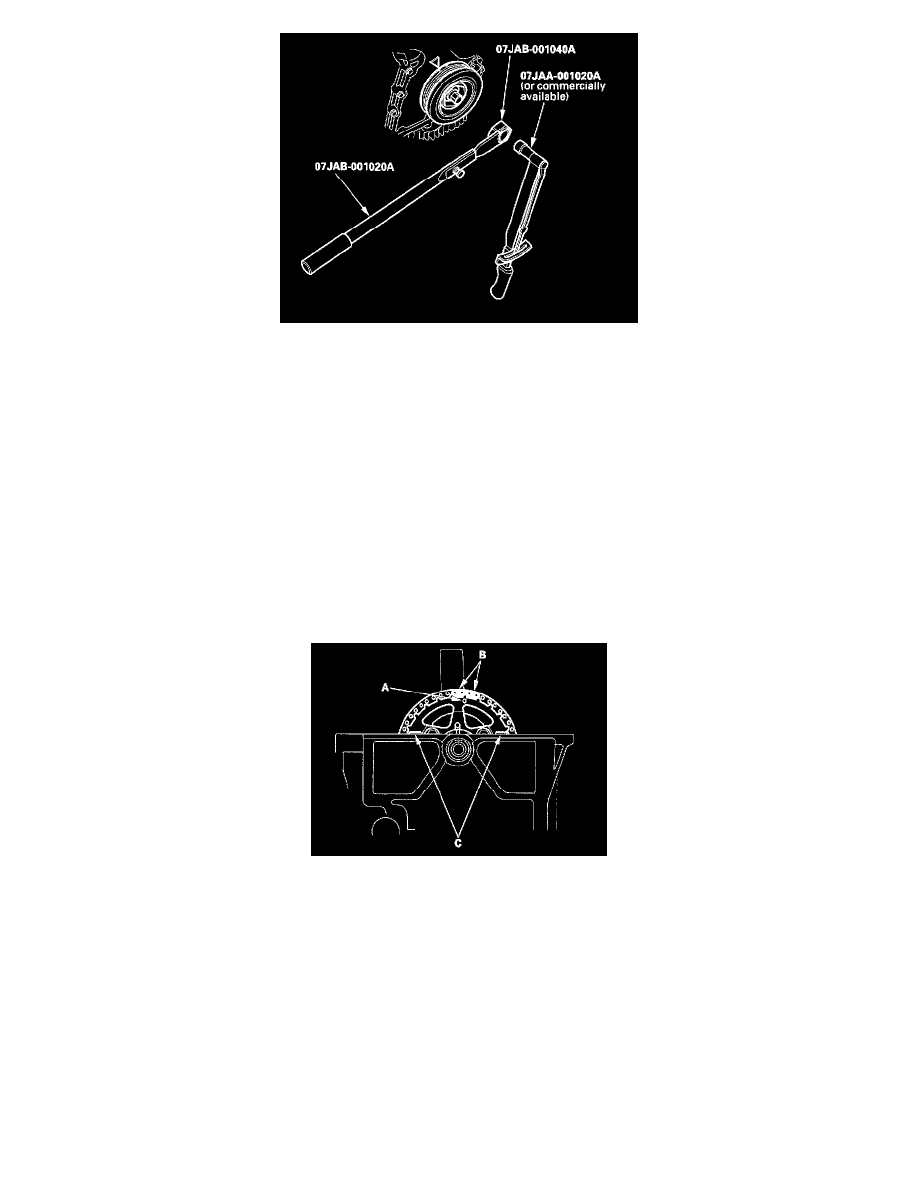
13. Install the crankshaft pulley, and tighten the bolt to 245 Nm (25.0 kgf-m, 181 ft. lbs.). Do not use an impact wrench.
14. Measure the diameter of each cylinder head bolt at point A and point B (see step 1). If either diameter is less than 11.5 mm (0.45 inch), replace
the cylinder head bolt.
15. Clean the cylinder head and block surfaces.
16. Apply liquid gasket, part No.08718-0009, to the shaded areas of the cylinder head gasket mating surface of the block and chain case (see step 3).
17. Install the dowel pins and new cylinder head gasket (see step 4).
18. Apply liquid gasket, part No. 08718-0009, to the cylinder head mating surface of the block and chain case within 5 mm from the edge of the
cylinder head gasket (see step 5).
19. Install the cylinder head on the block.
20. Apply engine oil to the threads and under the heads of all the cylinder head bolts.
21. Tighten the cylinder head bolts in sequence to 29 Nm (3.0 kgf-m, 22 ft. lbs.). Use a beam-type torque wrench. When using a preset-type torque
wrench, be sure to tighten slowly and do not overtighten. If a bolt makes any noise while you are torquing it, loosen the bolt and retighten it (see
step 8).
22. Tighten all cylinder head bolts in two steps (90° per step). If you are using a new cylinder head bolt, tighten the bolt an extra 90° (see step 9).
23. Tighten the 8 mm bolts to 22 Nm (2.2 kgf-m, 16 ft. lbs.).
24. Make sure the crankshaft pulley is at TDC (see step 11).
25. Place the idler gear/idler gear collar assembly into the cylinder head (see step 12).
26. Install the cam chain on the sprocket with the punch mark (A) aligned with the center of the two colored pieces (B).
27. Fit the idler gear collar into the cylinder head.
28. Turn the idler gear counterclockwise to relieve cam chain free play, and check the alignment of the TDC marks (c) on the cam chain sprocket with
the cylinder head surface. If the cam chain sprocket is not positioned at TDC, remove the idler gear from the cylinder head and reposition the cam
chain to bring the cam chain sprocket to TDC.
29. Apply engine oil to the idler gear center bolt threads. Install a new O-ring on the bolt.
30. Install the washer on the idler gear, and tighten the idler gear center bolt (see step 16).
31. Clamp the cam chain auto-tensioner in a soft-jawed vise (see step 17).
32. Turn the 5 x 0.8 mm bolt clockwise to compress the bottom of the auto-tensioner, then insert the set pin (see step 18).
33. Remove the 5 x 0.8 mm bolt from the maintenance hole. Install a new O-ring, then install the nozzle and end cover (see step 19).
34. Install the cam chain auto-tensioner in the cylinder head with new O-rings (see step 20).
35. Remove the maintenance bolt from the cylinder head (see step 21).
36. Remove the set pin from the cam chain auto-tensioner. Reinstall the maintenance bolt with new washer (see step 22).
37. Install the rocker arm assembly.
38. Check the alignment of the TDC marks on the cam chain sprocket with the cylinder head surface (see step 23).
39. Align the TDC marks on the intake camshaft gear and the exhaust camshaft gear, and install the camshafts (see step 25).
