
S2000 L4-2.2L (2004)
Headlamp Bulb: Service and Repair
HID Bulb Removal
HID Bulb Removal
WARNING: A transient high tension (25,000 V) occurs at the bulb sockets of the high intensity discharge (HID) lamps when the combination
light switch is turned ON. It may cause serious electrical shock or electrocution if you do not observe the cautions below.
CAUTION:
-
Never turn on the combination light switch before fitting the HID bulbs to their bulb sockets and completing the reassembly of the headlight
assembly.
-
Do not service the headlights assembly in wet conditions, such as rain or snow, near a sprinkler system, or when your hands are wet to prevent
electrocution.
-
Do not touch the surface of the HID bulbs with your bare hands and do not stain it with any oils and fats.
-
Do not disassemble the inverter unit and the igniter unit.
-
Do not turn on the HID bulb by using a power source other than the battery mounted in your vehicle.
1. Make sure you have the anti-theft code for the radio, then write down the frequencies for the radio's preset buttons.
2. Turn the combination light switch OFF.
3. Disconnect the battery negative cable, then disconnect the positive cable.
4. Remove the front part of the inner fender as necessary.
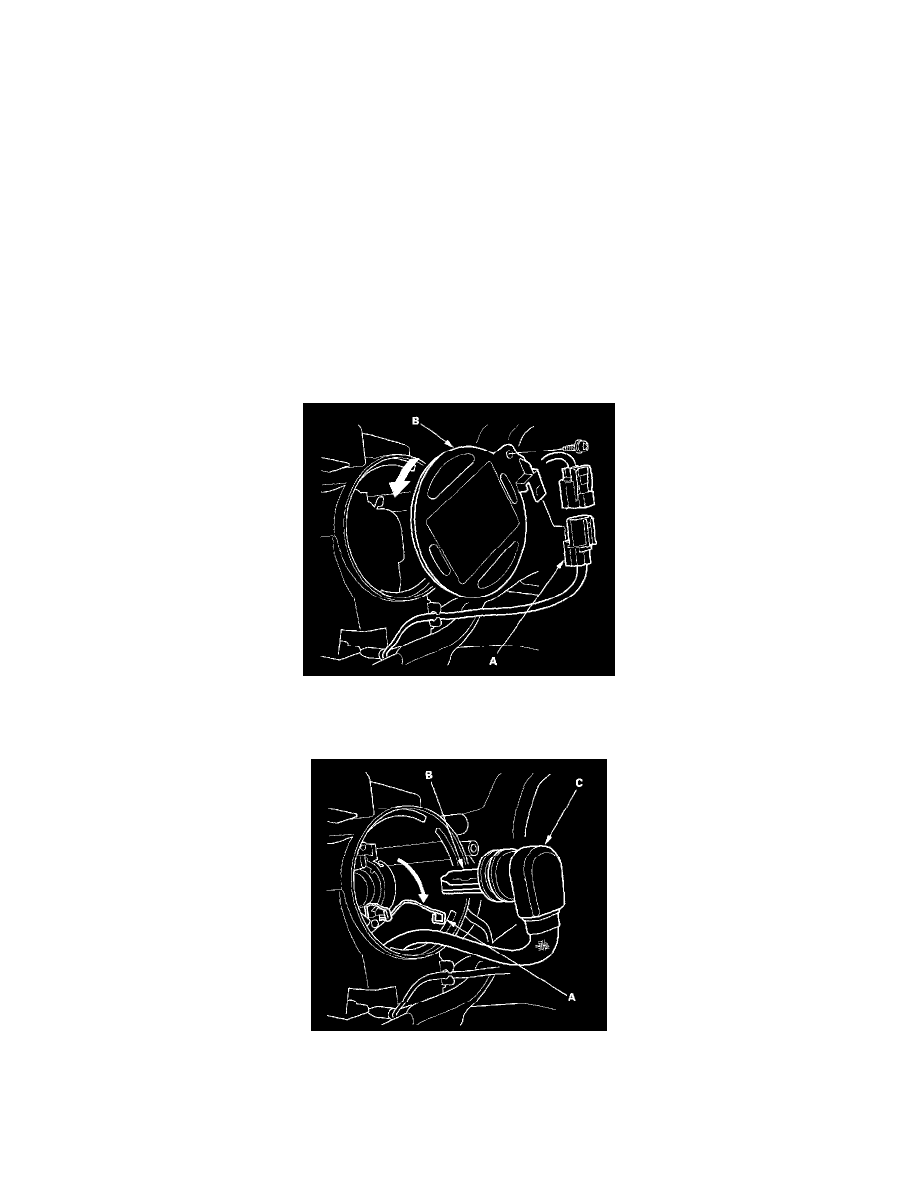
5. Disconnect 2P connector (A) from the inverter unit.
6. Remove the Torx bolt using a tamper-proof Torx T25 bit.
7. Turn the cover (B) 45° counterclockwise to remove it from the headlight assembly.
8. Pull the retaining spring (A) away from the bulb (B), then remove the socket and the bulb (C).