
S2000 L4-2.2L (2004)
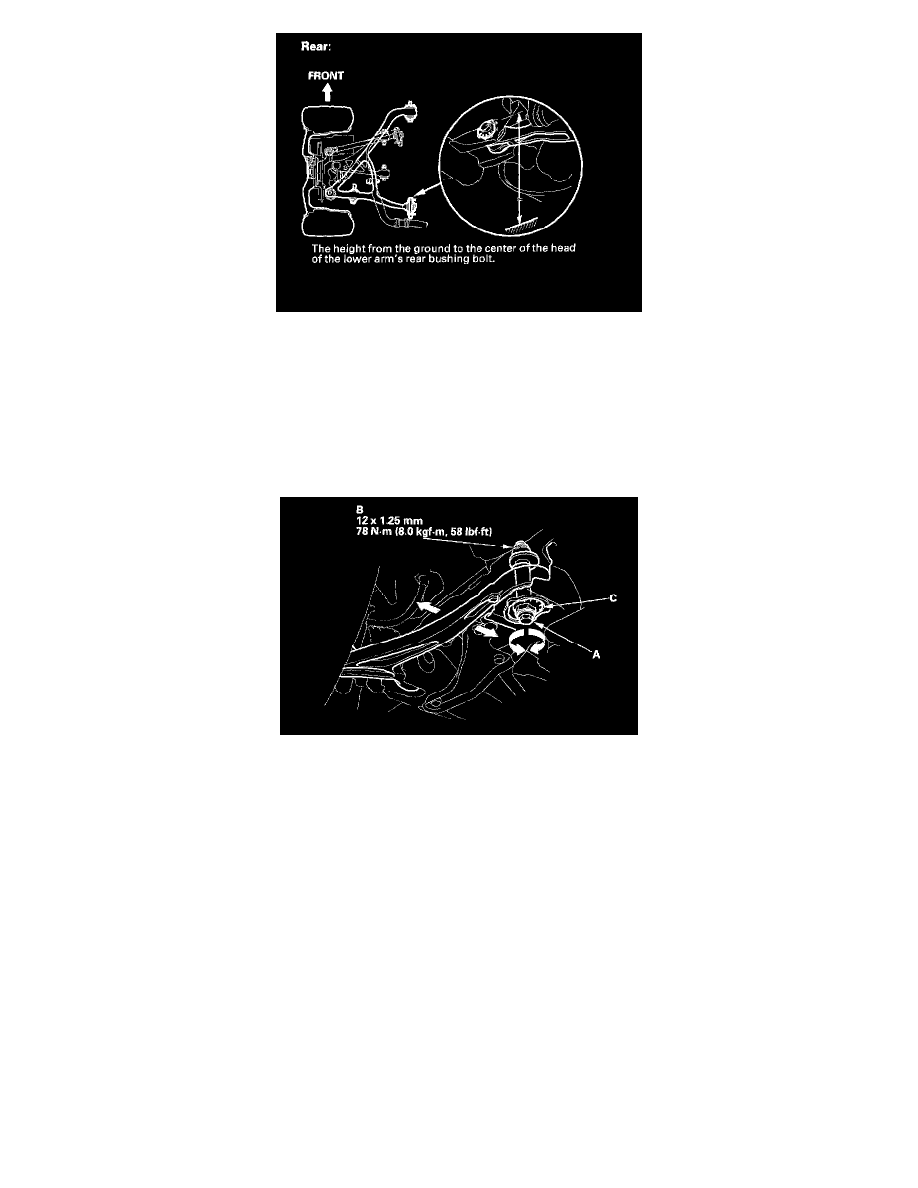
7. Check the height of each suspension. Make sure the vehicle is empty, is parked on a level surface, and has properly inflated tires (the treadwear
indicator must not be showing). If the height is out of specification, adjust the load as necessary.
Caster Inspection/Adjustment
Use commercially available computerized four wheel alignment equipment to measure wheel alignment (caster, camber, toe, and turning angle).
Follow the equipment manufacturer's instructions.
1. Check the caster angle. If adjustment is required, go to step 2.
Caster angle: 6°00' ± 15'
Maximum difference between the right and left side: 0°15'
2. Hold the flange bolt (A) on the rear of the lower arm, and loosen the self-locking nut (B).
3. Turn the adjusting cam collar (C) until the caster is correct.
4. After adjusting, tighten the self-locking nut while holding the flange bolt.
5. Bounce the vehicle several times and recheck the caster reading.
Front Camber Inspection/Adjustment
Use commercially available computerized four wheel alignment equipment to measure wheel alignment (caster, camber, toe, and turning angle).
Follow the equipment manufacturer's instructions.
1. Check the camber angle. If adjustment is required, go to step 2.
Front camber angle: -0°30' ± 10'
Maximum difference between the right and left side: 0°10'