S2000 L4-2.2L (2004)

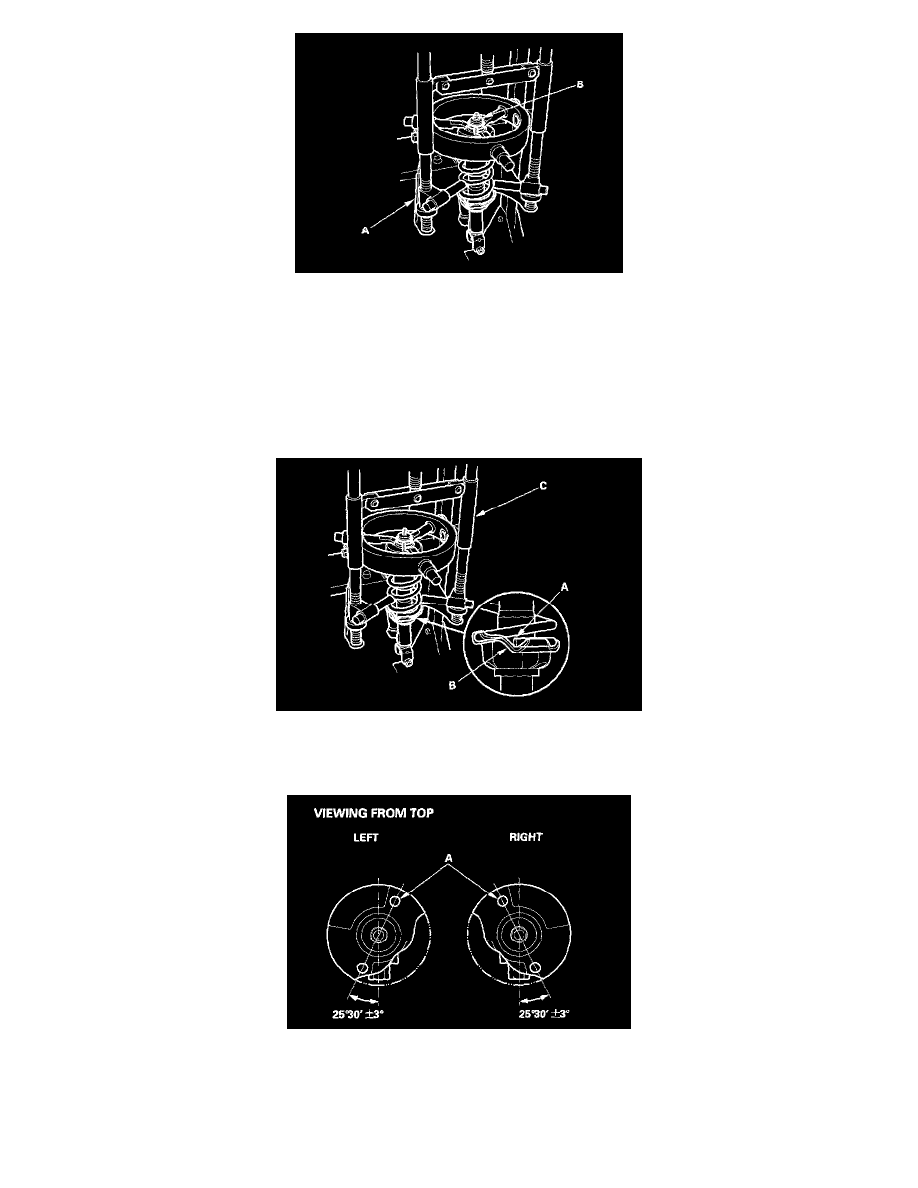
1. Compress the damper spring with a commercially available strut spring compressor (A) according to the manufacturer's instructions, then remove
the self-locking nut (B). Do not compress the spring more than necessary to remove the nut.
2. Release the pressure from the strut spring compressor, then disassemble the damper as shown in the Exploded View.
3. Reassemble all of the parts, except the spring.
4. Compress the damper assembly by hand, and check for smooth operation through a full stroke, both compression and extension. The damper
should extend smoothly and constantly when compression is released. If it does not, the gas is leaking and the damper should be replaced.
5. Check for oil leaks, abnormal noises, or binding during these tests.
Reassembly
1. Assemble all of the damper components except the self-locking nut onto the damper unit. Align the spring bottom end (A), the stepped part of the
lower spring mounting cushion, and the step on the lower spring seat (a).
2. Install the damper assembly on a commercially available strut spring compressor (C).
3. Position the stud bolt (A) in the damper mounting base as shown.
4. Compress the damper spring with the spring compressor.
