
Accent L4-1.6L (2003)
1. Remove the stop lamp switch.
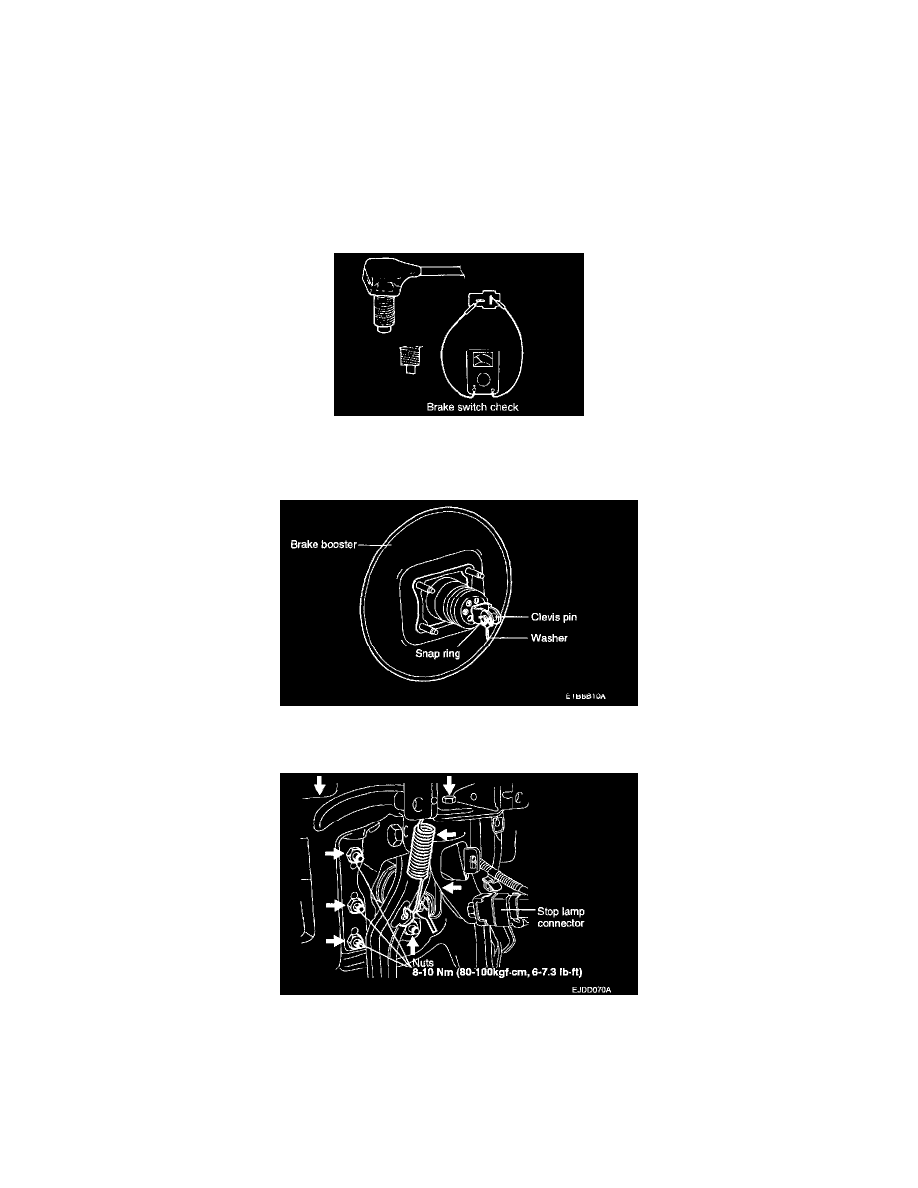
2. Remove the split pin and clevis pin.
3. Remove the brake pedal assembly mounting nut.
4. Remove the brake pedal assembly.
INSPECTION
1. Check the bushing for wear.
2. Check the brake pedal for distortion.
3. Check the brake pedal return spring for damage.
4. Check the stop lamp switch.
1. With an ohmmeter connected to the stop lamp switch terminals, check for continuity.
2. If there is no continuity when the plunger is depressed and there is continuity when the plunger is released, the stop lamp switch is normal.
INSTALLATION
1. Installation is the reverse of removal.
NOTE: Be sure to install the split pin on the operating rod clevis pin. Apply the grease (NLG/ No.2)
2. Install the brake pedal assembly and tighten the flange nuts (booster mounting nuts) and bolt.
3. Install the stop lamp switch.
4. Adjust the brake pedal height and free play.