
Accent GL Sedan L4-1495cc 1.5L SOHC MFI (1997)
5. Remove the cotter pins and clips (transaxle side).
6. Remove the shift cable and select cable.
INSPECTION
1. Check the select cable for proper operation and damage.
2. Check the shift cable for proper operation and damage.
3. Check the boot for damage.
4. Check each bushing for wear, abrasion, sticking, restricted movement or damage.
5. Check for a weak or damaged spring.
INSTALLATION
1. Install the shift lever assembly.
2. Installation of shift lever and select cable.
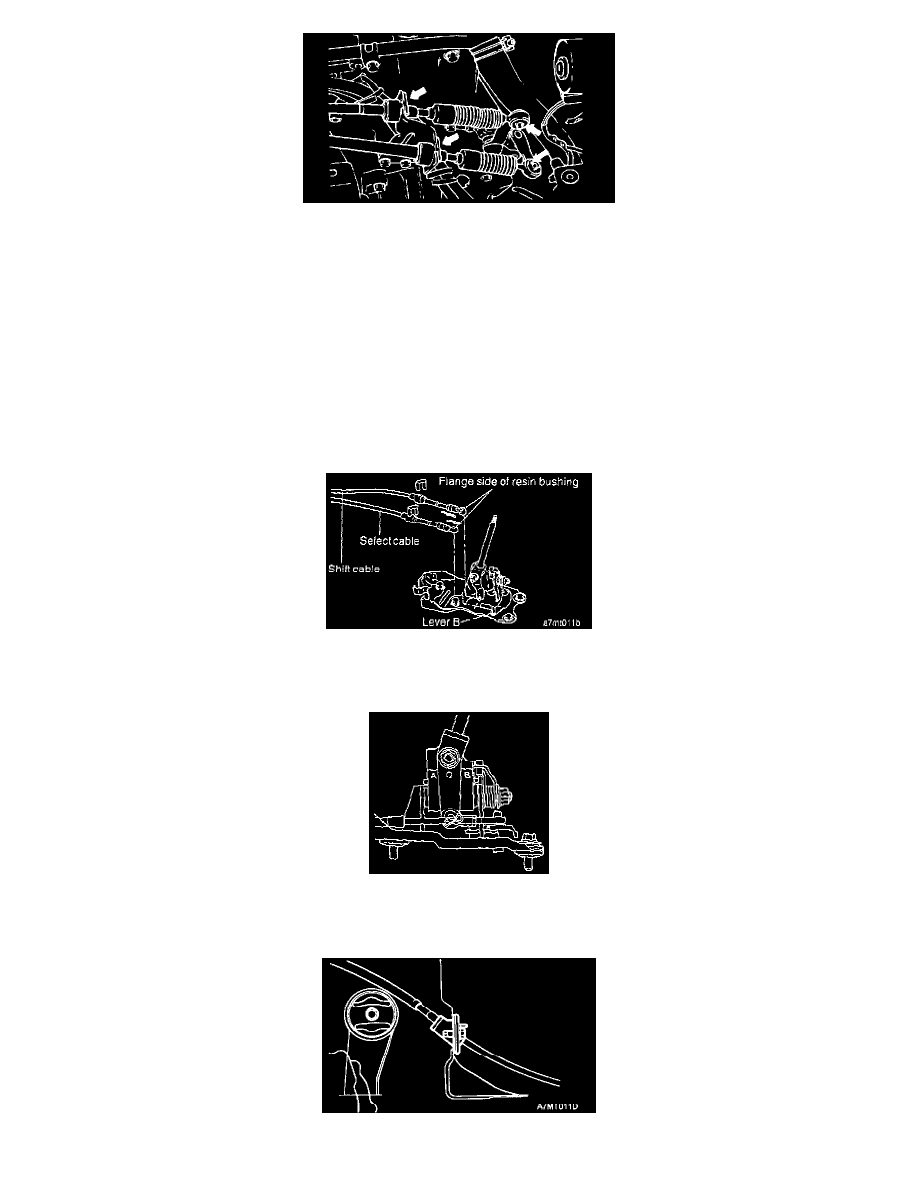
a. Move the transaxle select lever and shift lever to the neutral position.
b. When connecting the select cable to lever (B), adjust the select cable's length so that lever (B) is at the neutral position.
c. The flange side of the resin bushing at the select cable end should be at the lever (B) end surface.
d. he flange side of the resin bushing at the shift cable end should be at the shift lever's cotter pin hole.
e. After connecting the shift cable, check that the dimensions (A) and (B) shown in the illustration are equal.
f.
If the dimensions (A) and (B) are not equal, adjust the regulator of shift cable.
g. Move the shift lever to each position and verify that the shifting is smooth.
3. Install the retainer and bolts.