
Accent GT Coupe L4-1495cc 1.5L DOHC MFI (1997)
7. Tighten the tensioner attaching bolts 2 and 1 in that order to 20-27 Nm (200-270 kg. cm., 15-20 ft. lbs.).
8. Then recheck the belt tension as follows:
MANUAL METHOD:
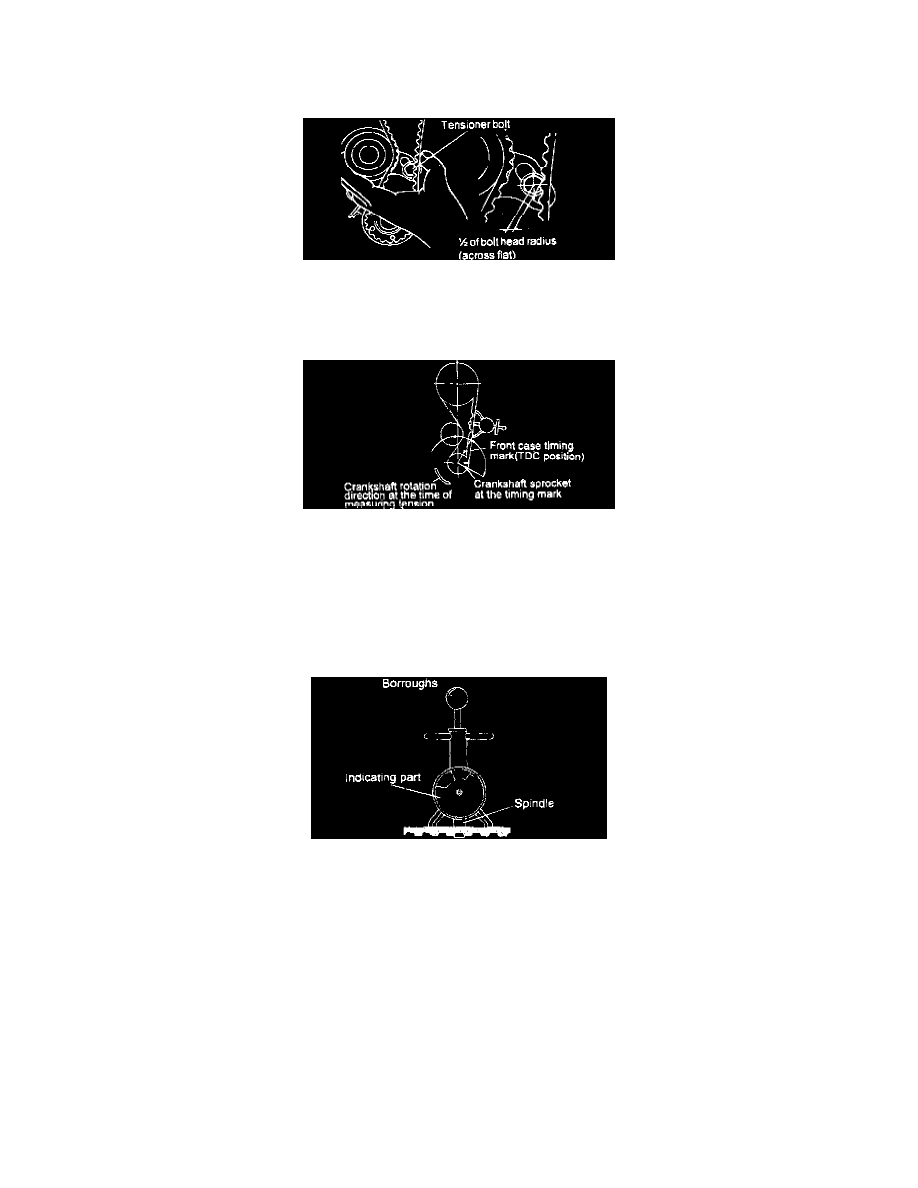
Verify that when the tensioner and the tension side of the timing belt are pushed in horizontally with a moderate force [approximately 49 N (11
lb)], the timing belt cog end is approximately 1/2 of the tensioner mounting bolt head radius (across flats) away from the bolt head center.
GAUGE METHOD:
(a) Rotate the crankshaft in a counterclockwise direction to position of 90 degrees before top dead center as shown in the illustration.
NOTE: Make sure the valves are adjusted properly
(b) Measure the belt tension in the middle of the tension side span using the tension gauge, BORROUGHS BT-33-73F, or equivalent.
Timing belt tension (In cool condition): 9.5-16.5 Kg (20.9-36.4 lb).
NOTE:
-
Put arm on bottom of belt teeth.And put spindle on the middle of belt back surface.
-
Keep hand off from indicating part.
9. Install the timing belt cover, tighten timing belt cover bolts to 10-12 Nm (100-120 kg. cm., 7-9 ft. lbs.).
10. Install the crankshaft pulley, ensure the crankshaft sprocket pin fits the small hole in the pulley.
11. Install the fan belt and adjust the belt tension.
12. Install the water pump pulley
13. Install V-belt and adjust the belt tension.