
Accent GT Coupe L4-1495cc 1.5L DOHC MFI (1997)
Crankshaft: Service and Repair
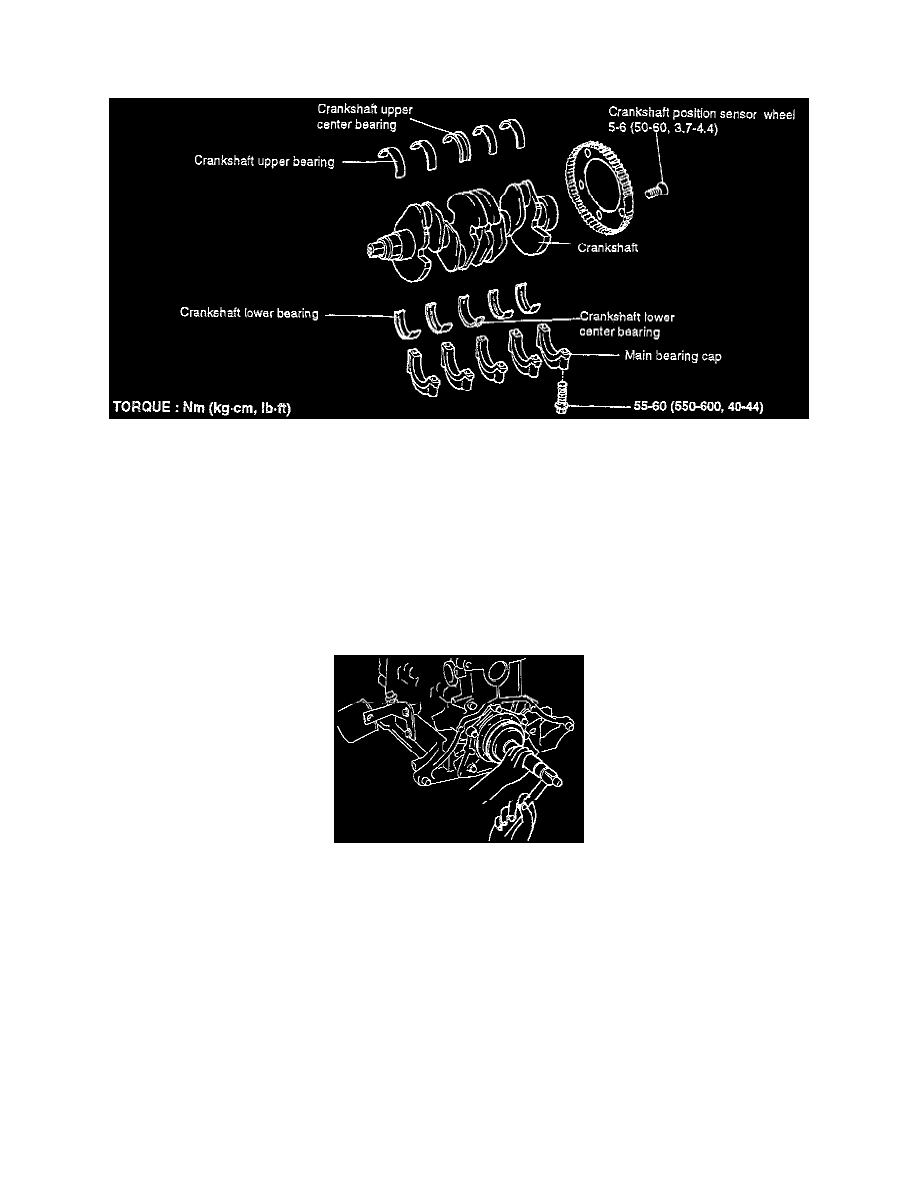
Installation
1. Install the upper main bearing inserts in the cylinder block.
-
When reusing the main bearings, remember to install them by referring to the location marks made at the time of disassembly.
2. Install the crankshaft.
-
Apply engine oil to the journals.
3. Install bearing caps, then using the sequence of the center, No.2, No.4, front and rear caps, tighten cap bolts to 55-60 Nm (550-600 kg. cm., 40-44
ft. lbs.).
-
Cap bolts should be tightened evenly in 2 to 3 stages before they are tightened to the specified torque.
-
The caps should be installed with the arrow mark directed toward the crank pulley side of engine.
-
Cap numbers must be corrected.
4. Make certain that the crankshaft turns freely and has the proper clearance between the center main bearing thrust flange.
Crankshaft end play standard value: 0.05-0.175 mm (0.002-0.005 inch).
5. Install the crankshaft main bearing seal in the crankshaft rear seal case as follows:
(a) Using crankshaft rear oil seal installer tool No. 09231-21000, or equivalent, as shown.
(b) Press and fit the oil seal in all the way, being careful not to misalign it.
6. Install the rear oil seal case and new gasket.
-
Tighten the five bolts.
-
Apply engine oil to the oil seal lips and crankshaft at the time of installation.
7. Install the rear engine plate and tighten the bolts
.
8. Install the connecting rod caps, tighten to 35-38 Nm (350-380 kg. cm., 25-28 ft. lbs.).
-
Check connecting rod end play.
Standard value: 0.05-0.175 mm (0.002-0.005 inch).
9. Install the flywheel.
10. Install the front case.
11. Install the oil pan.
12. Install the timing belt.