
Accent GT Coupe L4-1495cc 1.5L DOHC MFI (1997)
4. Align the timing marks of the camshaft sprocket and crank shaft sprocket, with the No.1 piston placed at top dead center on its compression stroke.
5. To install the timing belt tensioner, proceed as follows:
-
Mount the tensioner, spring, and spacer.
-
Temporarily tighten the bolts.
-
Temporarily tighten the tensioner long hole side washer and bolts.
-
Install the bottom end of the spring against the front case as shown in the illustration.
6. Secure the tensioner, postponed towards the water pump.
7. Install the timing belt on the crankshaft sprocket.
8. Install the timing belt on the camshaft sprocket.
NOTE:
-
When the timing belt is installed on the camshaft sprocket, make sure that the tension side is tight.
-
Check to ensure that when the tension side is tightened by turning the camshaft sprocket in a reverse direction, all timing marks are in line.
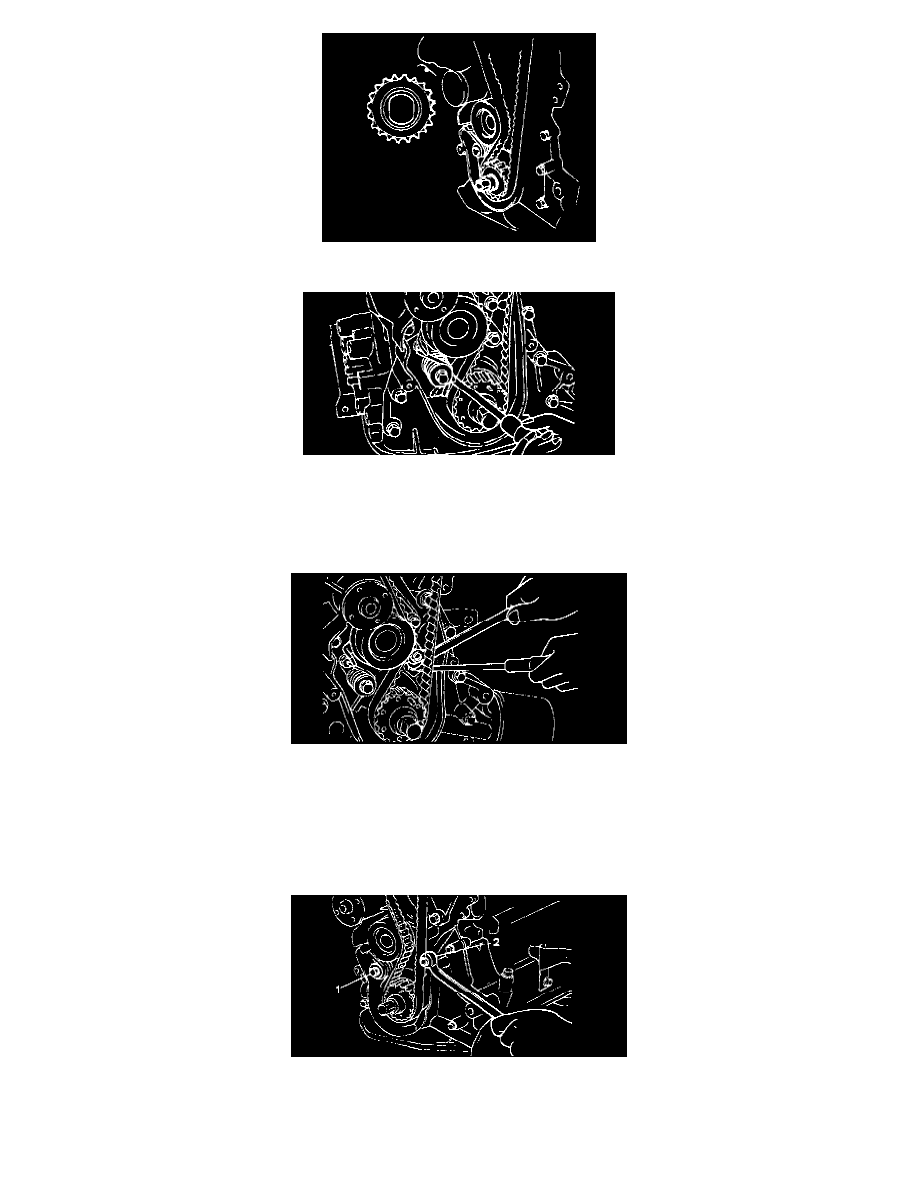
9. Loosen the tensioner mounting bolts 1 and 2 in that order as shown. This will apply spring tension to the timing belt only. Check the belt to ensure
that it is not out of position.
10. Tighten the tensioner tightening bolts 1 and 2 in that order. If the bolt 1 is tightened first, the tensioner will move with the belt in the direction that
the belt is tightened.