
Accent L L4-1495cc 1.5L SOHC MFI (2001)
Use the Loctite sparingly. Applying too much will not allow the product to cure properly.
13.
Insert the PCV elbow into the hole where the expansion plug was removed.
NOTE:
The new PCV elbow is already connected to the new PCV hose. Do not separate these pieces.
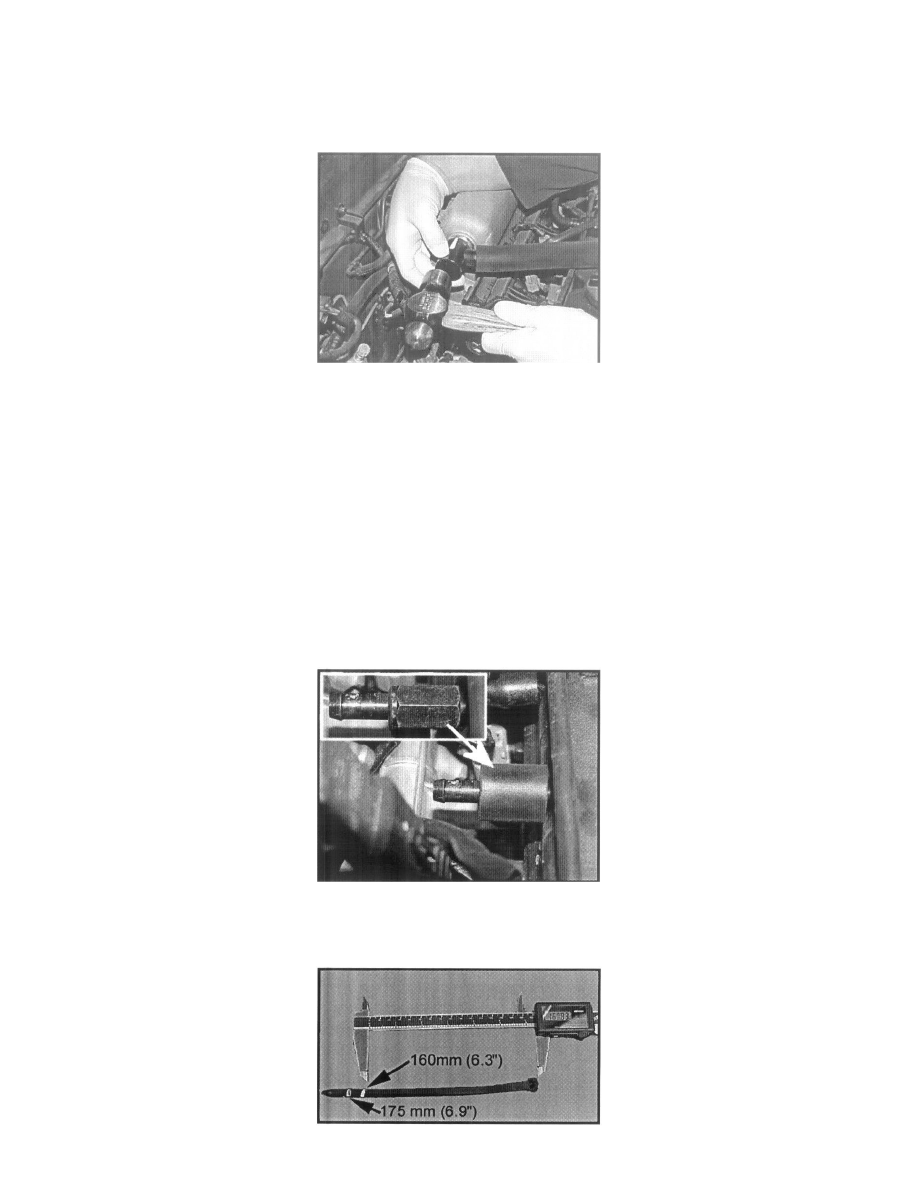
14.
Orient the PCV installation jig with the "top" pointed up and place the jig over the PCV elbow. Using a small hammer, gently tap the PCV elbow
into the surge tank until the installation jig is flush with the surge tank.
NOTE:
By orienting the installation jig with the "top" mark up, the finished angle of the PCV elbow will be 10° above horizontal (this is the desired
installation angle).
15.
Wipe off any excess Loctite 603.
16.
Mix a small amount of 3M adhesive (P/N DP460) and apply it to perimeter of the PCV elbow and surge tank. Use a small brush to get the area
behind the elbow/hose.
17.
Remove the PCV hose from the surge tank and PCV valve, and discard. Save the hose clamps.
18.
Insert the rubber vacuum cap (P/N 28325-22070) over the hose fitting on the surge tank. Install one of the hose clamps from previous step over the
rubber vacuum cap.
19.
Install the PCV valve insulation (P/N 26719-23010) over the PCV valve.
20.
Install the PCV hose (P/N 26721-22611-D) onto the PCV valve.