
Accent L Hatch Back L4-1495cc 1.5L SOHC MFI (2000)
Part 3 Of 3
TIMING BELT
1. Check the belt for oil or dust deposits. Replace, if necessary Small deposits should be wiped away with a dry cloth or paper. Do not clean with
solvent.
2. When the engine is overhauled or belt tension adjusted, carefully check the belt. If any of the following flaws are evident, replace the belt.
SPROCKETS AND TENSIONER
1. Check the camshaft sprocket, crankshaft sprocket, tensioner pulley, and idler pulley for abnormal wear, cracks, or damage. Replace as necessary.
2. Inspect the tensioner pulley and the idler pulley for easy and smooth pulley rotation and check for play or noise. Replace as necessary.
TENSIONER INSTALLATION PROCEDURE
1. Temporarily fasten timing belt tensioner in such a position as to place it's pulley nearest to the coolant pump (pulley may touch coolant pump
body)
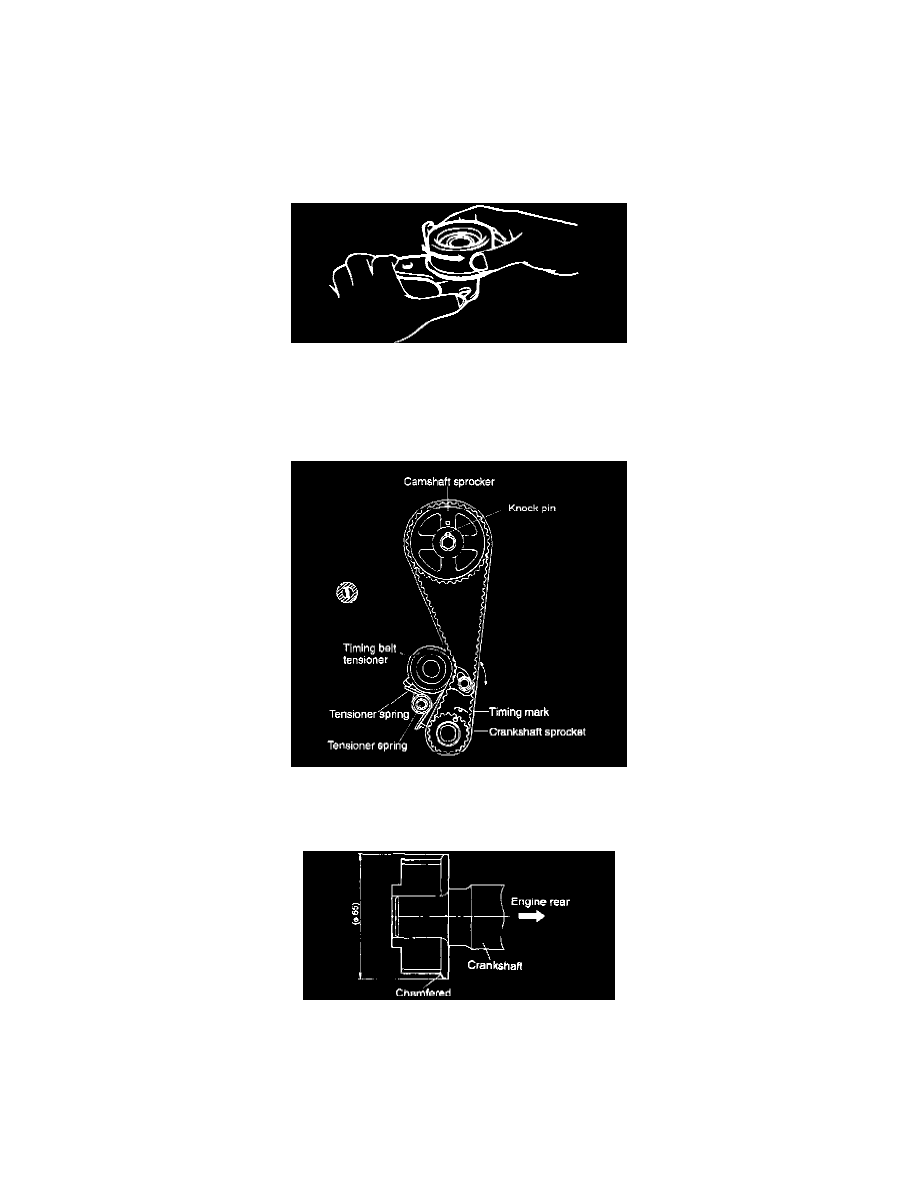
2. After installing the tensioner, the crankshaft sprocket and the camshaft sprocket match the timing mark of each sprocket as shown in the
illustration.
Rotate the crankshaft until the No.1 cylinder is at top dead center on the compression stroke.
CAUTION:
1. Be sure to install the flange in the correct direction (Chamfered part shows front of engine).
2. When installing the camshaft sprocket, make sure that the pin on the camshaft fits the small hole in the pulley.
NOTE:
Allow tensioner to remain in assemble state and must be installed temporarily as follows.
Then set extended end of tensioner spring at front case with drive etc.