
Accent L Hatch Back L4-1495cc 1.5L SOHC MFI (2000)
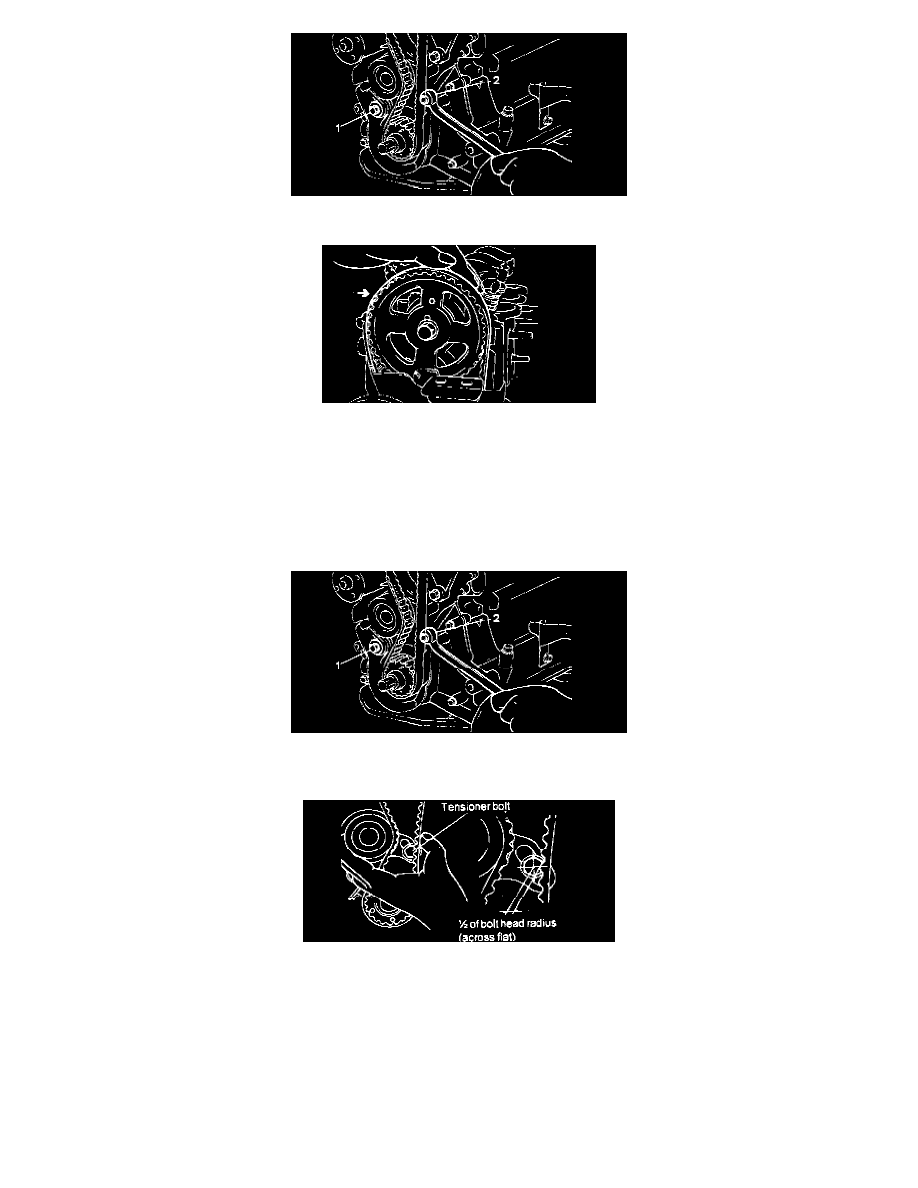
10. Loosen the tensioner mounting bolts 1 and 2 in that order as shown to give the timing belt spring tension.
11. Check the belt to ensure that it is not out of position.
12. Tighten the tensioner attaching bolts 2 and 1 in that order as shown. If the bolt 1 is tightened first, the tensioner will move with the bolt and cause
the belt to become overtightened.
13. Give the crankshaft one turn in the operating direction (clockwise) and realign crankshaft sprocket-timing mark with the top dead center position.
CAUTION: Do not turn the crankshaft in a counterclockwise direction.
14. Loosen the tensioner attaching bolts 1 and 2 in that order as shown.
15. Retighten the tensioner attaching bolts 2 and 1 in that order as shown to the specified torque.
Tightening torque: 20 - 27 Nm (200 - 270 kgf-cm, 15 - 20 ft. lbs.)
16. Recheck the belt tension. When the tensioner and the tension side of the timing belt are pushed in horizontally with a moderate force [approx. 49
N (11 lbs.)], the timing belt cog end is approx. half of the tensioner mounting bolt head radius (across flats) away from the bolt head center.