
Elantra L4-1595cc 1.6L DOHC 16 Valve (1995)
Synchronizer Ring: All Technical Service Bulletins
M/T - Synchronizer Ring Installation Procedure
GROUP: TRANSAXLE
NUMBER: 95-40-007
DATE: JUNE, 1995
MODEL: ALL w/MANUAL TRANSAXLE
SUBJECT:
SYNCHRONIZER RING INSTALLATION PROCEDURE
DESCRIPTION:
This bulletin provides the procedures to follow when repairing "gear clash" conditions. Even if new parts are being used during the repair process, the
following procedures must be followed to provide the best fit between synchronizer components and to reduce the possibility of gear clash from
occurring.
SERVICE INFORMATION:
1.
Confirm gear clash condition exists, and which gears are affected.
2.
If gear clash exists, remove and disassemble the transaxle. Locate and remove gear/cone and synchronizer of affected gear range(s).
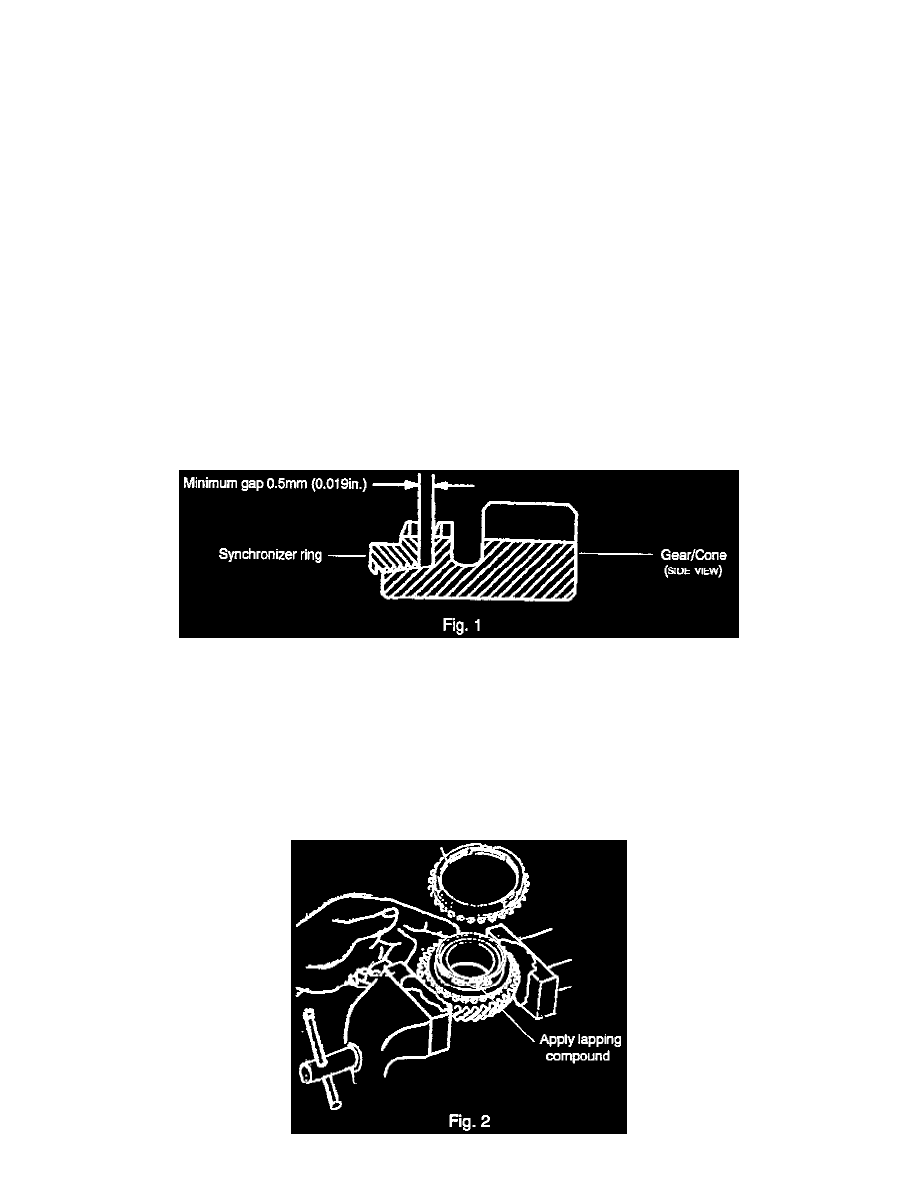
3.
Place synchronizer ring onto gear/cone and rotate with light pressure to seat the ring onto the cone. Measure gap between top of gear and bottom
of synchronizer ring. If gap is less than 0.5 mm (0.019 in.), replace synchronizer ring (Fig.1).
4.
Place either the original or a new synchronizer ring onto gear/cone and rotate with light pressure to seat the ring onto the cone. With your fingers
on the synchronizer ring, try to rock the ring on the cone. Move the position of your fingers 120° around the ring and try to rock the ring again.
Repeat after moving your fingers another 120°. If the synchronizer ring can rock on the cone, proceed to step 5. If the synchronizer ring fits
properly, steps 5 through 9 are not required.
5.
Clamp gear/cone into vise with cone side up (use a soft jaw vise, or, if using a standard vise, protect gear with two blocks of wood, heavy cloth,
etc.).