
Elantra GLS Wagon L4-2.0L (2000)
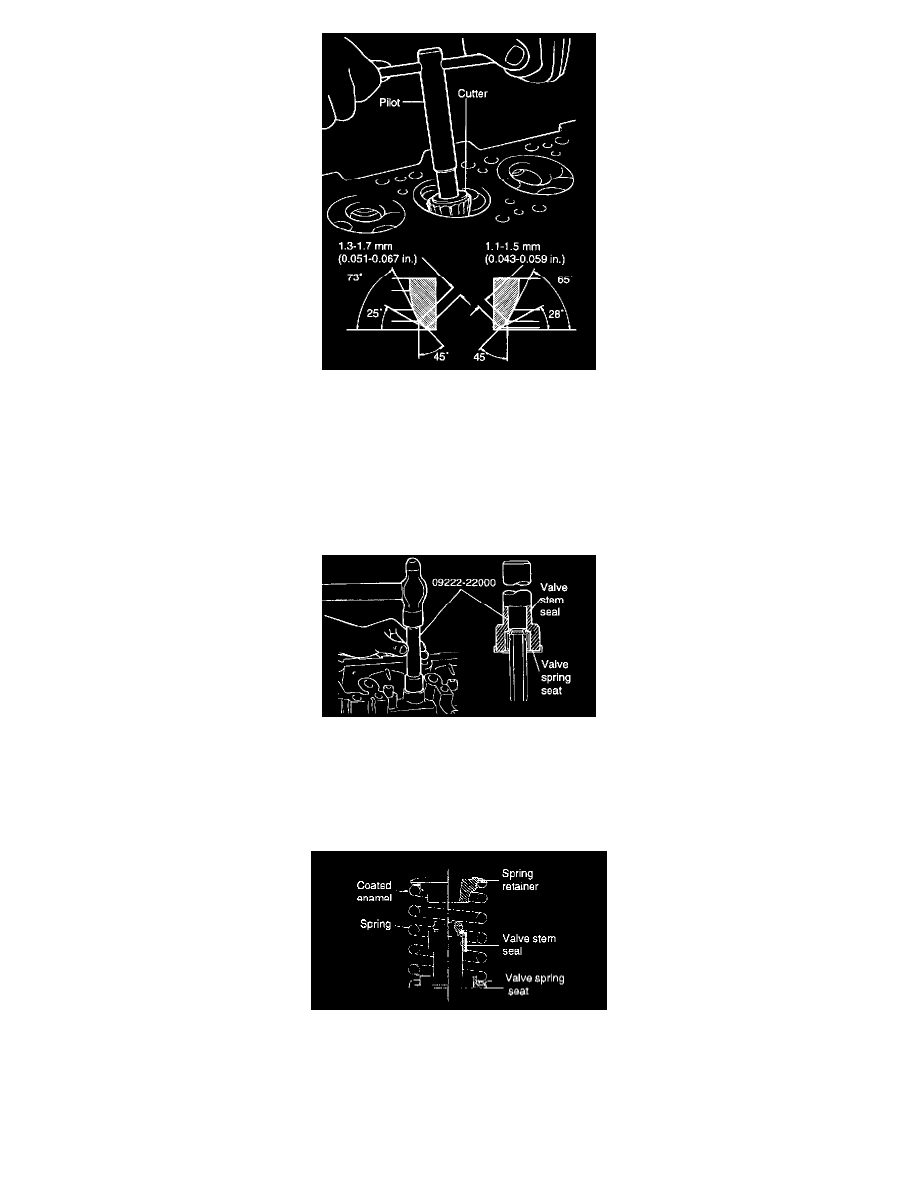
Check the valve seat for evidence of overheating and improper contact with the valve face. Replace the seat if necessary.
Before reconditioning the seat, check the valve guide for wear. If the valve guide is worn, replace it, then recondition the seat. Recondition the valve
seat with a valve seat grinder or cutter. The valve seat contact width should be within specifications and centered on the valve face.
INSTALLATION
NOTE:
1) Clean each part before assembly.
2) Apply engine oil to sliding and rotating parts.
1. After installing the spring seat, fit the stem seal onto the valve guide.
To install, fit the seal in by lightly tapping the Special Tool, Valve Stem Oil Seal Installer (09222-22000).
The seal is installed in the specified position by means of the special tool. Incorrect installation of the seal will adversely affect the lip I.D. and
eccentricity, resulting in oil leaking down the valve guides. Therefore, when installing, be careful not to twist the seal. Do not reuse old stem seals.
2. Apply engine oil to each valve stem. Insert the valves into the valve guides. Avoid using force when inserting the valve into the seal. After
insertion, check to see if the valve moves smoothly.
3. Install springs and spring retainers. Valve springs should be installed with the enamel coated side toward the valve spring retainer.