
Elantra GLS Wagon L4-2.0L (2000)
Stabilizer Link: Service and Repair
Rear
REMOVAL
1. Remove the stabilizer link mounting nuts.
2. Remove the stabilizer bar brackets and bushing.
3. Remove the stabilizer bar.
INSPECTION
1. Check the bushing for wear and deterioration.
2. Check the stabilizer bar for deterioration or damage.
3. Check the stabilizer link ball joint dust cover for crack.
4. Check all bolts for condition and straightness.
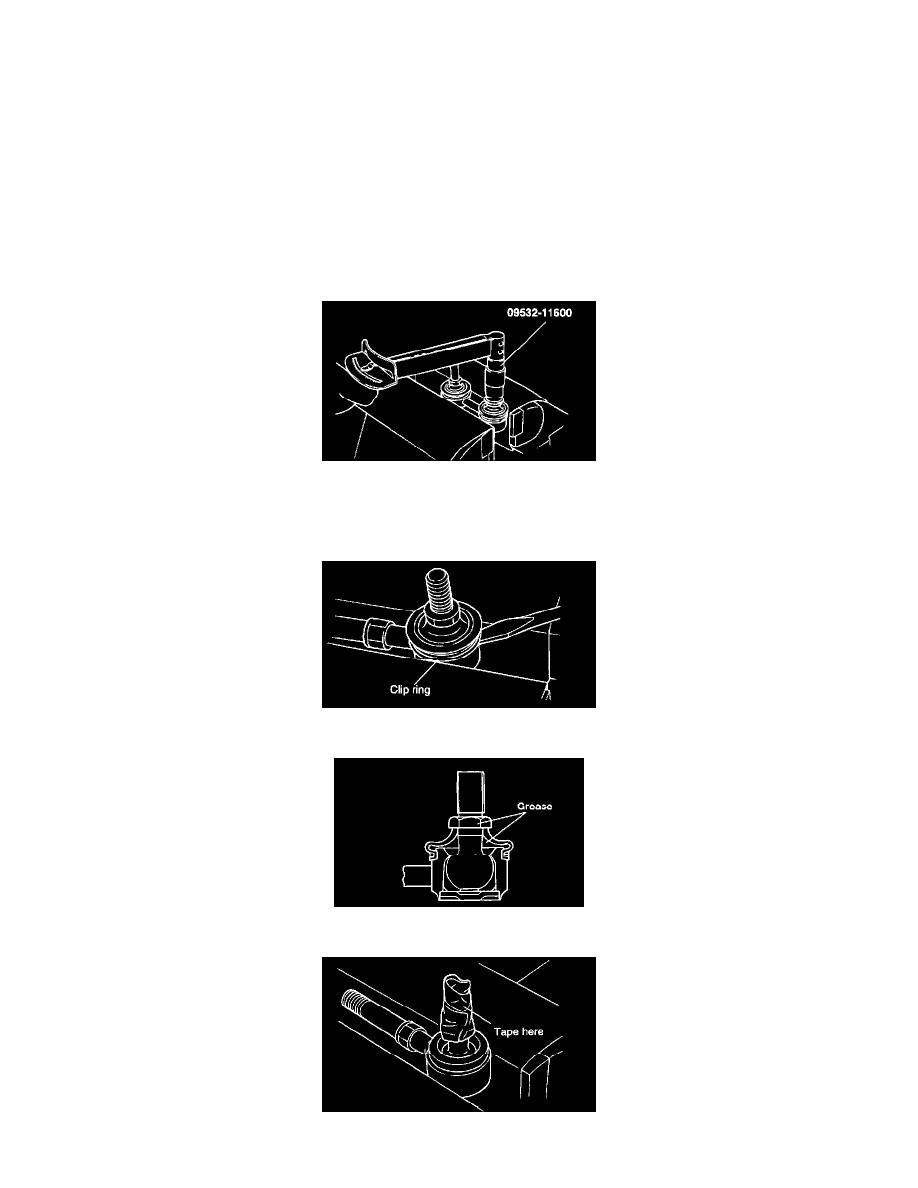
CHECKING OF STABILIZER LINK BALL JOINT FOR ROTATING TORQUE
With the special tool measure the ball joint continuous rotating torque.
Standard value: 0.3 - 1 Nm (3 - 10 kg.cm, 2.7 - 8.8 inch lbs.)
BALL JOINT DUST COVER REPLACEMENT
1. Remove the clip ring and the dust cover.
2. Apply multipurpose grease to the lip and inside of the dust cover.
3. Use vinyl tape to tape the stabilizer link as shown in the illustration. Install the dust cover to the stabilizer link.