
Elantra GT Hatchback L4-2.0L (2002)
1.
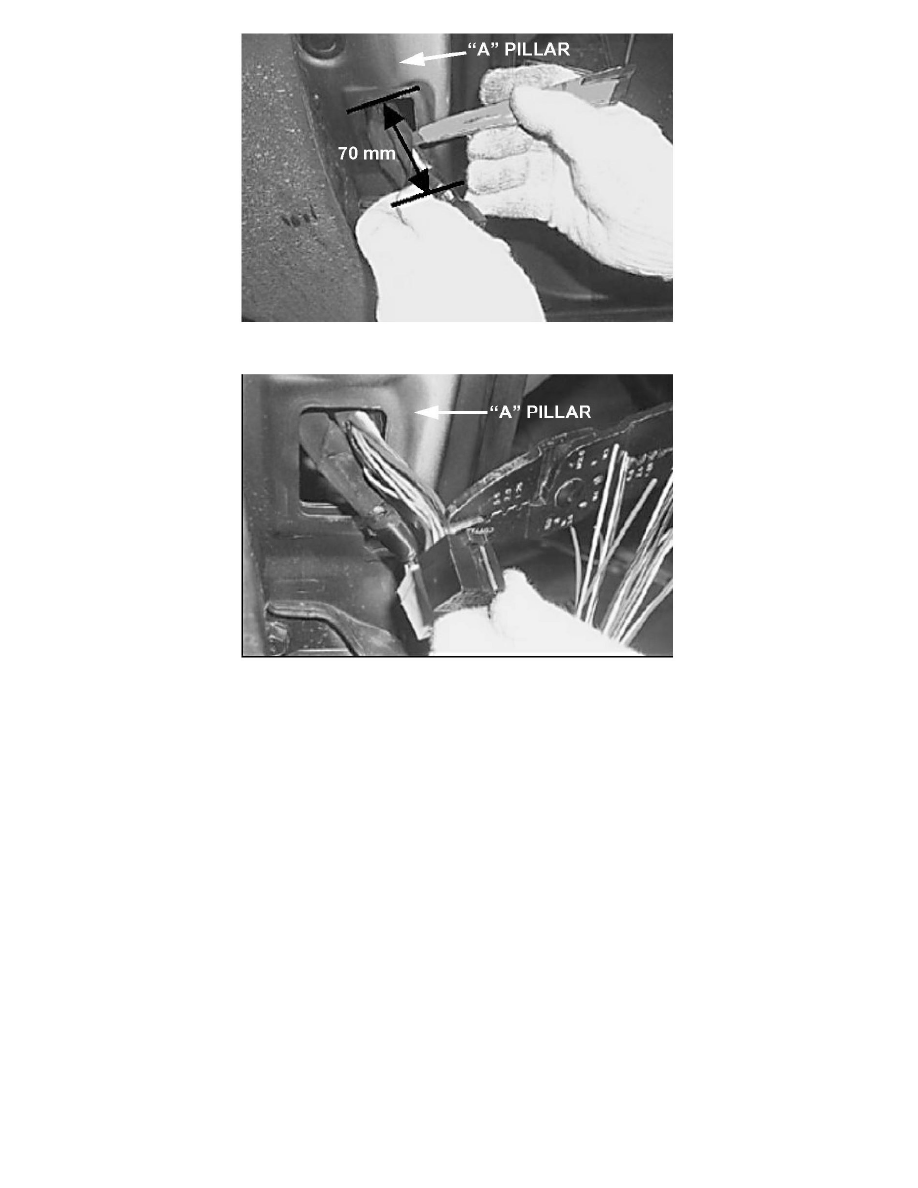
Cut and remove the first 2.5 - 3 inches (about 70 mm) of the vinyl sheathing from the door wiring. Be careful not to nick the wires.
2.
Take the most corroded wire in the connector first. Cut it about 1 inch (25 mm) from the connector. If it is corroded at the cut, cut an additional 1
inch. If the wire is black, it is OK. Strip the wire end about 0.25 inch (7 mm).
NOTES:
^
Only cut and solder one wire at a time to avoid confusing the same color wires in each connector. If you have the wrong driver's side door
wiring connector kit, you will be able to match the wires by pin location, even though the colors will not exactly match.
^
Pin 17 of MD02 connector will have a smaller gauge yellow wire if the vehicle has the factory keyless entry option. Connect it to the larger
red wire supplied on the connector.
^
If the wires are corroded more than 2 inches from the connector, you may need to access them from inside the vehicle. The procedure for
removing the cowl trim and connector cover is similar to the passenger side inspection procedure noted in "Passenger Side Door Wiring
Connector Inspection" in this TSB.