
Entourage V6-3.8L (2009)
22. Install the timing chain cover.
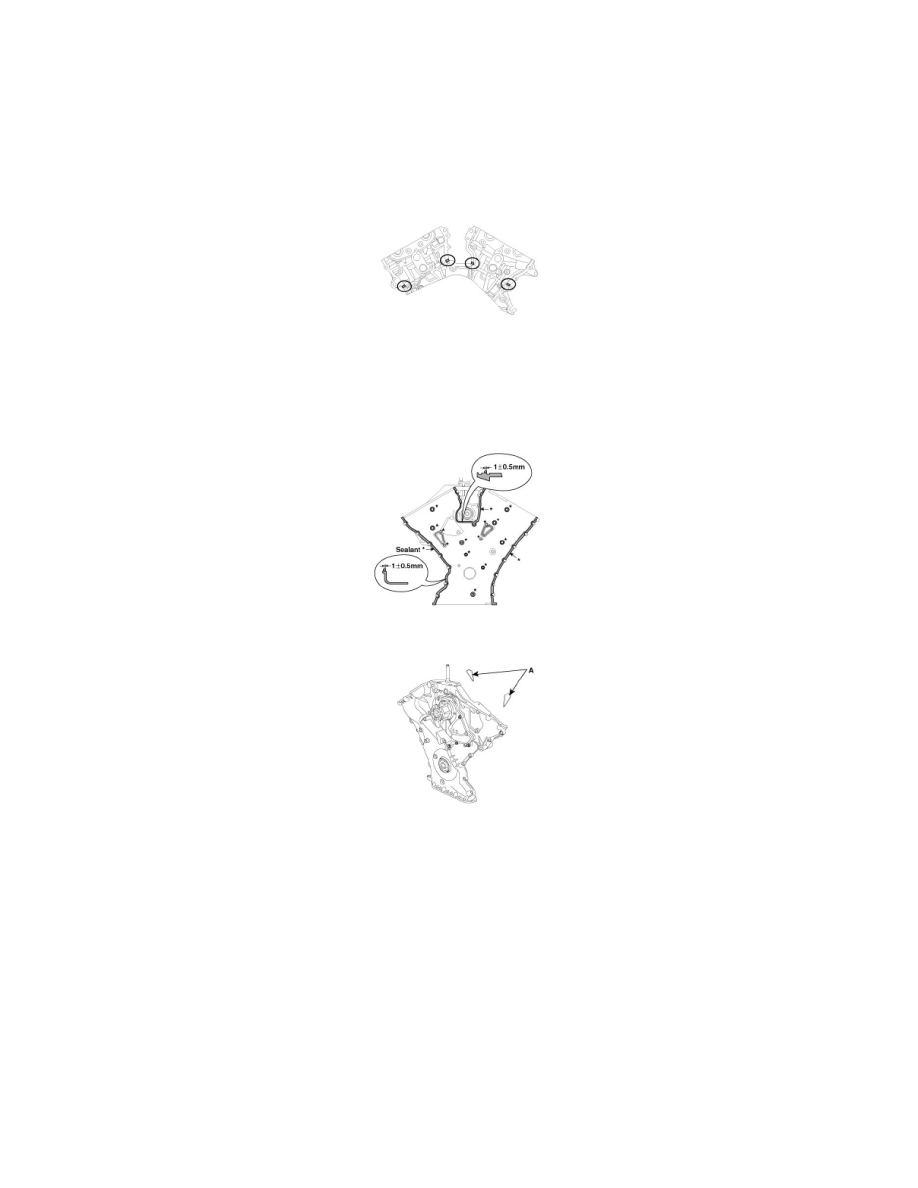
(1) The sealant locations on chain cover and on counter parts (cylinder head, cylinder block, and lower oil pan) must be free of engine oil and
ETC.
(2) Before assembling the timing chain cover, the liquid sealant TB1217H should be applied on the gap between cylinder head and cylinder block.
The part must be assembled within 5 minutes after sealant was applied.
Bead width: 2.5mm(0.1in.)
(3) After applying liquid sealant TB1217H on the timing chain cover.
The part must be assembled within 5 minutes after sealant was applied.
Sealant should be applied without discontinuity.
Bead width: 2.5mm(0.1in.)
(4) Install the new gasket (A) to the timing chain cover.
NOTE:
During timing cover installation, care not to take off applied sealant on the timing cover by contact with other parts.
(5) The dowel pins on the cylinder block and holes on the timing chain cover should be used as a reference in order to assemble the timing chain
cover to be in exact position.
Tightening torque :
B(17) :
18.62 - 21.56N.m (1.9 - 2.2kgf.m, 13.74 - 15.91lb-ft)
C(4) :
9.80 - 11.76N.m (1.0 - 1.2kgf.m, 7.23 - 8.68lb-ft)
D(1) :
58.80 - 68.80N.m (6.0 - 7.0kgf.m, 43.40 - 50.63lb-ft)
E(1) :
58.80 - 68.80N.m (6.0 - 7.0kgf.m, 43.40 - 50.63lb-ft)
F(2) :
24.50 - 26.46N.m (2.5 - 2.7kgf.m, 18.08 - 19.53lb-ft)
G(4) :
21.56 - 23.52N.m (2.2 - 2.4kgf.m, 15.91 - 17.36lb-ft)