
Entourage V6-3.8L (2009)
CAUTION:
-
Use a pry bar being careful not to damage the transaxle and joint.
-
Do not insert a pry bar too deep, as this may cause damage to the oil seal.
-
Do not pry on the driveshaft by excessive force it may cause components inside the joint kit to dislodge resulting in a torn boot or a damaged
bearing.
11. Pull out the driveshaft from the transaxle case.
CAUTION:
-
Plug the hole of the transaxle case with the oil seal cap to prevent contamination.
-
Replace the retainer ring whenever the driveshaft is removed from the transaxle case.
Installation
CAUTION:
-
Replace the circlip with new ones before the installation.
-
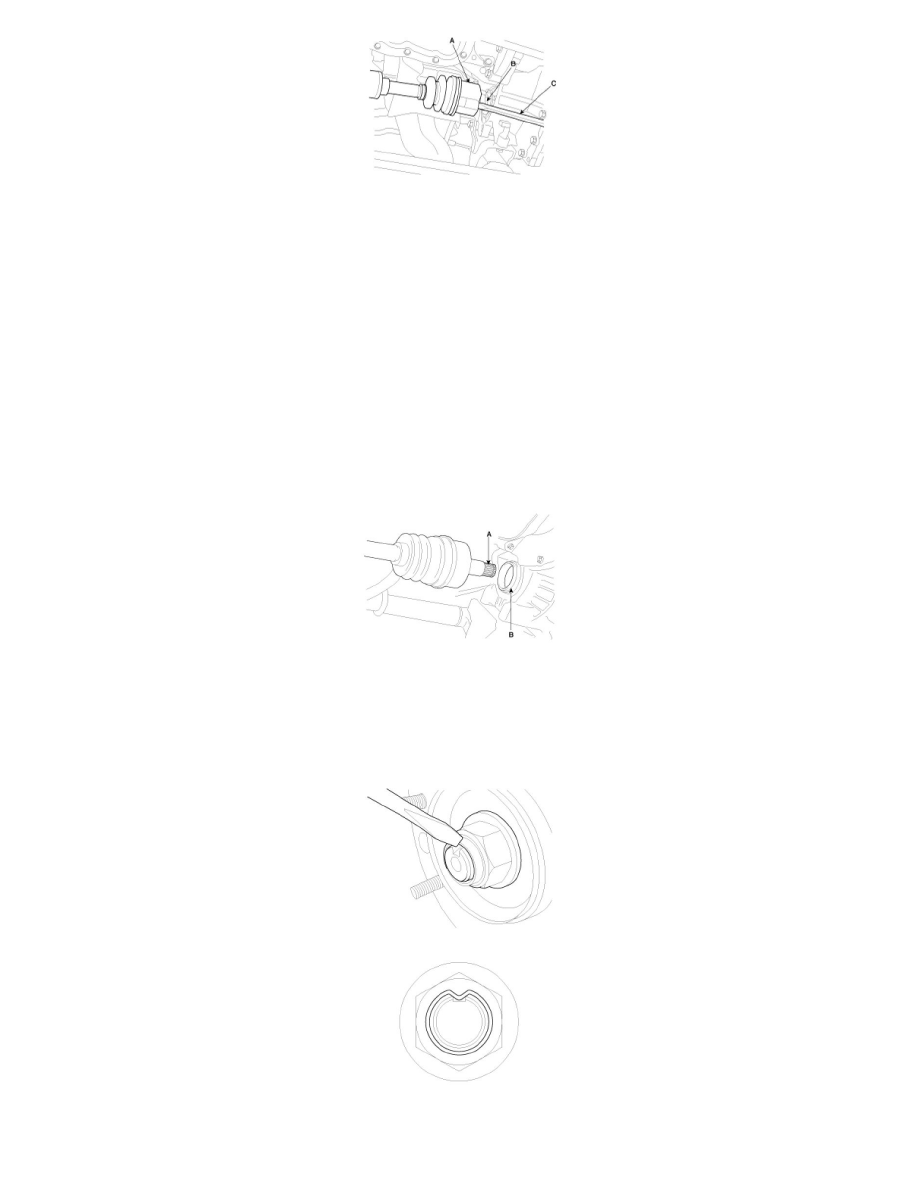
Before the installation, apply the gear oil on the driveshaft splines (A) and contacting surface of differential case oil seal (B).
1. Installation is the reverse of removal.
CAUTION:
-
After installing the driveshaft joint to the transaxle case, be sure not to come out.
-
The driveshaft lock nut should be replaced with new ones.
-
After installation driveshaft lock nut, stake the lock nut using a chisel and hammer as shown in the illustration below.