
Santa Fe L4-2.4L (2001)
CAUTION:
1. If the pad lining thickness is out of specification, the pads for the right and left wheels should be replaced at the same time.
2. Never split or intermix brake pad sets. All pads must be replaced as a complete set.
3. When the thickness difference between the left pad and the right pad is large, check the sliding condition of the piston, the lock pin and the
guide pin.
NOTE: If a squealing or scraping noise occurs from the brake during driving, check if the pad wear indicator is contacting the disc. If it is, the
brake pads should be replaced.
Thickness of pad lining [Limit] : 2.0 mm (0.079 in.)
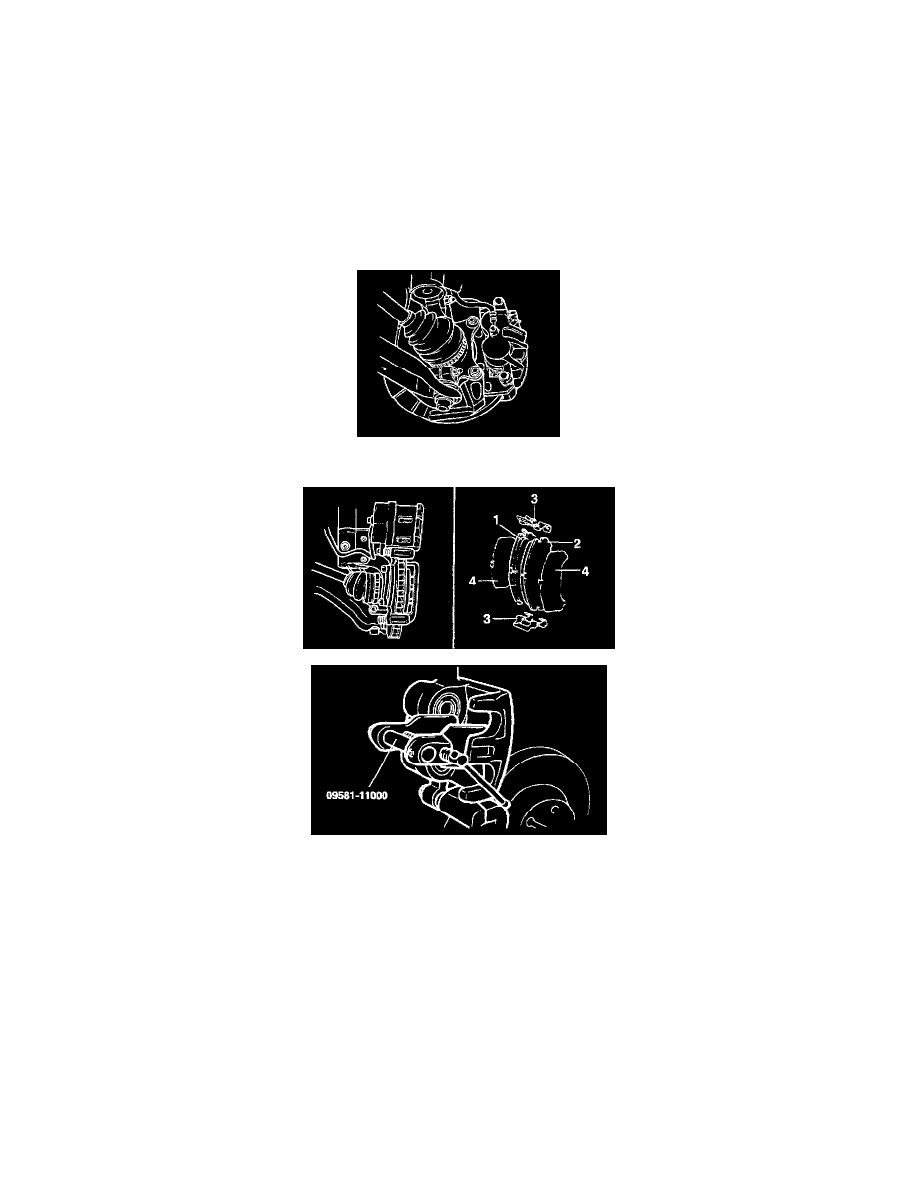
2. Remove the guide pin, lift the caliper assembly up and suspend it with a wire.
CAUTION: Be careful not to contaminate the lock pin and the guide pin with grease.
3. Remove the following parts from the caliper support.
1. Pad and wear sensor assembly
2. Pad assembly
3. Clip
4. Outer shim
INSTALLATION
1. Install the pad clips.
2. Install the pads on each pad clip.
NOTE:
1. All four pads must be replaced as a complete set.
2. When replacing the brake pads, check for deformation. When replacing the guide spring, use a new one or thoroughly clean the used one.
3. Press in the piston with a hammer handle or the special tool.
4. Lower and insert the brake cylinder carefully so as not to damage the boot.