
Santa Fe L4-2.4L (2001)
Brake Proportioning/Combination Valve: Testing and Inspection
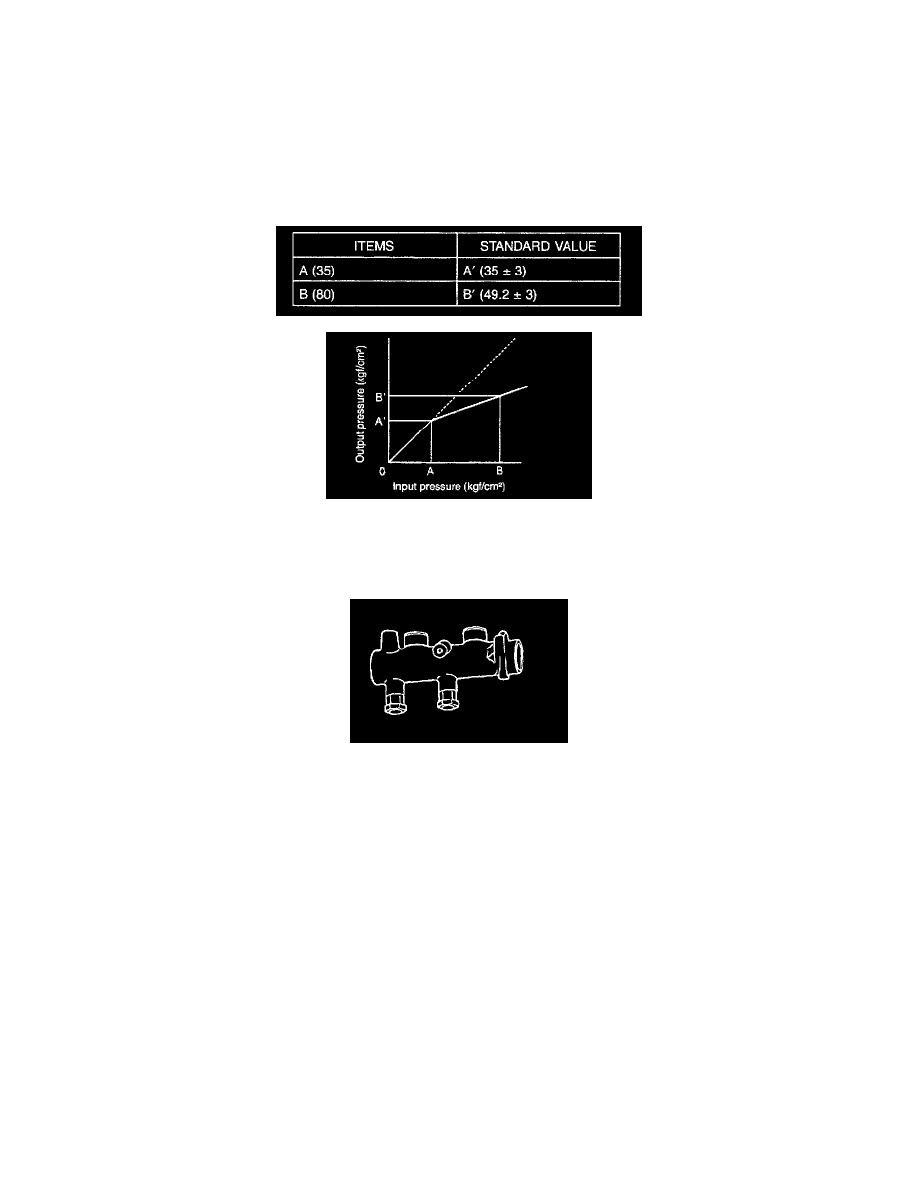
PROPORTIONING VALVE FUNCTION TEST
1. Remove the proportioning valve from the master cylinder.
2. There are two pressure gauges. Connect one to the input side of the proportioning valve and the other to the output side of it.
NOTE: Be sure to bleed the system after connecting the pressure gauges.
3. With the brakes applied, measure the input pressure and the output pressure. If the measured pressures are within the specified range as illustrated,
the proportioning valve is good.
4. Reconnect the brake lines in their original positions and bleed the system.
NOTE: This figure shows characteristics of the proportioning valve as the pressure increases.
INSTALLATION OF PROPORTIONING VALVE
1. Install the master cylinder according to the illustration.
2. Tighten the flare nuts and bleed the system.
Tightening torque
Brake tube flare nut: 13 - 17 Nm (130 - 170 kg.cm, 9 - 12 ft. lbs.)
Proportioning valve mounting nut: 35 - 55 Nm (350 - 550 kg.cm, 30 - 40 ft. lbs.)