
Santa Fe L4-2.4L (2001)
2.
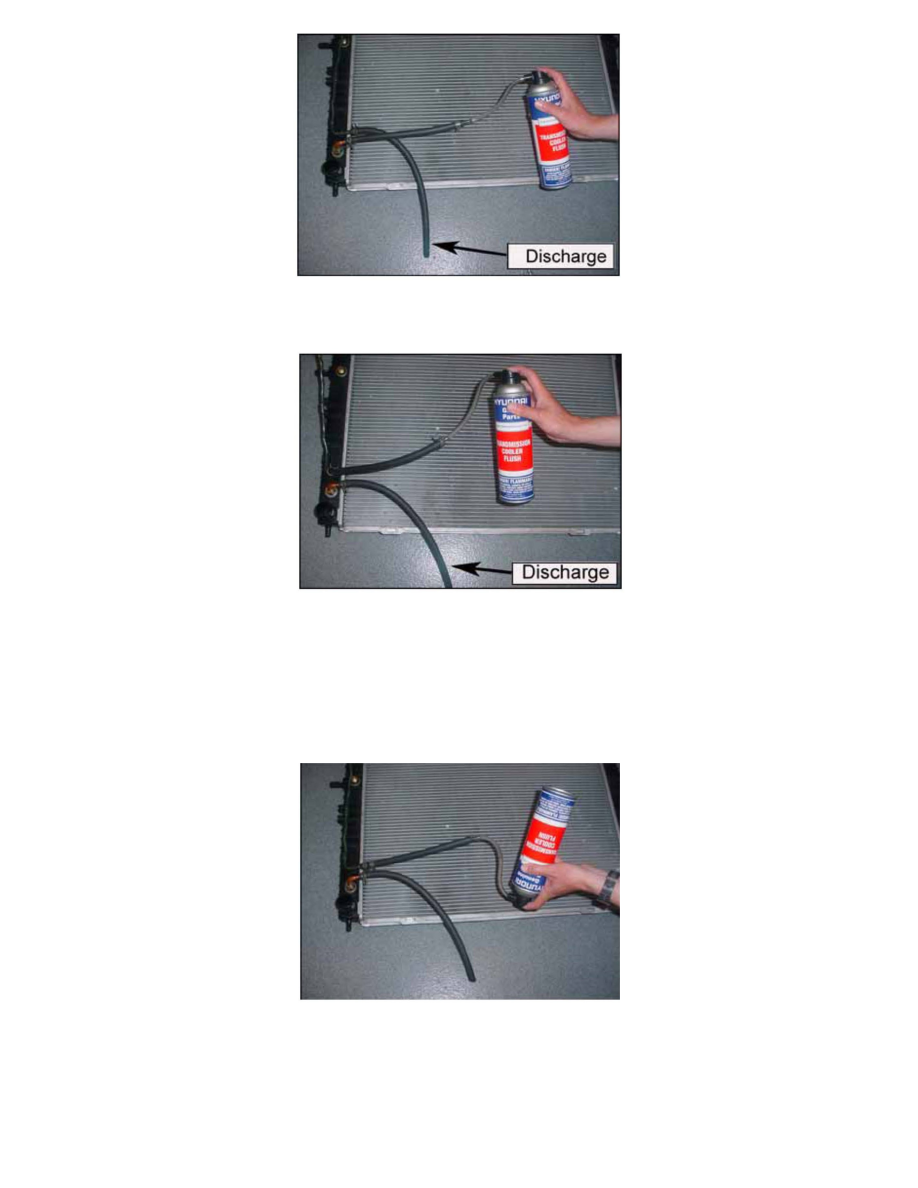
Insert the nozzle of the aerosol can to either hose and secure it with a hose clamp. Position the other hose so that it discharges into a waste
container.
3.
Remove the protective cap. Hold the can upright and press firmly on the button to release the solution. Flush for 15-20 seconds until clear liquid
comes from the outlet hose.
4.
Insert the aerosol flush to the other hose and flush in the other direction until clear liquid comes from the outlet hose. For best results, use the
entire contents of the aerosol can.
NOTE:
Clear liquid must flow freely in both directions through the oil cooler. If not, the oil cooler is clogged with debris and must be replaced.
5.
When the flush has been expelled, turn the can upside down and blow any remaining liquid out of the cooler.
6.
Reconnect the cooler hoses to the transaxle and secure with clamps.
7.
Add ATF. Start the vehicle and check for leaks.
8.
Check the automatic transaxle fluid (ATF) level with the engine idling in "N". Add ATF to bring the ATF level to the top of the "FULL" mark.