
Santa Fe L4-2.4L (2001)
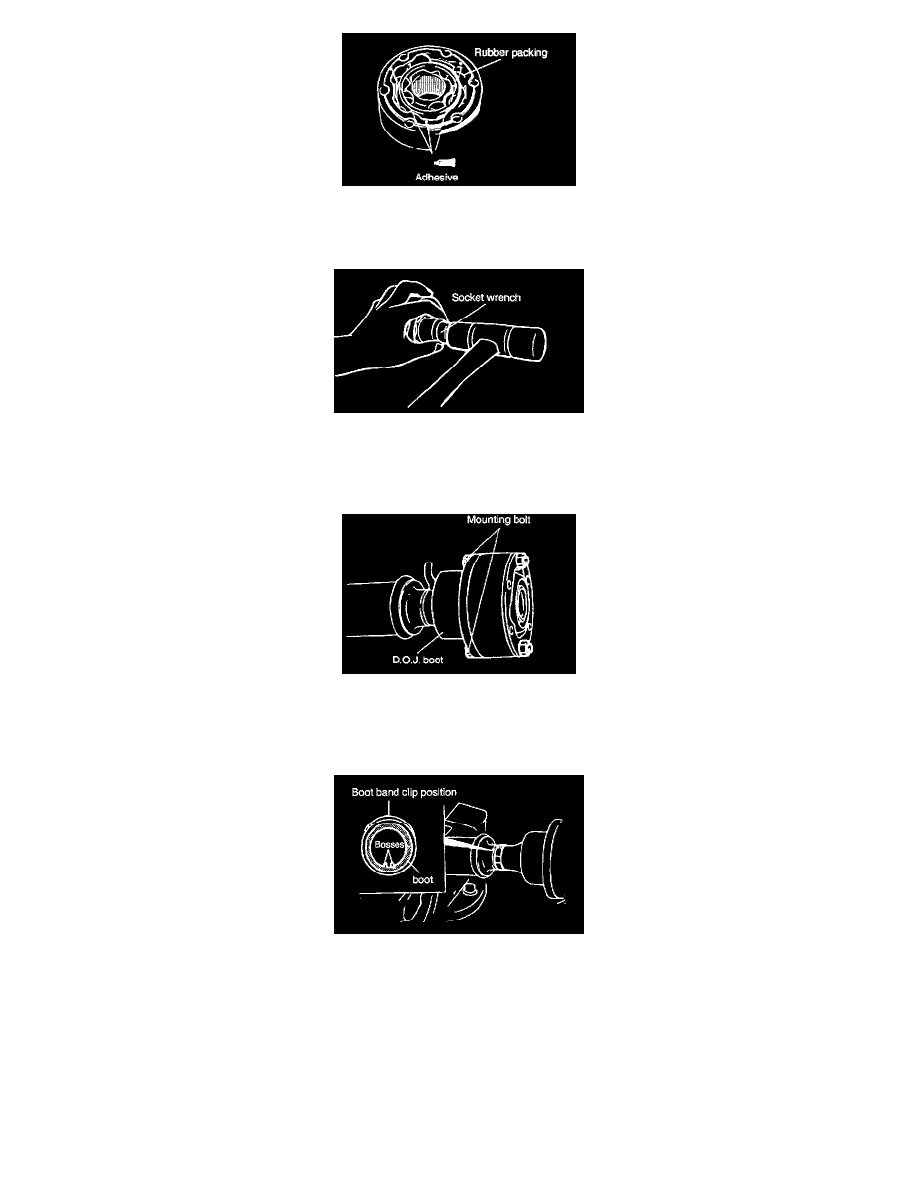
g. Apply a small amount of specified adhesive in three places, equally divided, on the surface of the D.O.J. ball groove stepped section and then
fit the rubber packing.
Specified adhesive: 3M ATD Part No.8121 or 3M ATD Part No.8155 or equivalent
h. Install the D.O.J. assembly on the propeller shaft while aligning the bolt holes, and hammer the joint assembly using a socket wrench or to
install the inner race completely.
NOTE Be sure that the grooves of the D.O.J. assembly face toward the D.O.J. boot.
i.
Realign the bolt holes in the boot and D.O.J. assembly utilizing the mounting bolts, and fit the boot on the joint assembly.
j.
Fit the rubber packing on the companion flange according to the same procedure as in step (g).
3. INSTALLATION OF BOOT BAND
CAUTION Position the boot band clip on the side opposite to the bosses which are provided in the boot for ventilation. Be sure to remove
grease, if present, from around the bosses because the grease obstructs the ventilation.
4. INSTALLATION OF CENTER BEARING ASSEMBLY / COMPANION FLANGE / SELF-LOCKING NUT
a. Install the bearing and retainer to the groove of the center bearing bracket.