
Santa Fe AWD L4-2.4L (2010)
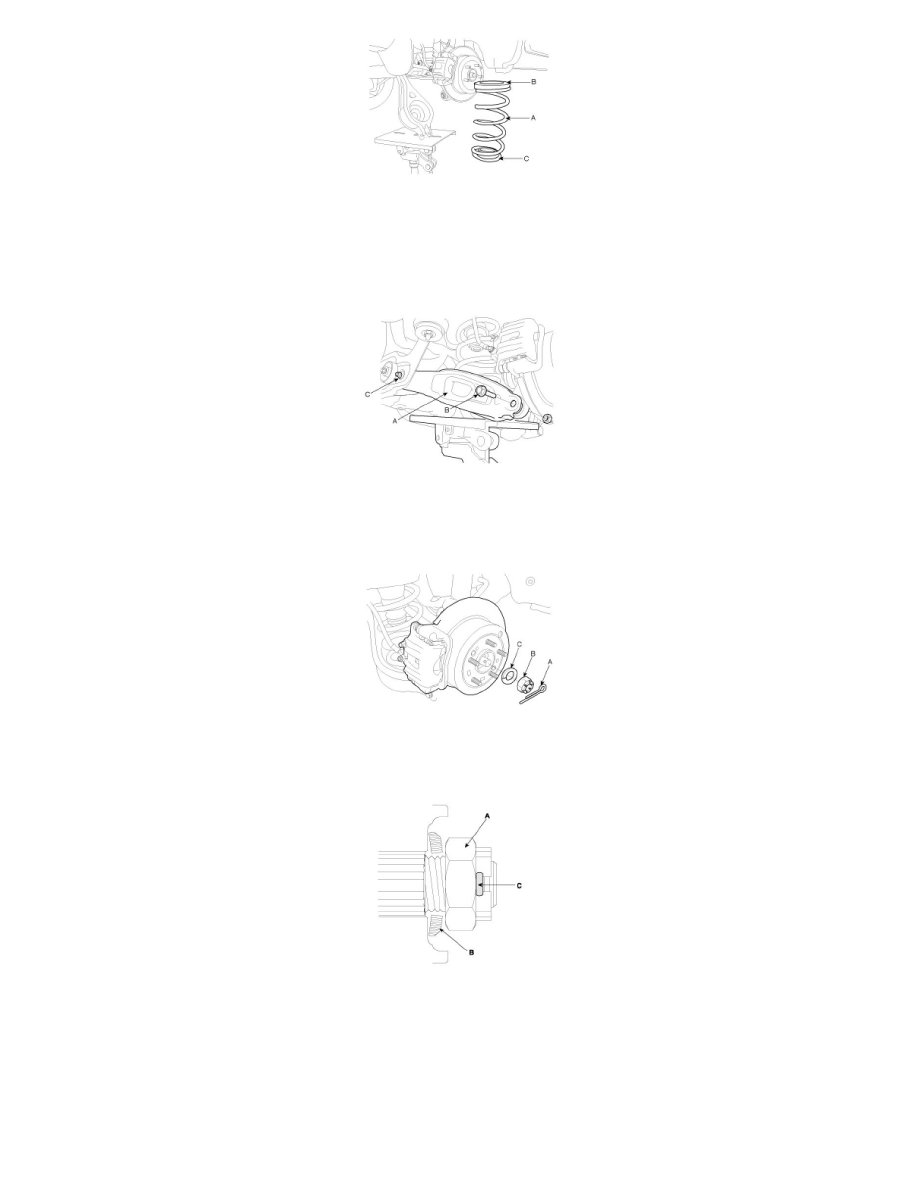
9. Install the mounting bolt (B) of the rear lower arm (A) and the rear carrier with a specified torque, while supporting the lower arm (A) with a jack
as shown in the illustration. Tighten the mounting bolt (C) of the cross member and the rear lower arm with a specified torque.
Tightening torque :
Bolt (B) : 137.3 - 156.9 Nm (14 - 16 kgf-m, 101.3 - 115.7 lb-ft)
Nut (C) : 137.3 - 156.9 Nm (14 - 16 kgf-m, 101.3 - 115.7 lb-ft)
10. Install the washer (C), castle nut (B) and split pin (A) to the rear hub assembly.
Tightening torque :
196.1 - 255.0 Nm (20 - 26 kgf-m, 144.7 - 188.1 lb-ft)
CAUTION:
The washer (B) should be assembled with convex surface outward when installing the castle nut (A) and split pin (C).
11. Install the wheel and tire (A) to the rear hub (B).
Tightening torque :
88.3 - 107.9 Nm (9 - 11 kgf-m, 65.1 - 79.6 lb-ft)