
Santa Fe FWD V6-3.3L (2009)
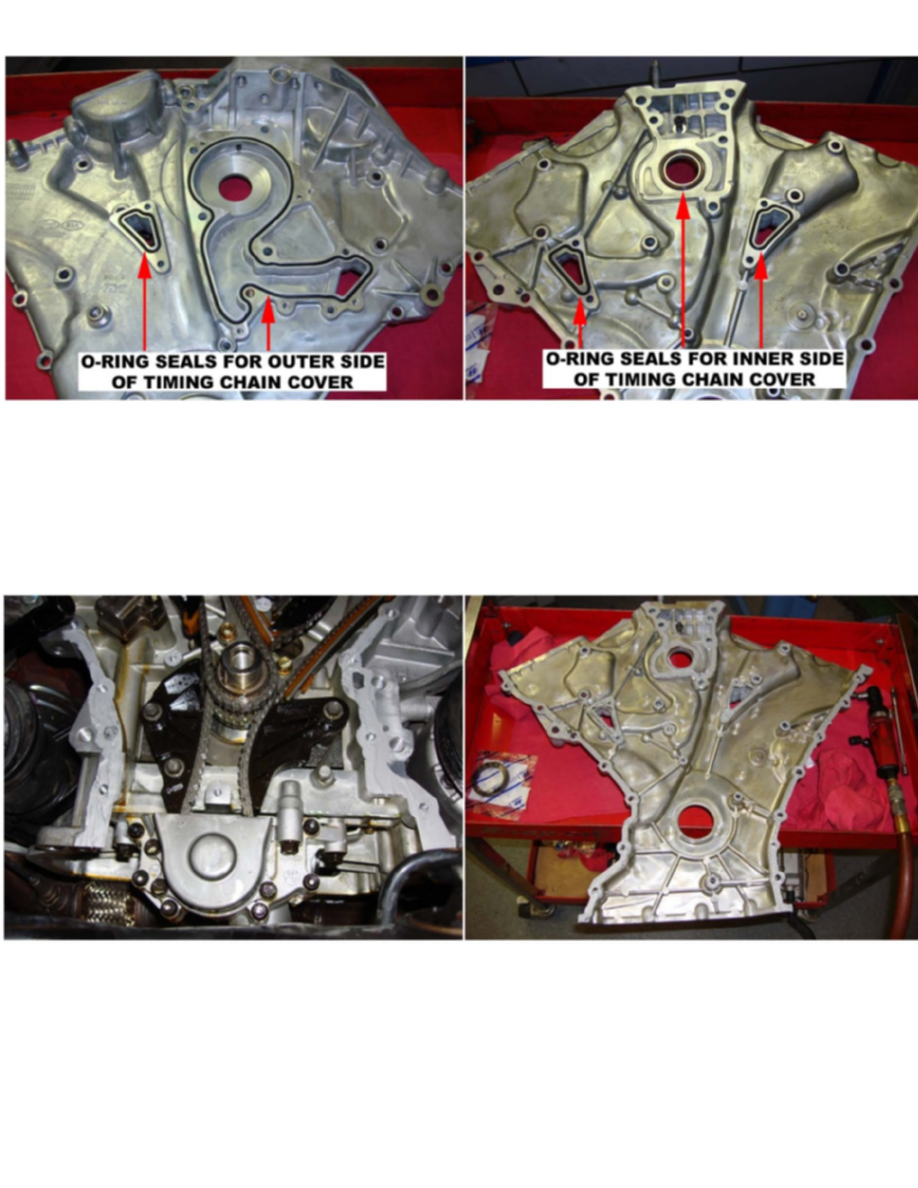
34. Install new rubber 0-ring and gaskets to the front and back sealing recesses of the timing chain cover (as shown above).
35. Remove and replace both timing chain tensioners.
NOTE:
Once the chain position and guides are secure, remove the pull pin from the new tensioners.
36. Thoroughly wipe clean and dry all the sealing surfaces using a lint-free shop towel.
37. Apply thin bead of liquid gasket to the timing chain cover sealing surfaces of the block, cylinder head, lower crankcase, and timing chain cover (as
shown above).
NOTE:
Use Genuine Hyundai Gray RTV (P/N 00232-19039) or equivalent. Once the liquid gasket is applied to the sealing surfaces, be sure to assemble the
parts within 5 minutes to prevent premature drying of the liquid gasket.
38. Carefully locate the timing chain cover into position and then attach to the engine.
39. Reinstall the center galley coolant hose and hose clamp.