
Scoupe L4-1468cc 1.5L SOHC VIN J MFI (1994)
Axle Beam: Service and Repair
Assemble
1. Apply suitable grease to inside of left suspension arm, outer edge of right suspension arm and to outside surfaces of bushings "A" and "B".
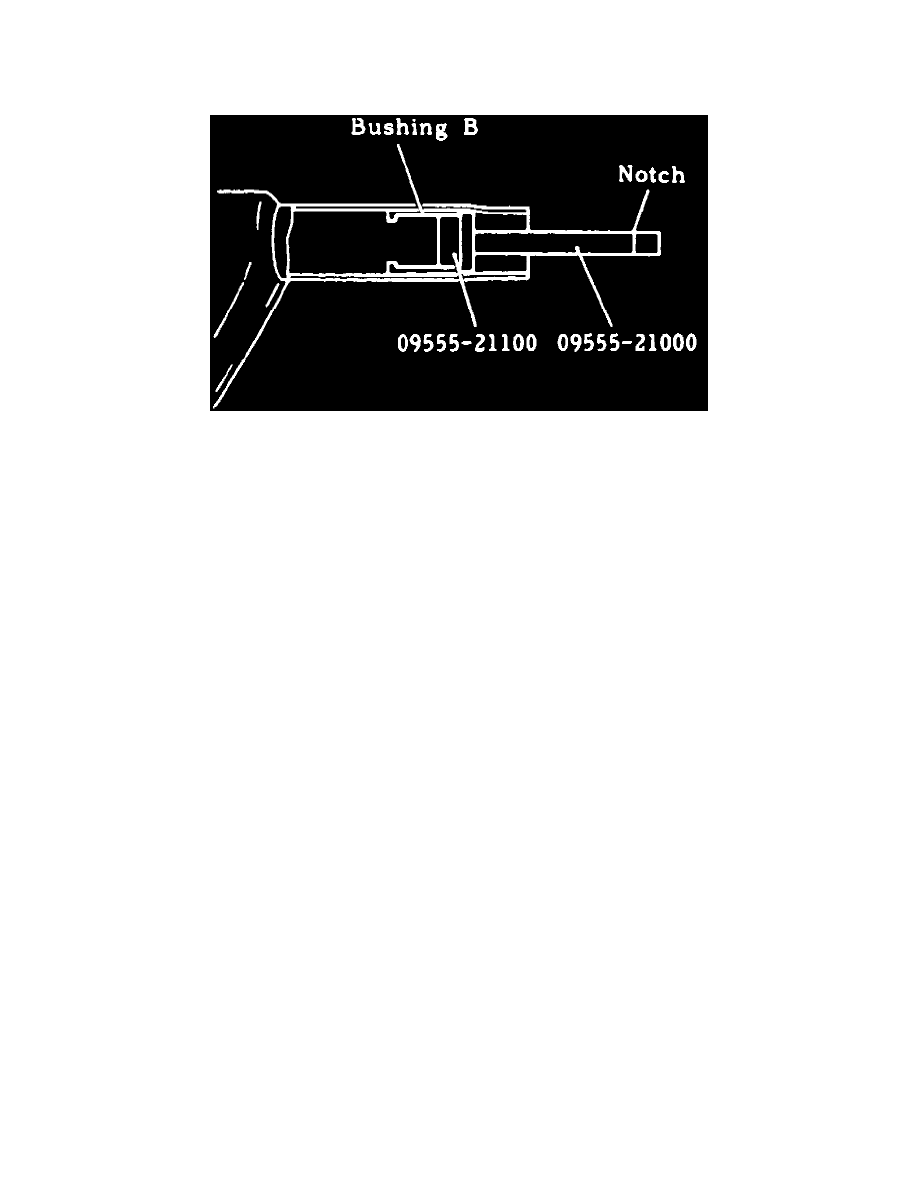
Fig. 9 Installing Bushing "B" Into Left Suspension Arm
2. Using bushing installer tool Nos. 09555-21100 and 09555-21000, or equivalents, drive bushings "B" and "A" in that order into left suspension
arm. When installing bushing "B", drive bushing inward until notch on tool No. 09555-21000 reaches end of arm, Fig. 9.
3. Install rubber stopper into right suspension arm. If dust cover if being replaced, install cover up to center position of right suspension arm.
4. Slowly push right and left suspension arms together, wiping away excess grease.
5. Install stabilizer bar, if equipped, aligning marks made before disassembly.
6. Install rubber bushings, fixtures, washers and retaining nuts, aligning all marks made during disassembly. Do not tighten retaining nuts at this time.
Ensure washers are installed with tooth faced end positioned against bushings.
7. Pack grease in dust cover and lips, then install dust cover and retain with clamp.