
Sonata V6-3.0L (1991)
NOTE:
Use the wheel lug nuts to secure the rotor to the wheel hub. (Do not use an impact gun).
4.
If the rotor run-out equals or exceeds allowable specifications, change the position of the rotor and hub. (Remove rotor and install on different lug
bolts)
5.
Re-check the rotor run-out and if necessary re-position the rotor until the minimum run-out is achieved.
6.
Resurface the rotor using an on-the-car brake lathe if run-out is above specification and/or rotor has grooves deeper than 0.38 mm.
BRAKE ROTOR THICKNESS VARIATION
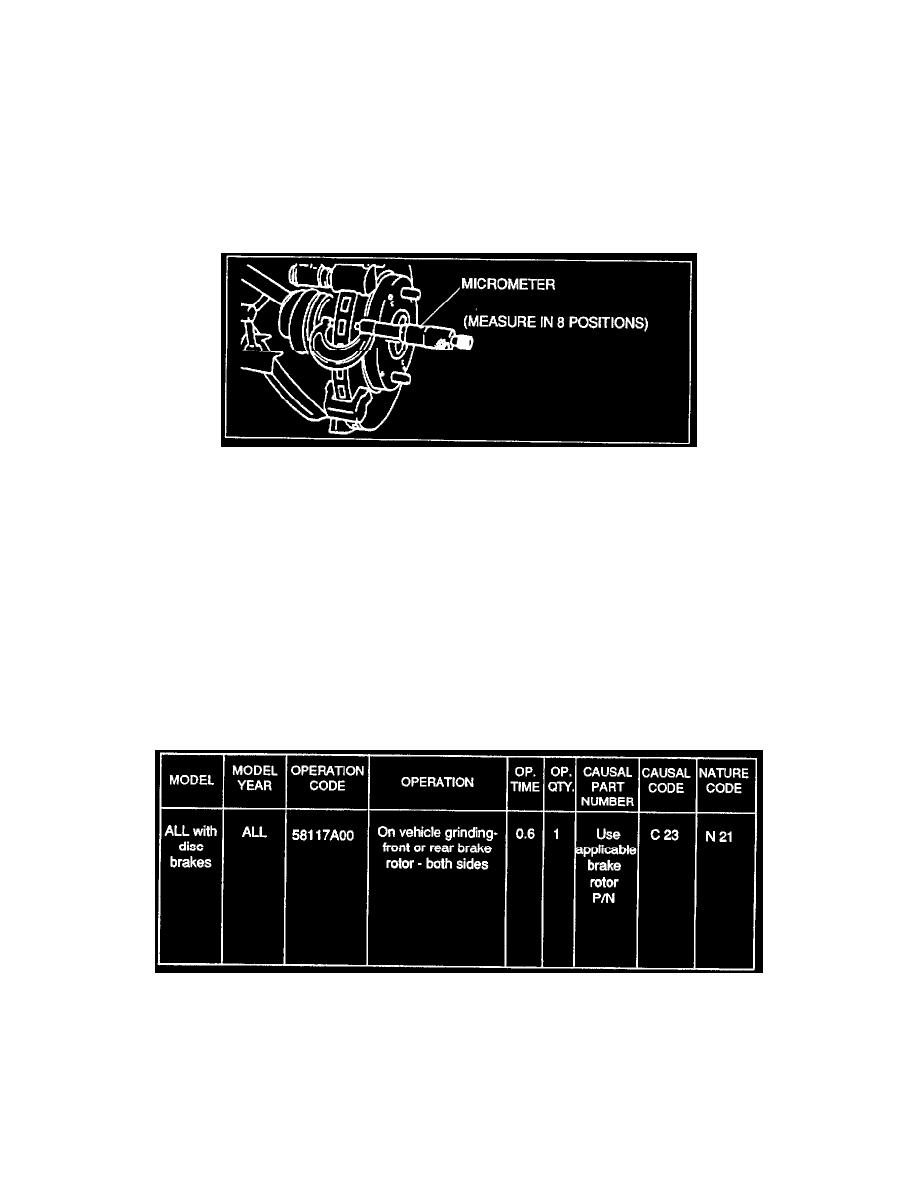
1.
Measure thickness of the brake rotor at 8 different positions using a micrometer. Each measuring position should be 45 degrees apart and 10 mm
from the outer edge of the rotor. Refer to the appropriate service manual for the allowable thickness variation specification, or use the suggested
thickness variation specification of 0.010 mm.
NOTE:
The thickness variation between any two measurement positions must not exceed the allowable or suggested specification.
2.
If the thickness variation is above the specification limit, and if the rotor was NOT resurfaced in the BRAKE RUN-OUT PROCEDURE, resurface
the rotor using an on-the-car brake lathe.
3.
If run-out and/or thickness variation measurement remains above specification after brake rotor resurface with an on-the-car brake lathe, the cause
may be the brake hub or the knuckle assembly or their bearings and/or hub.
WARRANTY INFORMATION
The 8-digit operation code shown in the chart DOES NOT apply when an off the car brake lathe is used.
LABOR OPERATION TIME FOR ON THE CAR BRAKE ROTOR MACHINING OF FRONT OR REAR BRAKES