
Sonata V6-3.0L (1991)
Assist Link: Service and Repair
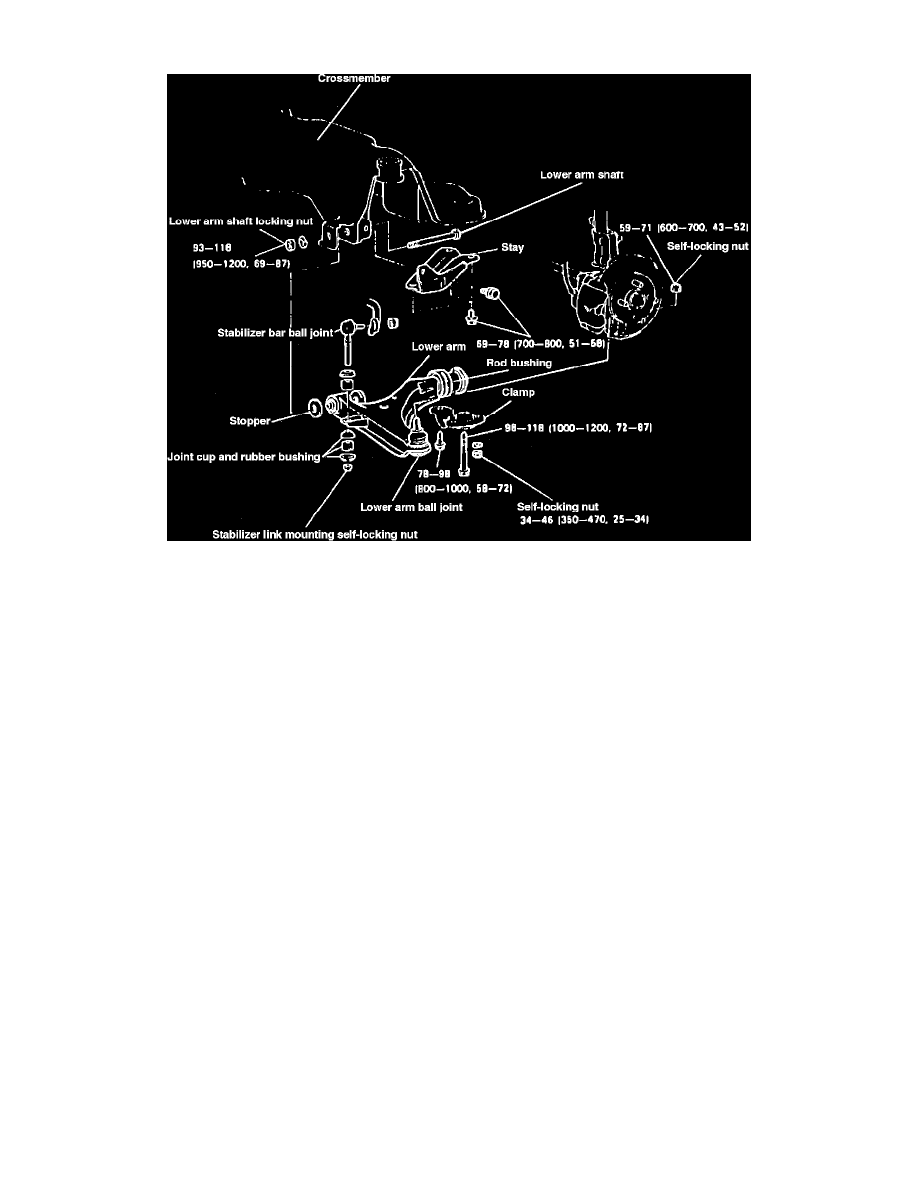
Fig. 3 Exploded View Of Lower Control Arm
1.
Raise and support front of vehicle, then remove wheel and tire assembly.
2.
Remove wheel and tire assembly.
3.
Using tie rod end puller tool 9568-31000 or equivalent, disconnect lower ball joint from knuckle, Fig. 3.
4.
Remove lower arm, then using lower arm bushing arbor tool 0945-21400 or equivalent, disconnect bushing from clamp.
5.
Using a screwdriver, remove dust cover from lower arm ball joint and snap ring.
6.
Remove ball joint from lower arm assembly.
7.
Inspect control arm and bushings. Replace as necessary.
8.
Check ball joint dust cover for cracks and damage. Replace if necessary.
9.
Check ball joint starting torque. Starting torque should be 26-87 inch lbs.
10.
If starting torque exceeds limit. Replace tie rod end.
11.
Reverse procedure to install.