Sonata GL V6-3.0L (1997)

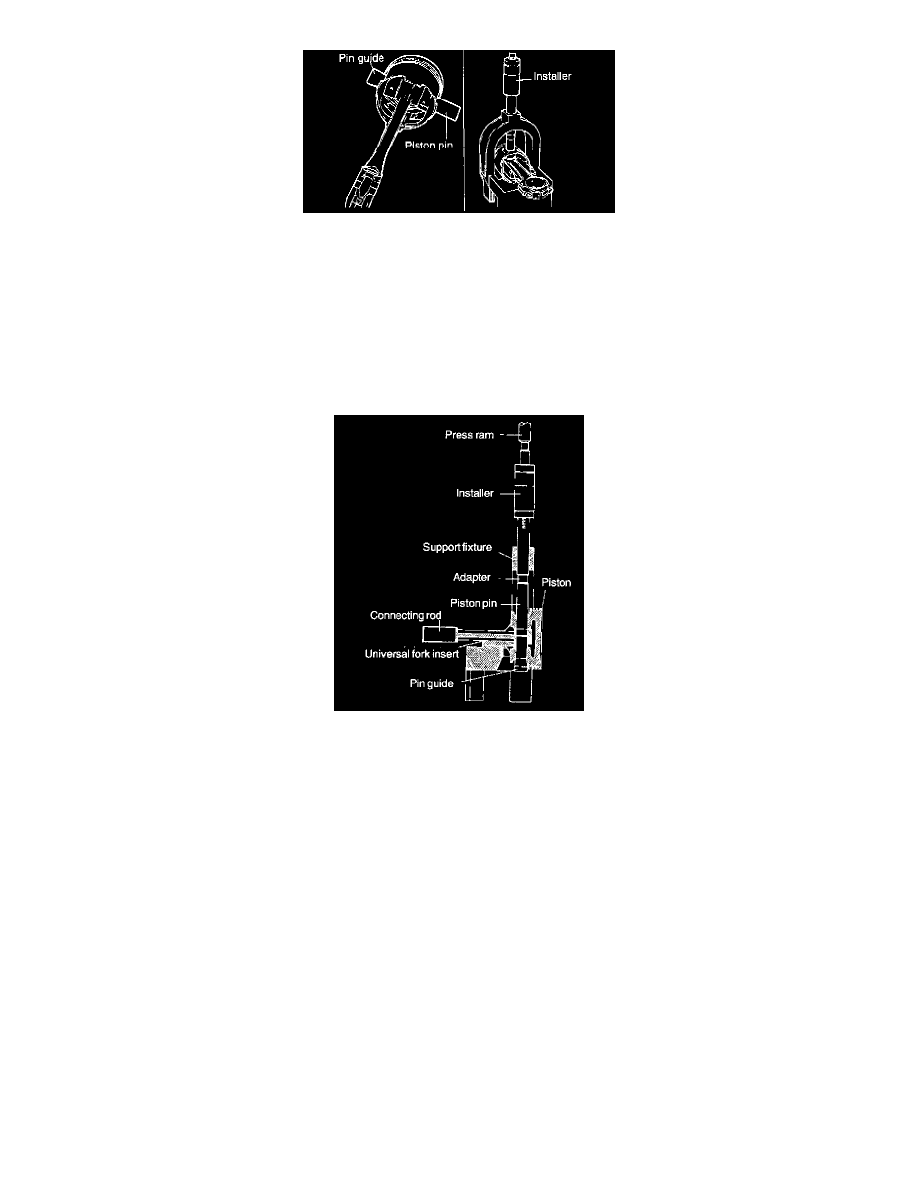
1. Install proper pin guide (refer to application chart supplied with tool) through piston and into connecting rod.
2. Hand fit and tap pin guide into piston for proper retention. Drop piston pin into the other side of the piston.
NOTE:
-
The pin guide centers the connecting rod in the piston.
-
When the piston, connecting rod, piston pin and pin guide assembly are positioned on the fork of the tool, the pin guide will also center this
assembly in the tool.
CAUTION: If too small a pin guide used, the piston assembly will not be located centrally in the tool, and damage may occur to the fork and/or
insert of the tool.
3. Install piston assembly onto fork assembly of tool.
NOTE: Tool will support connecting rod at the piston pin. Be sure to slide the piston assembly onto the fork until the pin guide contacts the fork
insert.
4. Adjust the installing arbor to the proper length by turning the numbered sleeve on the lettered shaft until the specified alpha-numeric setting from
the application chart is obtained. Turn knurled nut to lock numbered sleeve on shaft.
5. Insert the installing arbor through the hole in the arch of the tool.
6. Press piston pin into the connecting rod until the sleeve on the installing arbor contacts the top of the tool arch. The pin guide will fall out of the
connecting rod as the piston pin is pressed inch
CAUTION: Do not exceed 5000 pounds of force.
