
Sonata GL V6-3.0L (1997)
Drive Belt: Adjustments
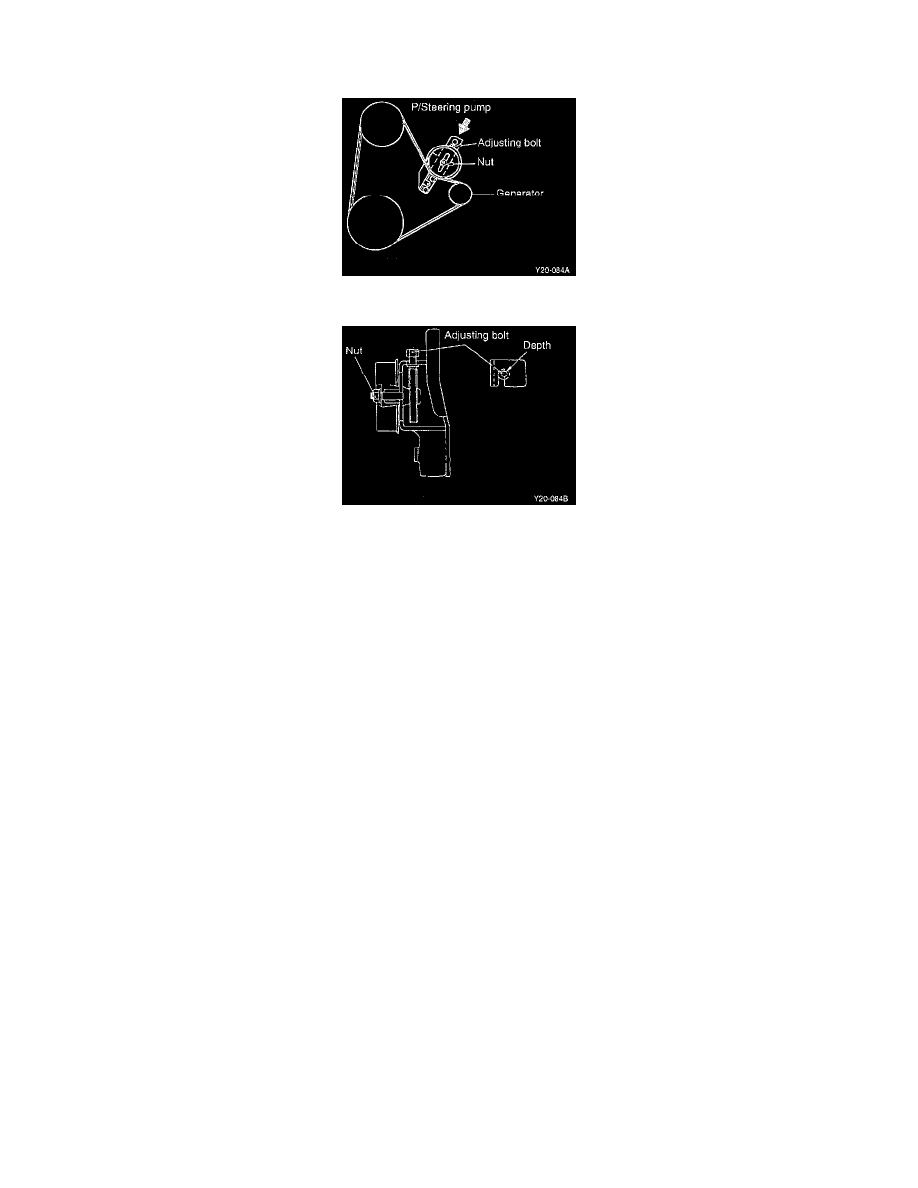
Alternator
1. To increase belt tension, loosen the tension pulley locking nut slightly.
2. Turn the left-hand threaded adjusting bolt clockwise, and move the tension pulley slightly.
3. Tighten the locking nut to 39-60 Nm (390-600 kg. cm, 28-43 ft. lbs.).
NOTE: Put the adjusting bolt into the recess at the far depth of the elongated hole on the tension bracket.
4. Check for the proper amount of belt deflection. Readjust if necessary.
NOTE: Before re-checking, crank the engine one or more revolutions.
DRIVE BELT TENSION
1. Check that the belts are not damaged and fit properly into the pulley grooves.
CAUTION: When adjusting the V-ribbed belt, check that the V-ribs are properly aligned.
NOTE:
-
If noise or slippage is detected, check the belt for wear, damage, or breakage on the pulley contact surface, and check the pulley for scoring.
-
Check for the proper belt deflection measurement.
2. Apply 100 N (22 Lbs.) force to the belt back midway between the pulleys as shown in the illustration, measure the amount of deflection with a
tension gauge.
NOTE:
-
The belt tension must be measured between the specified pulleys.
-
When a new belt is installed, adjust the tension to the center of the standard range indicated under "New." Let the engine idle for 5 minutes or
more, and check the standard value indicated under "Inspection."
-
When adjusting a used belt or a newly installed belt after 5 minutes or more of operation, refer to the standard value indicated under "Used."
-
Refer to the standard value indicated under "Inspection" for periodic inspections.
Specification Table