
Sonata GL V6-3.0L (1997)
B.
Remove the left rear wheel, pressurize the system to 20 inches H20 and squirt the filler neck pipe area with soapy water. If no leak is found,
continue to Step 7.
C.
If a leak is found in the filler cap/neck area, repair and continue at Step 9.
7.
Remove the fuel lank from the vehicle and inspect the rollover valve and fuel line hoses for signs of leakage. If there are no signs of leakage,
continue at Step 8.
8.
Replace the fuel tank with P/N 31150-34Q70, which already has the pads attached to the upper fuel tank, after transfering the fuel shut-off valve,
rollover valve and heat shield to the new fuel tank.
9.
After any necessary repairs have been made, reassemble the evaporative system and repeat Steps 4 and 5 to verify the repair.
AIR INTAKE SYSTEM HOSE REPLACEMENT
10.
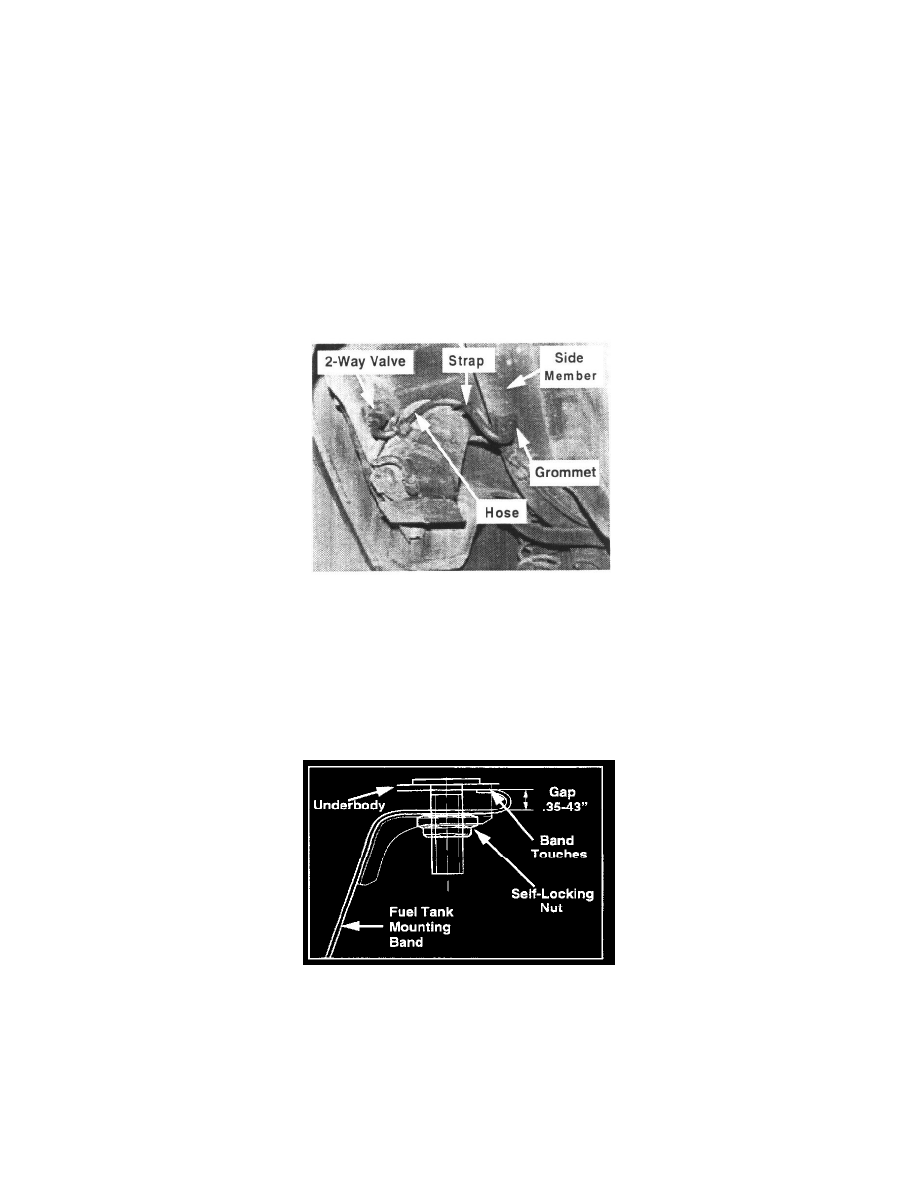
Remove the air filter and hose that connects the air filter to the 2-way valve and discard them.
11.
Connect the straight end (without the grommet) of the supplied hose (P/N 31377-34Q70) to the 2-way valve and secure with a hose clamp.
Insert the other end of the hose into the left rear side member (frame rail) as shown. Plug the grommet into the hole in the side member. Tie the
middle of the hose to the fuel vapor hoses with a tie strap.
NOTE:
The hose end inserted into the side member hole should face toward the rear of the vehicle.
FUEL TANK REPLACEMENT
NOTE:
When installing the new fuel tank, tighten the self-locking nuts until the end of each looped fuel tank mounting band touches the vehicle underbody
or the gap between the band and the underbody surface is .35-.43" (9-11 mm) as shown on the illustration.