
Sonata GLS V6-2.7L (2002)
4. Install the camshaft sprockets and align the timing marks.
NOTE:
-
When installing the camshaft sprockets, fasten them tightly while holding the hexagonal part of the camshaft.
-
Before installing the timing belt, if the timing marks of the cam sprocket and the cylinder head cover do not coincide, do not rotate the cam
sprocket more than 3 teeth in either direction.
-
Rotating the sprocket more than 3 teeth may allow the valve and piston to touch each other.
-
If the cam sprocket is rotated more than 3 teeth unavoidably, rotate the crankshaft counter-clockwise a bit before rotating the cam sprocket.
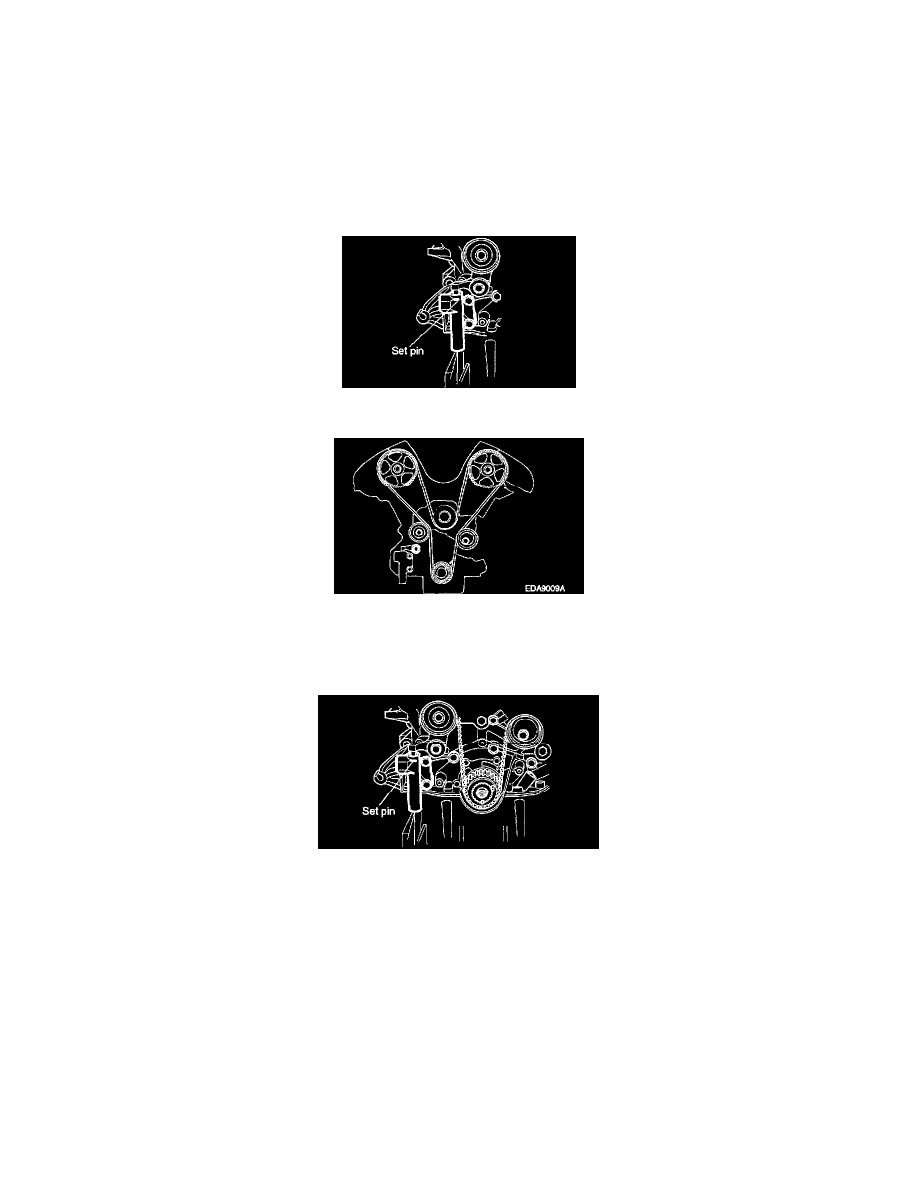
5. Install the auto tensioner to the front case.
NOTE: At this time auto tensioner's set pin should be compressed and secured with set pin.
6. Align the timing marks of each sprocket and install the timing belt in the following order. Crankshaft sprocket => Idler pulley => camshaft
sprocket (LH side) => Water pump pulley => camshaft sprocket (RH side) => Tensioner pulley.
NOTE: In this step, No. 1 cylinder is in the TDC (Compression stroke). Be very careful if you use your fingers.
7. Pull out the set pin of the auto tensioner.
8. Install the upper and lower timing belt covers.
9. Install the power steering pump pulley, idler pulley, tensioner pulley and crankshaft pulley
10. Using the wrench [16mm], rotate the tensioner arm clockwise (about 14°) and install the belt to the pulley.
11. Install the engine cover.
HOW TO ADJUST THE TENSION OF THE TIMING BELT
1. Rotate the crankshaft 2 turns clockwise and measure the projected length of the auto tensioner at TDC (# 1 Compression stroke) after 5 minutes.