
Sonata GLS V6-2.7L (2002)
2. Remove the circlip, then remove the D.O.J. outer race.
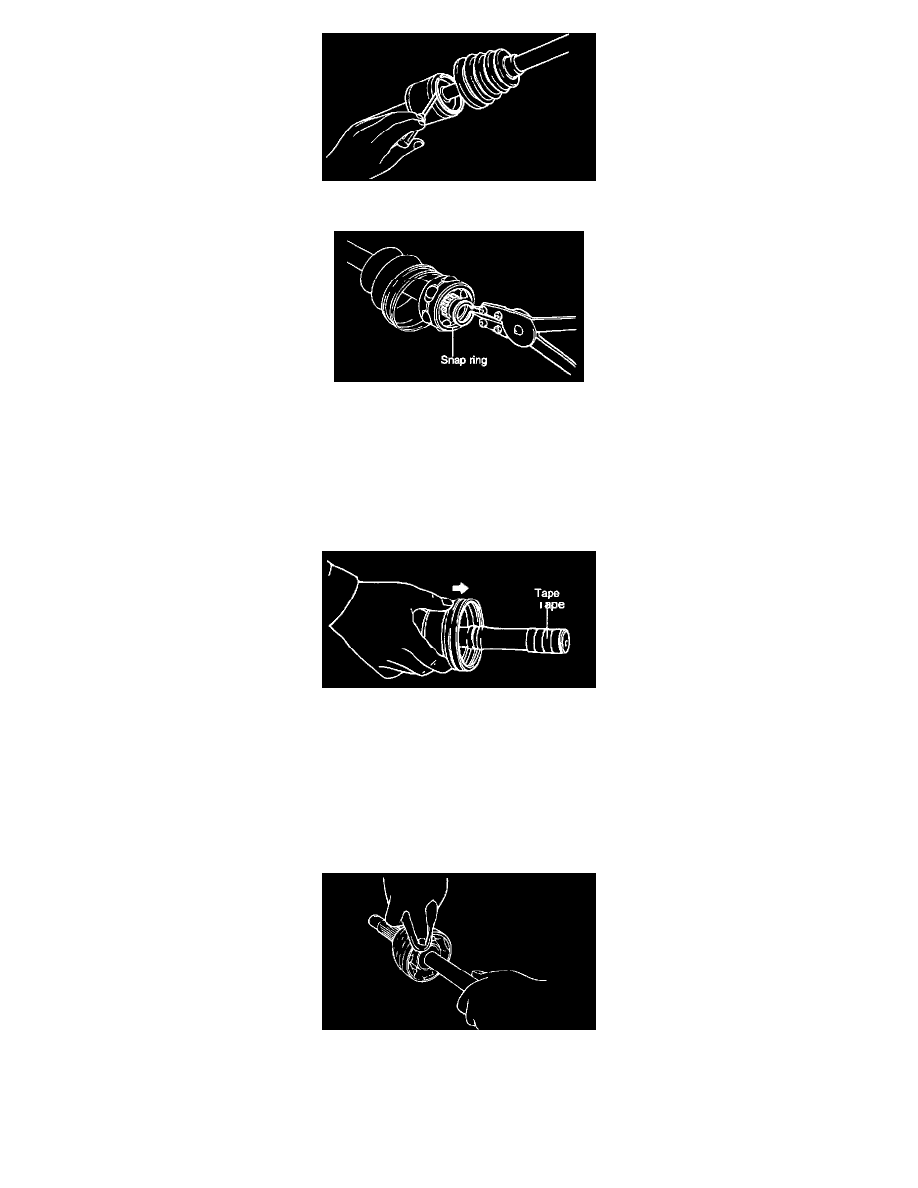
3. Remove the snap ring, then remove the D.O.J. inner race, the D.O.J. cage, and the balls as a unit.
4. Clean the D.O.J. inner race, the D.O.J. cage, and the balls, without disassembling them.
NOTE:
-
Be careful that the balls do not drop out of the cage.
-
If the balls drop out, press them back into the D.O.J. cage with the D.O.J. inner race.
5. Wipe the grease off the spline portion.
6. Remove the D.O.J. boot and BJ boot.
NOTE:
-
If the boots can be reused, wrap vinyl tape around the driveshaft splines so that the boots are not damaged when they are removed.
-
Do not disassemble the B.J.
INSPECTION
1. Inspect the driveshaft and driveshaft splines for wear, damage, bending or corrosion.
2. Inspect the birfield joint for entry of water and/or foreign material.
3. Check the D.O.J. outer race cage, balls and inner race for damage, corrosion or wear.
REASSEMBLY
1. Wrap the driveshaft splines (D.O.J. side) with tape to prevent damage to the boots.