
Tiburon L4-1.8L (1997)
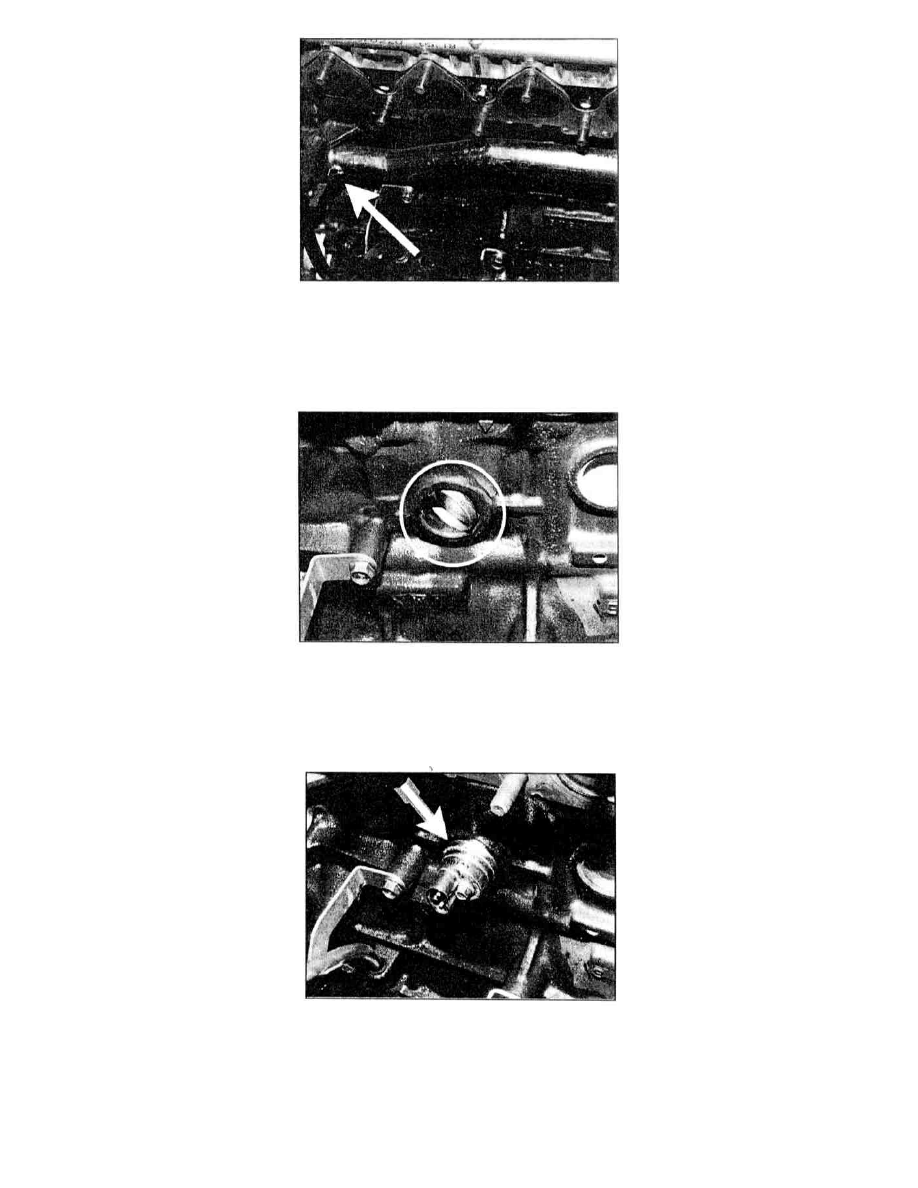
10.
Remove the tube going into the water pump by removing the one bolt. Pry back the end that plugs into the water pump by using a screwdriver to
leverage the part back.
CAUTION: BEFORE THIS TUBE IS REMOVED, PLACE A LARGE PAN UNDER THE AREA TO COLLECT THE COOLANT DRAINING
FROM THE BLOCK.
11.
Remove the right front core plug from the block by using a flat tipped punch at the "9-o'clock" position of the outer ring of the core plug. By
hammering the punch at the outer flange only, the core plug can be made to rotate in the hole, thus facilitating the removal process. Once the core
plug has rotated as far as possible, use a pair of pliers to remove the core plug.
12.
Clean the surface of the hole with a Scotchbrite (TM) (or equivalent) pad to make sure that there are no debris or burrs. An irregularity of the
surface may damage the O-ring on the block heater during the installation process.
13.
Install the plug side of the block heater so that the wire connector is at the "9 o'clock" position. Tighten the locking screw clockwise to 20-25 lb.in
(2.3 - 2.8 Nm).
CAUTION: Do not overtighten the screw, as this may strip the threads or stress the lock.
14.
Plug in the wiring connector.