
Tiburon L4-1.8L (1997)
Fuel Filler Cap: All Technical Service Bulletins
Fuel Tank - Cracking/Deformation
Number: 00-01-001
Group: CAMPAIGN
Date: JANUARY, 2000
Subject: 1996-91 ELANTRA AND 1997 TIBURON
FUEL CAP REPLACEMENT: CAMPAIGN 36
Model:
1996-97 ELANTRA, 1997 TIBURON
DESCRIPTION:
Some 1996 and 1997 Elantra and 1997 Tiburon vehicles may experience excessive vacuum formation in the fuel tank. This may cause minor distortion
of the fuel tank. After prolonged exposure to the excessive vacuum, a small crack may develop on the upper fuel tank. A new fuel filler cap has been
made available to decrease the vacuum in the fuel tank. Replacement fuel filler caps have been sent directly to owners of the affected vehicles. Vehicle
owners have been instructed that they may take their vehicles to Hyundai dealers to have the replacement fuel filler caps installed if they do not wish to
perform that operation themselves. Additionally, owners have been instructed to bring their vehicles to Hyundai dealers if the vehicle's "Check Engine"
light is illuminated or if they smell gasoline odors.
VEHICLES AFFECTED:
Elantra: 1996 and 1997 models
KMHJF_4M7TU000001 T: 1996 model year
KMHJF_4M7VU000001 V: 1997 model year
Tiburon: 1997 models
KMHJG_4_7VU000001 V: 1997 model year
DIAGNOSTIC PROCEDURE:
If the Malfunction Indicator Light (MIL)/Check Engine Light illuminates and remains on, check for Diagnostic Trouble Codes by using a Scan Tool. If
DTC P0442 (Evaporative Emission Control System Small Leak) or P0455 (Evaporative Emission Control System Large Leak) is detected:
1.
Diagnose and repair the cause for the P0442 or P0455 DTCs by using the procedures described in TSB 98-30-002, Enhanced Evaporative
Emission Control System Diagnosis and Repair. After repairing all causes determined for codes P0442 or P0455, recheck with the Scan Tool. If
codes P0442 or P0455 continue to exist, proceed to step 2.
2.
Inspect the fuel tank for cracking on the upper surface by using the following procedure:
a.
Remove rear seat cushion.
b.
Remove fuel pump access cover from the floor pan, in the area below the rear seat cushion.
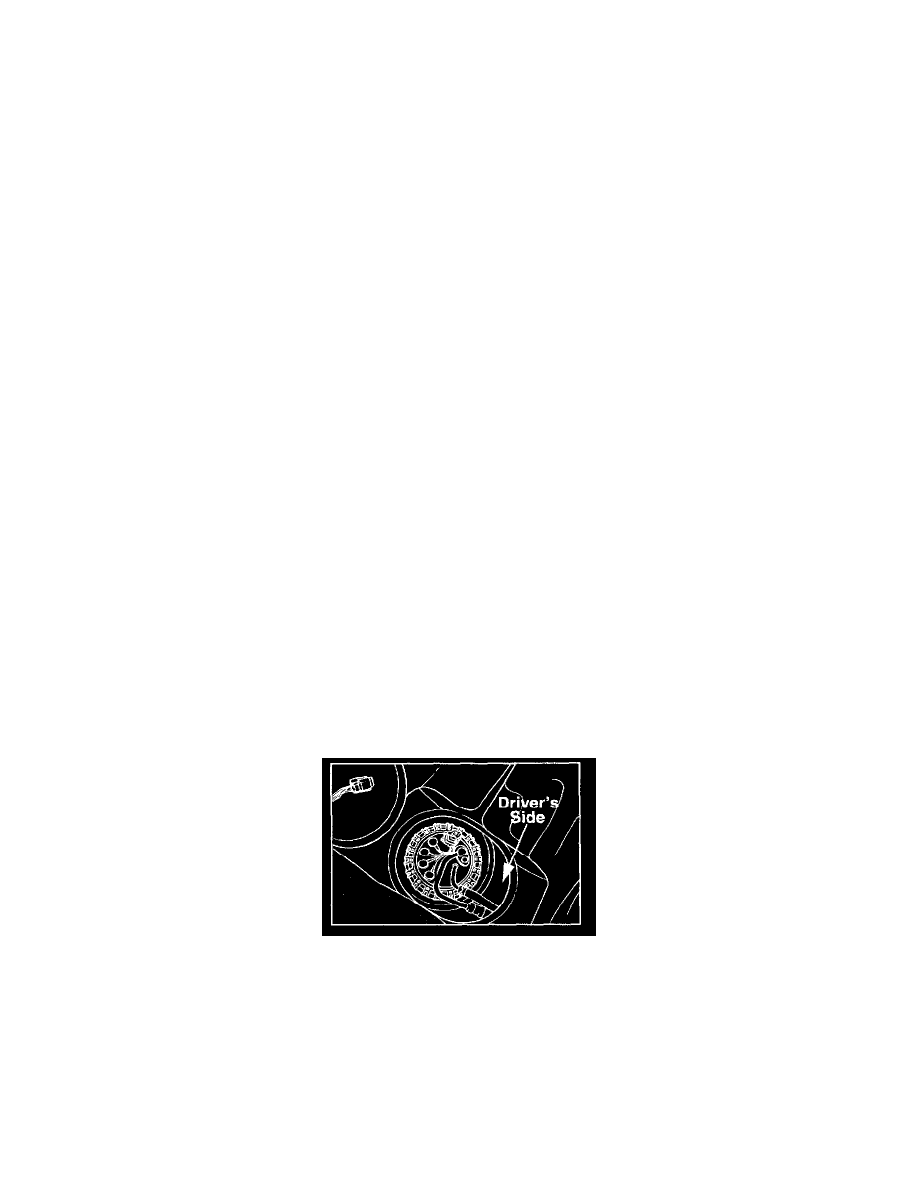
c.
Carefully inspect the driver's side top portion of the fuel tank through the fuel pump access hole. (See image)
d.
Look for cracks on the fuel tank surface or signs of discoloration. Replace the fuel tank if it has a crack.
NOTE:
If other diagnostic Trouble Codes are present, correct their causes by following normal diagnostic and warranty procedures.
SERVICE PROCEDURE:
Replace the fuel filler cap with the new part number cap.