
Tucson AWD L4-2.4L (2010)
Installation
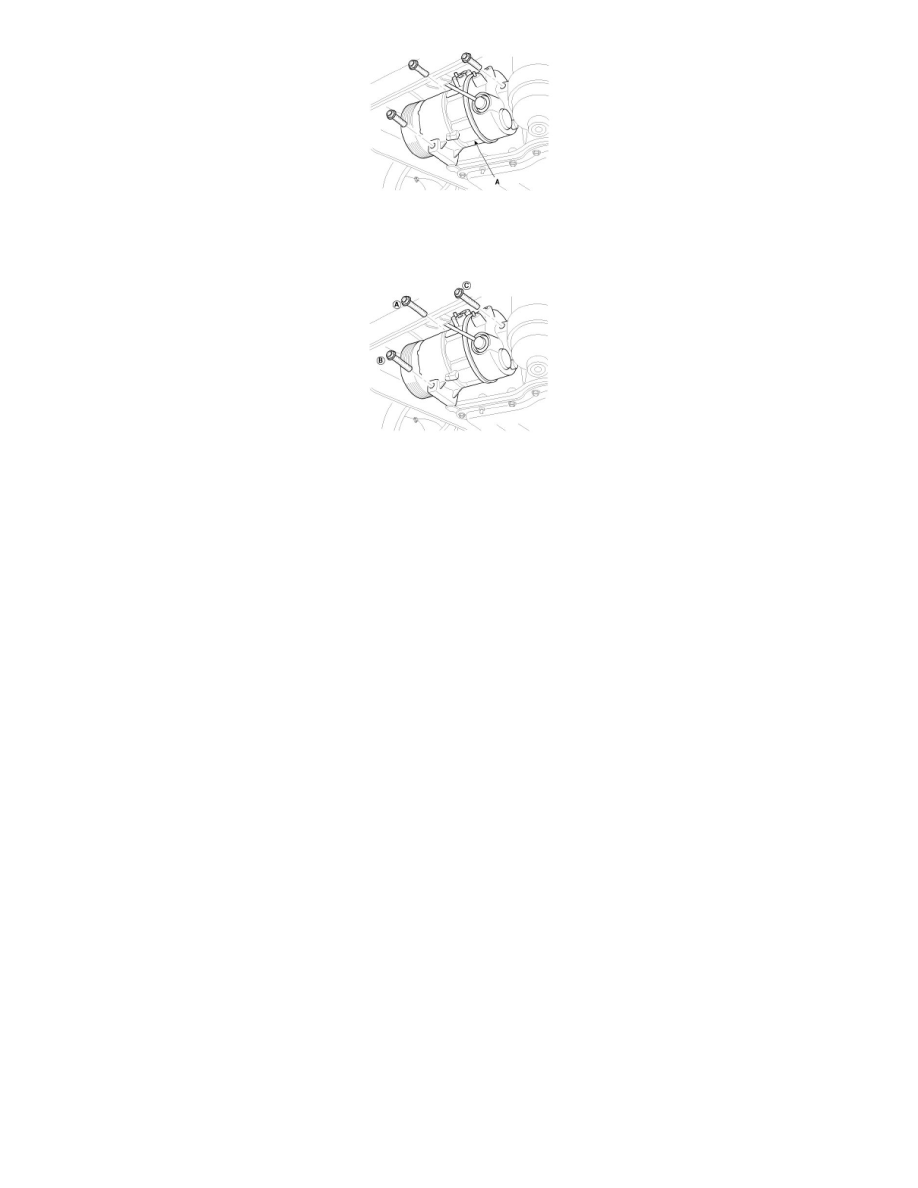
1. Make sure of the length of compressor mounting bolts, and then tighten it A->B->C order.
Tightening torque :
19.6 - 24.5 N.m(2.0 - 2.5 kgf.m , 14.5 - 18.1 lb-ft)
2. Install in the reverse order of removal, and note these items.
A. If you're installing a new compressor, drain all the refrigerant oil from the removed compressor, and measure its volume, Subtract the volume
of drained oil from 120cc(4.20 oz.) the result is the amount of oil you should drain from the new compressor (through the suction fitting).
B. Replace the O-rings with new ones at each fitting, and apply a thin coat of refrigerant oil before installing them. Be sure to use the right
O-rings for R-134a to avoid leakage.
C. To avoid contamination, do not return the oil to the container once dispensed, and never mix it with other refrigerant oils.
D. Immediately after using the oil, replace the cap on the container and seal it to avoid moisture absorption.
E. Do not spill the refrigerant oil on the vehicle; it may damage the paint; if the refrigerant oil contacts the paint, wash it off immediately.
F. Adjust the drive belt.
G. Charge the system and test its performance.