Tucson FWD L4-2.0L (2007)

3. After fully extending the piston rod, install the spring upper seat and insulator assembly.
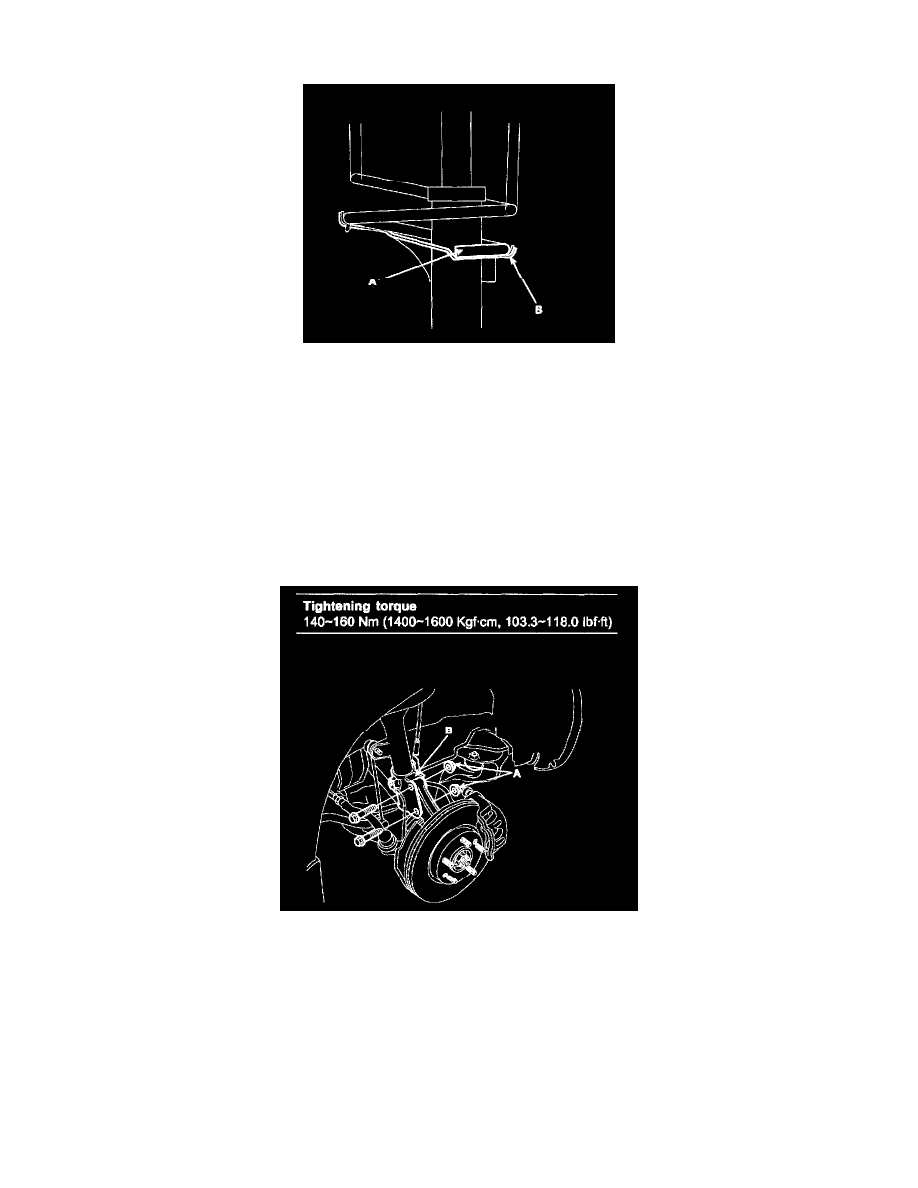
4. After seating the upper and lower ends of the coil spring (A) in the upper and lower spring seat grooves (B) correctly, tighten new self-locking nut
temporarily.
5. Remove the special tool (09546-26000).
6. Tighten the self-locking nut to the specified torque.
Tightening torque 60 - 70 Nm (600 - 700 kgf-cm, 44.3 - 51.6 ft. lbs.)
7. Apply grease to the strut upper bearing and install the insulator cap.
CAUTION: When applying the grease, be careful so that it isn't smeared on the insulator rubber.
Installation
FRONT STRUT ASSEMBLY
INSTALLATION
1. Install the strut assembly (B) and then install the strut lower mounting bolts (A).
Tightening torque 140 - 160 Nm (1400 - 1600 kgf-cm, 103.3 - 118.0 ft. lbs.)
