
Veracruz FWD V6-3.8L (2009)
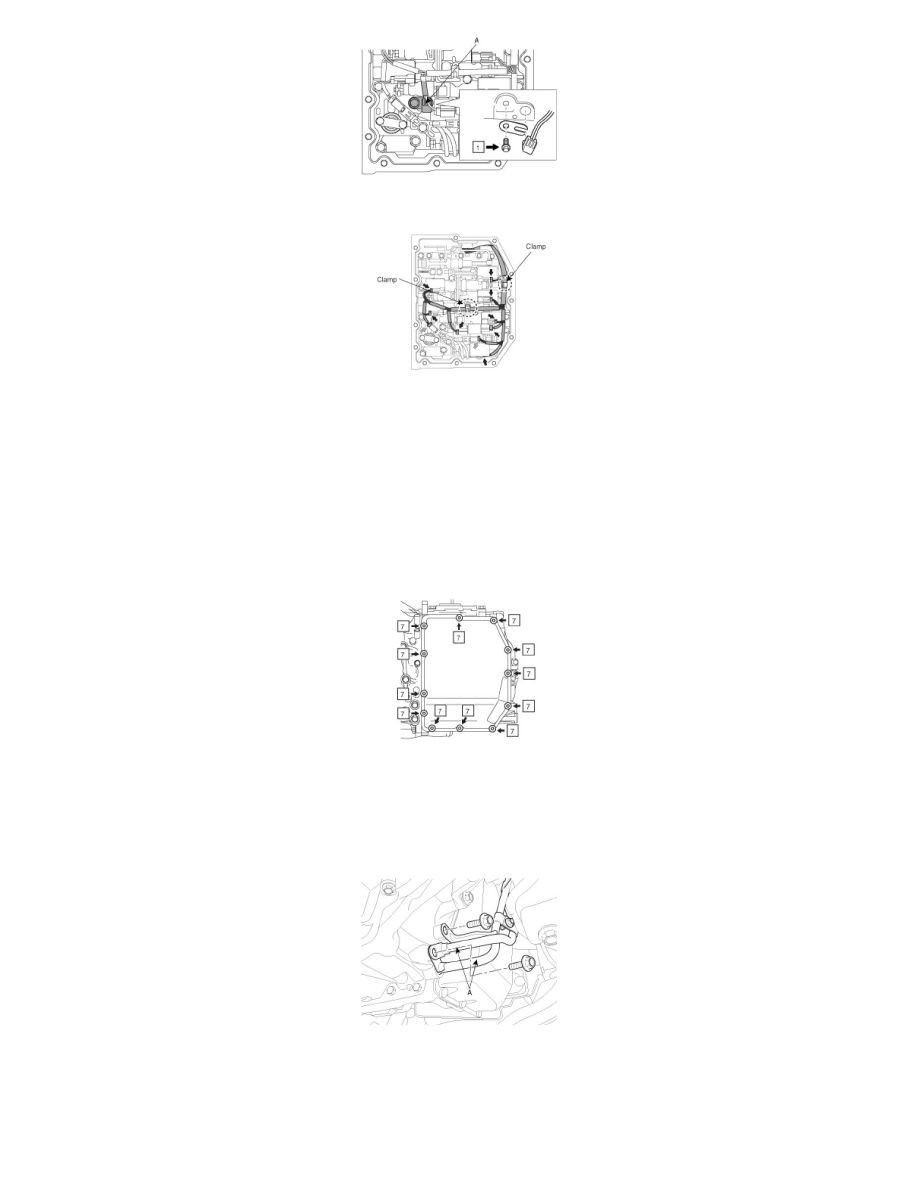
8. Connect the 8 solenoid connectors and the 2 speed sensor connectors, and the T/M wire to the 2 clamps.
9. Clean oil off the contact surface of the new transaxle side cover with the transaxle case.
NOTE:
Completely remove oil with white gasoline or similar products.
10. Apply sealant (FIPG) to the new transaxle side cover.
11. Install the transaxle side cover with 12 new seal bolts.
Tightening torque :
10-16Nm (1.0-1.6kgf.m, 7.2-11.6lb-ft)
Bolt size (7) :M8x1.25x15.5mm (Seal bolt)
12. Coat the new O-rings with ATF, and install it to the oil cooler tubes (A). Install the oil cooler tubes with the 2 bolts.
O-ring size:inner dia.-11.6mm, thickness-2.35mm
Tightening torque :
20-30Nm (2.0-3.0kgf.m, 14.5-21.7lb-ft)
Bolt size (8) :M8x1.25x20mm
13. Connect the oil cooler hoses from the tubes.
14. Install the drain plug (A) and the gasket by using a hexagon wrench (17mm).
Tightening torque :
35-61Nm (3.5-6.1kgf.m, 25.3-44.1lb-ft)