
Veracruz FWD V6-3.8L (2009)
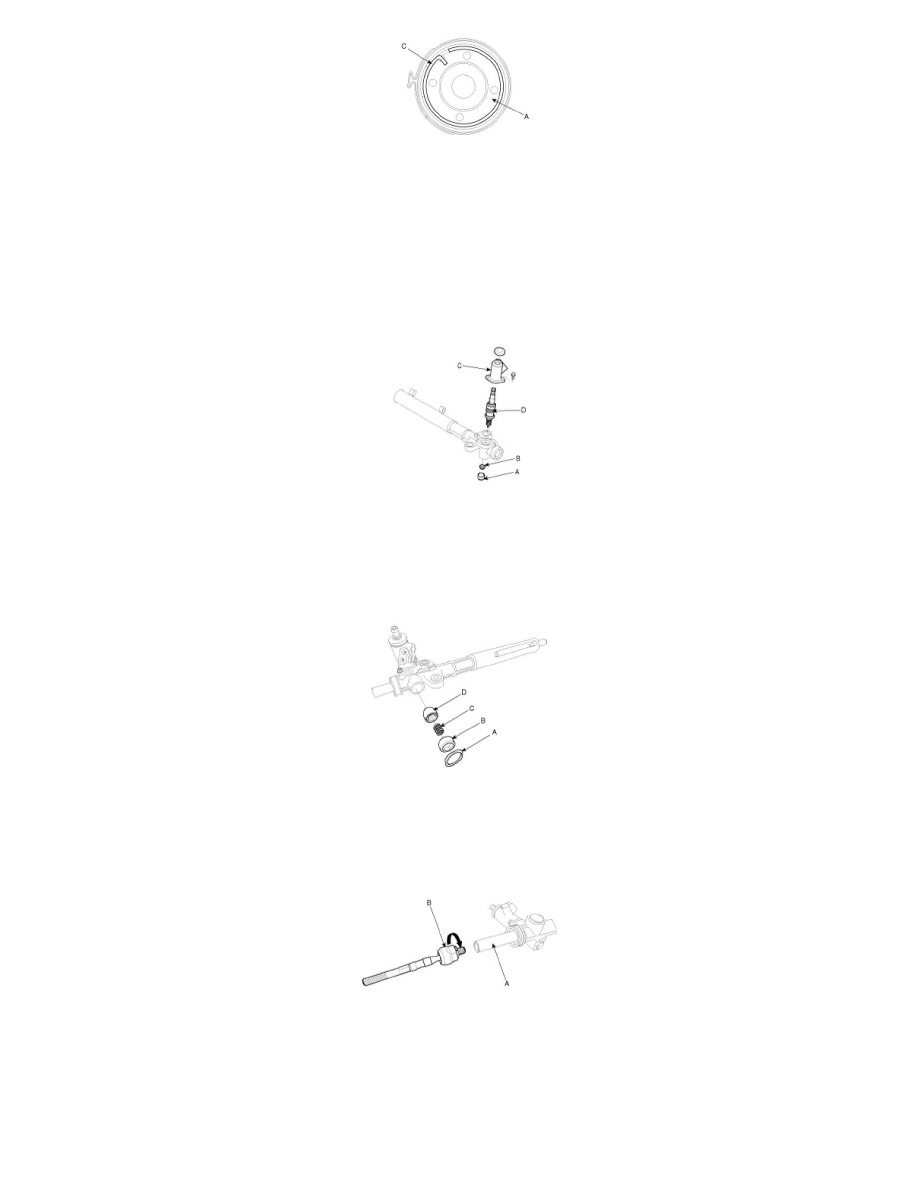
4. Install the valve assembly (D) and valve assembly housing (C).
5. Tighten the pinion lock nut (B).
Tightening torque :
20 - 30N.m (2.0 - 3.0kgf.m, 14 - 22lb-ft)
6. Apply liquid gasket to the thread of pinion plug (A) and then install it.
Tightening torque :
50 - 70N.m (5.0 - 7.0kgf.m, 36 - 51lb-ft)
7. Insert the support yoke (D) and yoke spring (C) into the rack housing.
8. Apply liquid gasket to the thread of yoke plug (B) and then install it to the rack housing.
9. Tighten the lock nut (A) while holding the yoke plug.
Tightening torque :
50 - 70N.m (5.0 - 7.0kgf.m, 36 - 51lb-ft)
10. Apply the liquid gasket to the thread of tie-rod ball joint (B) and then install it to the rack bar (A).
Tightening torque Nm (kgf.m, lb-ft):
80 - 100N.m (8.0 - 10.0kgf.m, 58 - 72lb-ft)
11. Apply the silicon grease to the portion (D) of the tie-rod.
12. Apply the liquid gasket to the bellows mating surface of the rack housing.
13. Assemble the bellows (C) to rack housing and then tighten the bellows clip (A) and band (B).