
Veracruz FWD V6-3.8L (2009)
Installation
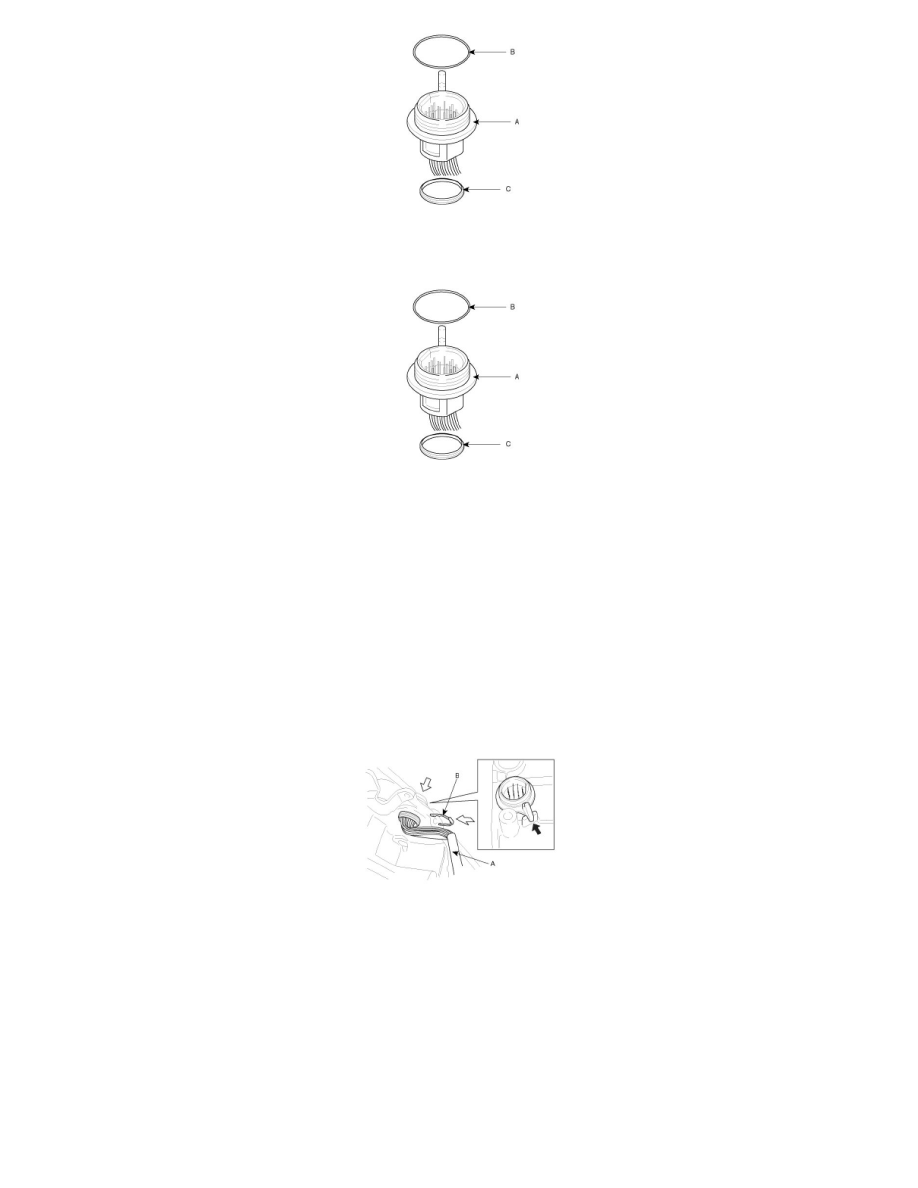
1. After coating a new gasket (C) with ATF, install it to the wire (A).
2. Install a new O-ring (B) to the wire.
O-ring size:inner dia.-27.3mm, thickness-2.4mm
CAUTION:
Do not coat ATF to the O-ring.
3. Install the wire (A) to the transaxle case.
CAUTION:
-
Be careful not to apply too much force to the wire.
-
Be careful not to damage the T/M wire.
NOTE:
Install the wire to the transaxle case by engaging its claw.
4. Install a new wire lock plate (B).
5. Install the transaxle side cover and the valve body assembly. (refer to Solenoid valve's Installation)
CAUTION:
Be careful not to drop the valve body assembly.
6. Coat the new O-rings with ATF, and install it to the oil cooler tubes (A). Install the oil cooler tubes with the 2 bolts.
O-ring size:inner dia.-11.6mm, thickness-2.35mm
Tightening torque :
20-30 Nm (2.0-3.0kgf.m, 14.5-21.7 lb-ft)
Bolt size (8) :M8x1.25x20mm