
Veracruz FWD V6-3.8L (2009)
2. Before installing the driveshaft(A), set the opening side of the circlip facing downward.
3. After installation, check that the driveshaft (A) cannot be removed by hand.
4. Install the driveshaft to the rear axle carrier assembly.
5. Install the rear stabilizer link (A) from the rear axle carrier.
Tightening torque Nm (kgf-m, lb-ft) :
Nut(B) : 58.8 - 78.5 (6.0 - 8.0, 43.4 - 57.9)
6. Install the assist arm (A) and the trailing arm (B) to the rear axle carrier.
Tightening torque Nm (kgf-m, lb-ft) :
Bolt (C) : 137.3 - 156.9 (14 - 16, 101.3 - 115.7)
Nut (D) : 98.1 - 117.7 (10 - 12, 72.3 - 86.8)
Nut (E) : 137.3 - 156.9 (14 - 16, 101.3 - 115.7)
Bolt (F) : 137.3 - 156.9 (14 - 16, 101.3 - 115.7)
NOTE:
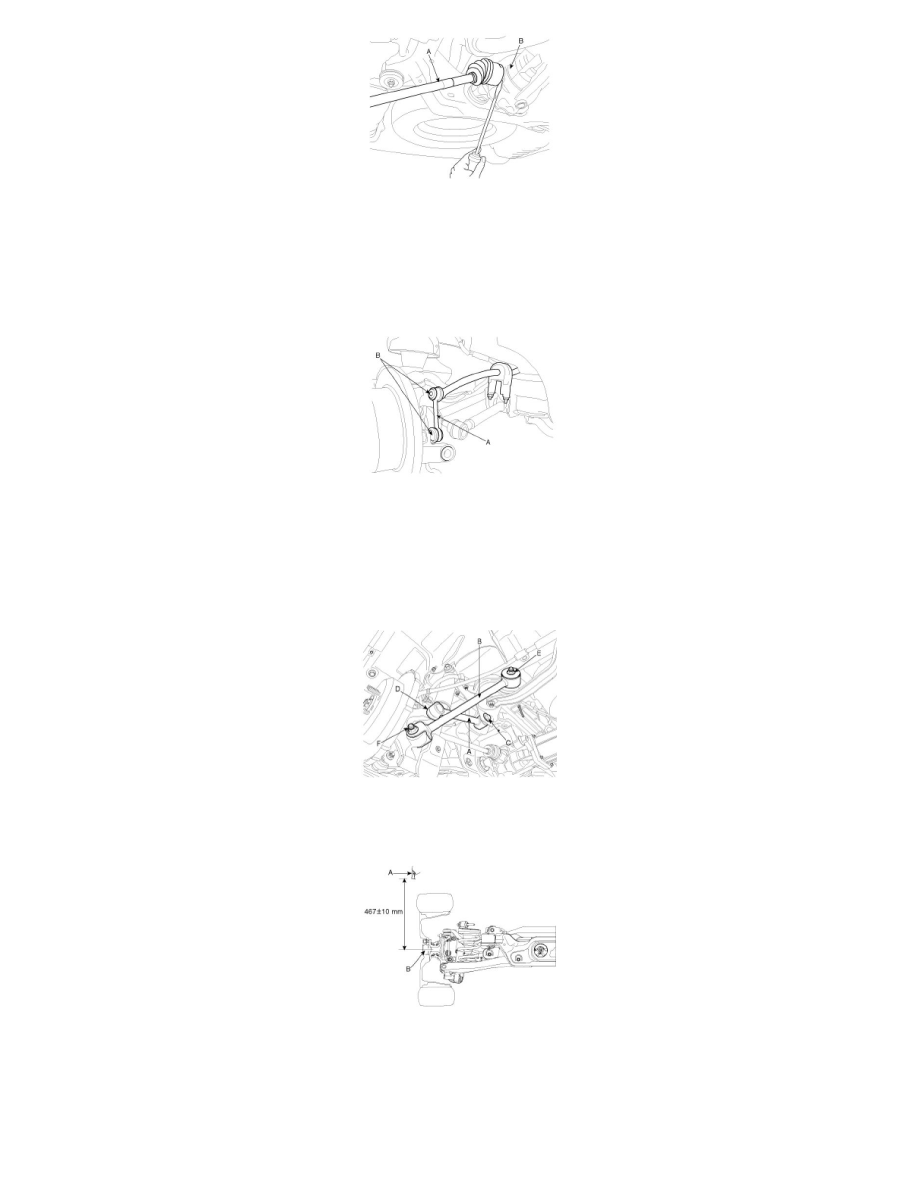
After checking the distance(467±10mm(18.39±0.39in)) between the wheel housing garnish(A) and the hub assembly(B) as shown in the
illustration, tighten the mounting bolts and nuts of rear chassis part with specified torque.
7. Install the rear shock absorber (A).
Tightening torque Nm (kgf-m, lb-ft) :
Bolt (B) : 137.3 - 156.9 (14 - 16, 101.3 - 115.7)
Nut (C) : 98.1 - 117.7 (10.0 - 12.0, 72.3 - 86.8)