
Veracruz FWD V6-3.8L (2009)
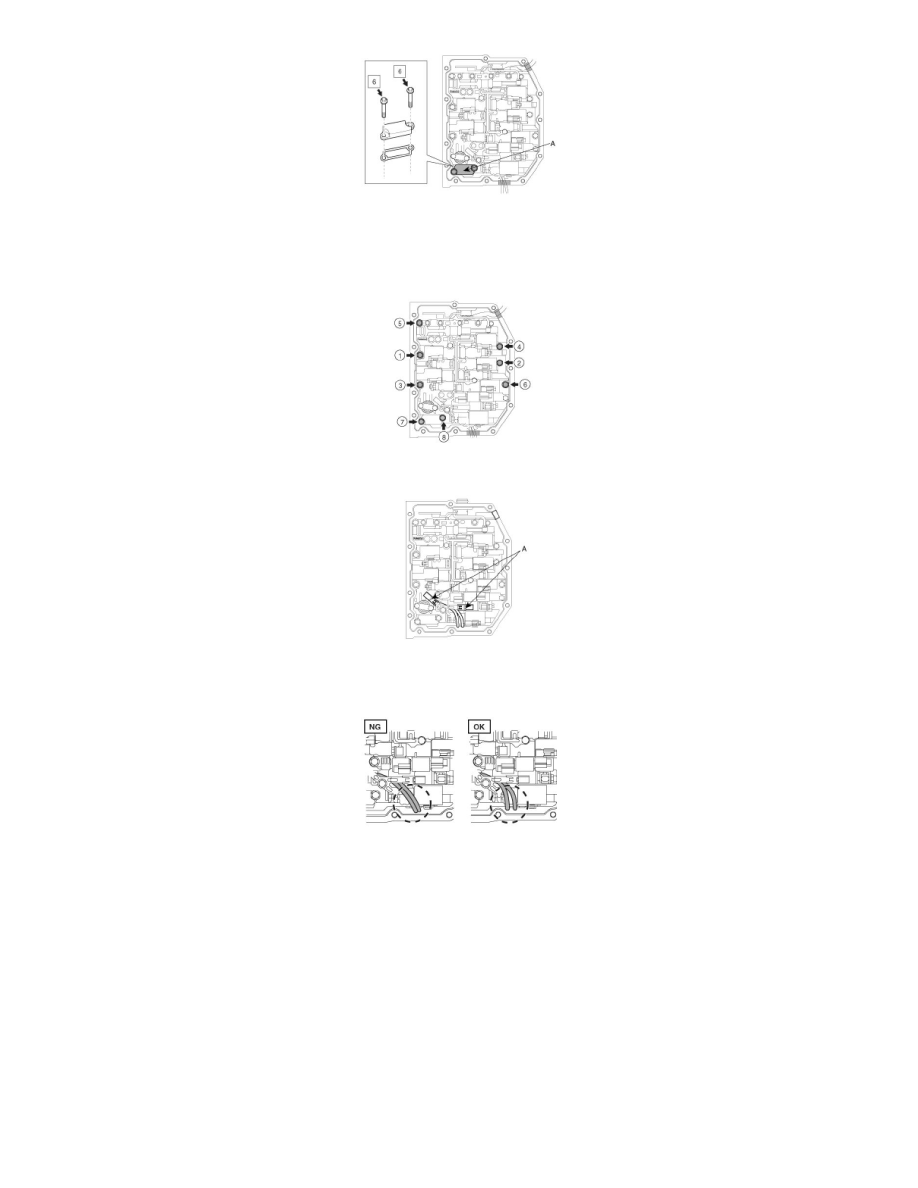
4. Tighten the 8 bolts in the order shown in the figure.
Tightening torque :
8-12Nm (0.8-1.2kgf.m, 5.8-8.7lb-ft)
5. Install the connectors of the 2 speed sensor wires (A) to the solenoid clamp.
CAUTION:
Install sensor as instructed as shown figure so that speed sensor wires cannot be stuck to solenoid.
6. Coat the new "O" ring with ATF, and install it to the oil temperature sensor.
O-ring size:inner dia.-11.57mm, thickness-1.98mm
7. Install the oil temperature sensor (A) with the lock plate and the bolt to the valve body assembly as shown in the figure.
Tightening torque :8-12Nm (0.8-1.2kgf.m, 5.8-8.7lb-ft)
Bolt size (1) :M6x1.0x12mm