
Axiom 2WD V6-3.5L (2002)
5.
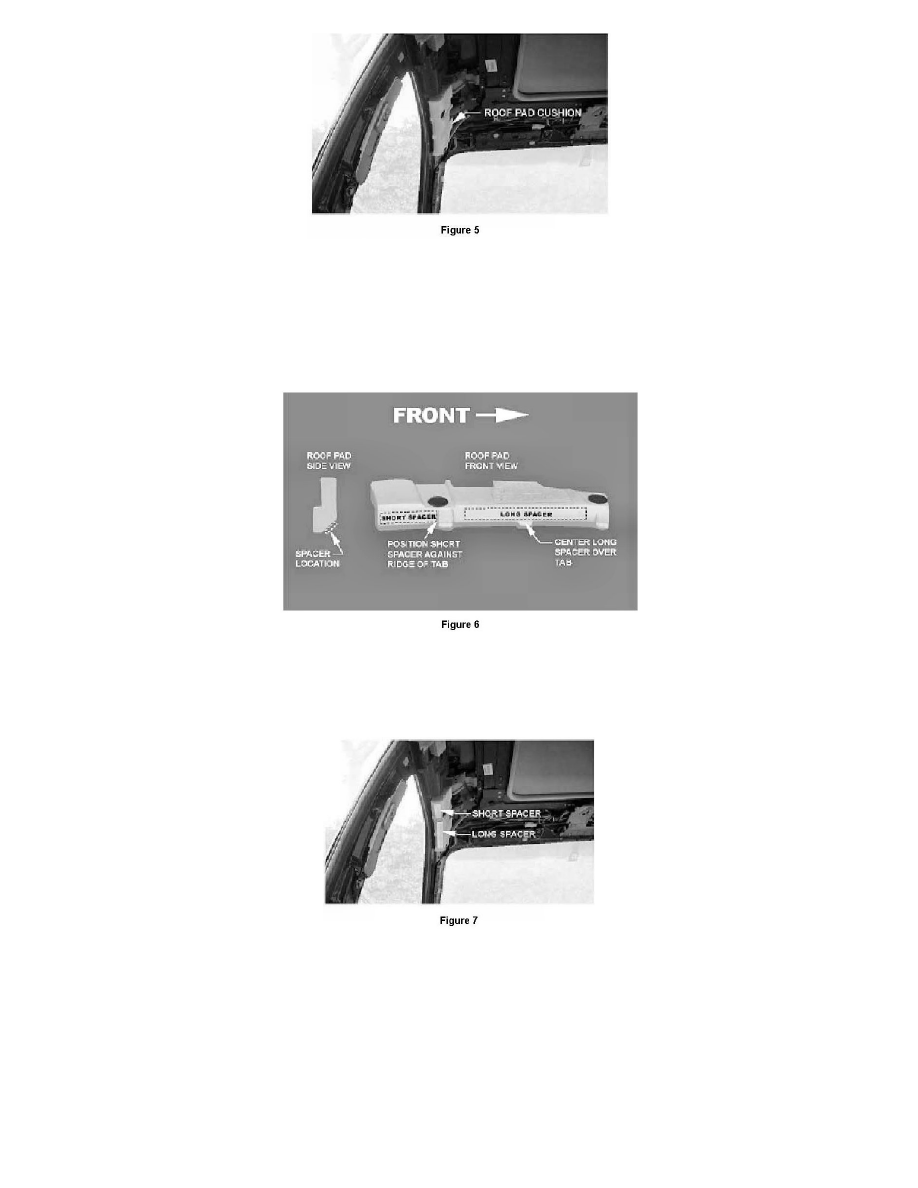
Pull back the edge ofthe headliner to gain access to the roof pad cushion (see figure 5).
NOTE:
Headliner has been removed for illustration purposes and does not need to be completely removed for spacer installation.
6.
New Pad Kit P/N 8-97362-625-0 contains two (2) long spacers and two (2) short spacers for installation on both driver and passenger sides roof
pad cushion.
Long and short spacer will be attached to locations as outlined on figure 6.
NOTE:
Roof pad cushion has been removed for illustration purposes only and does not need to be removed to attach the spacers.
7.
Remove the paper backing from the long and short spacer and affix to the roof pad cushion using figure 6 as a guide. When finished the long and
short spacers MUST be located as shown on figure 7.
8.
Reposition the headliner back in position.
9.
Re-install the "B" pillar trim; reattach the seatbelt anchor and torque to 39 N.m (29 ft lbs).
NOTE:
The seat belt anchor retaining bolts MUST be torqued to 39 N.m (29 ft lbs).
10.
Re-install the "A" pillar and door seal on both sides.