
Hombre S Regular Cab 2WD L4-2.2L CPC (1998)
Leak Test Adapter
Install or Connect
Tools Required
J 9625-A Leak Test Adapter
J 42136 A/C Lip Seal Remover
J 34614 Shaft Seal Protector
1. Dip the new compressor shaft seal (1) in clean 525 viscosity refrigerant oil and assemble the seal onto the J 42136 by turning the handle
clockwise.
2. Install the J 34614 onto the compressor shaft.
3. Using a rotary motion slide the new compressor shaft seal onto the compressor shaft until the seal is fully seated.
4. Remove the J 34614 by turning the handle counterclockwise
5. Install a new compressor shaft seal retaining ring (2), using internal snap ring pliers (1).
Important
-
Make sure that the chamfer side of the retaining ring is facing up and that the retaining ring snaps into the groove.
NOTE: Handling and care of seal protector is important. If seal protector is nicked or the bottom flared, the new seal may be damaged during
installation.
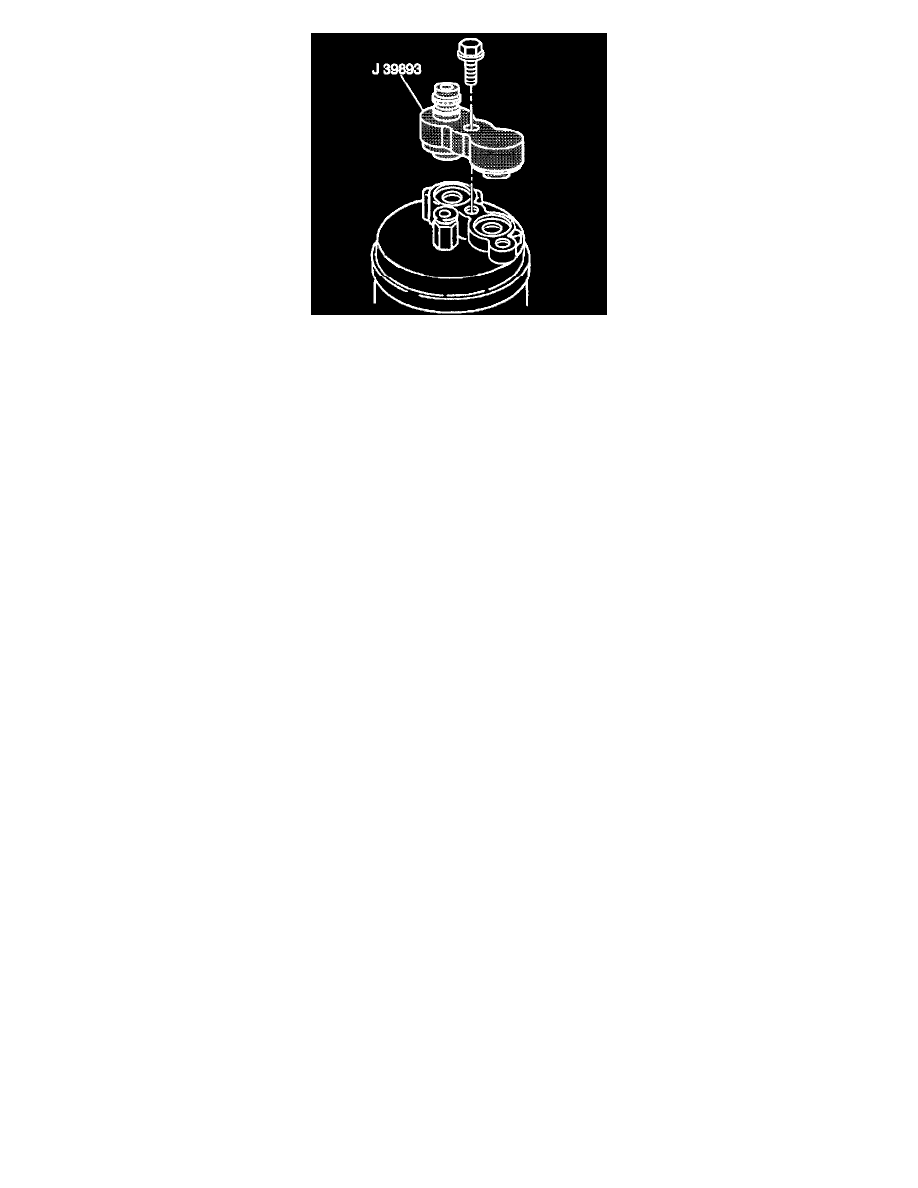
6. Leak test tile compressor, using J 39893 Leak Test Adapter as follows:
-
Install the J 9625-A onto the compressor and pressurize the suction and high-side of the compressor with R-134a.
-
Temporarily install the shaft nut
-
With compressor in a horizontal position, rotate the compressor shaft in the normal direction of rotation, several turns by hand
-
Leak test tile seal area and repair if necessary
-
Remove tile shaft nut
7. Recover the refrigerant. Refer to "Refrigerant Recovery and Recycling."
8. Remove and clean any excess oil resulting from installing the new seal parts from tile shaft and inside the compressor neck.
9. Install the compressor clutch plate and hub assembly. Refer to "Compressor Clutch Plate and Hub Assembly Removal".
10. Install the compressor into the vehicle.