
Hombre S Space Cab 2WD V6-4.3L (2000)
Tighten the shock absorber upper nut to 12 Nm (106 inch lbs.), while holding the stem with a wrench.
6. Install new nuts, if needed.
7. Install the shock absorber lower bolts through the pivot holes to the lower control arm holes.
Tighten
Tighten the shock absorber lower bolts to 30 Nm (22 ft. lbs.).
8. Lower the vehicle.
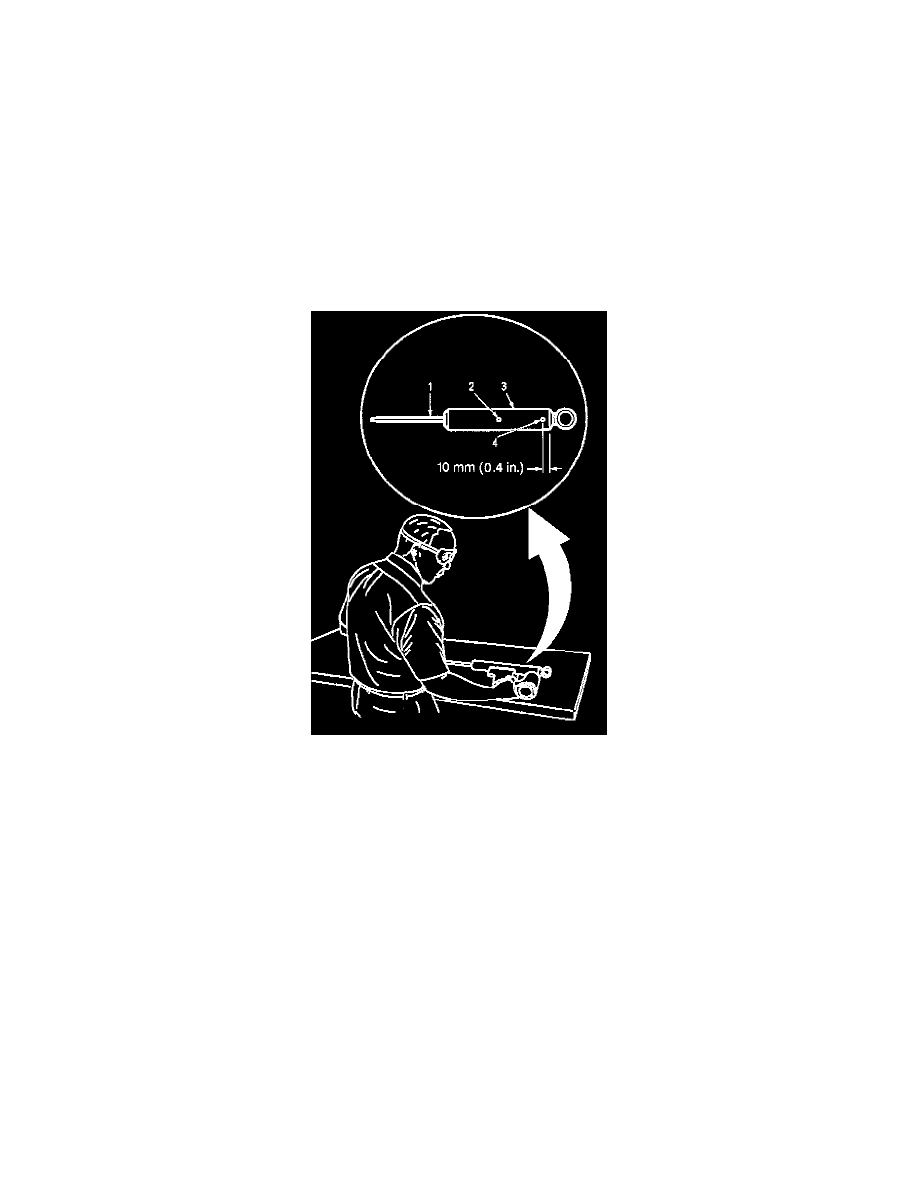
Front Shock Absorber Disposal
Caution: Gas charged shock absorbers contain high pressure gas. Do not remove the snap ring from inside the top of the tube. If the snap
ring is removed, the contents of the shock absorber will come out with extreme force, which may result in personal injury.
Caution: To prevent personal injury, wear safety glasses when centerpunching and drilling the shock absorber. Use care not to puncture the
shock absorber tube with the centerpunch.
1. Make an indentation 10 mm (0.4 inch) from the bottom (4) of the tube (3) using a centerpunch.
2. Clamp the shock absorber in a vise horizontally with the shock absorber rod (1) completely extended.
3. Drill a hole in the shock absorber at the centerpunch (4) using a 5 mm (3/16 inch) drill bit. Gas or a gas/oil mixture will exhaust when the drill bit
penetrates the shock absorber. Use shop towels in order to contain the escaping oil.
4. Make an indentation in the middle (2) of the tube (3) with a centerpunch.
5. Drill a second hole in the shock absorber at the centerpunch (2) using a 5 mm (3/16 inch) drill bit. Oil will exhaust when the drill bit penetrates the
shock absorber. Use shop towels in order to contain the escaping oil.
6. Remove the shock absorber from the vise. Hold the shock absorber over a drain pan horizontally with the holes down. Move the rod (1) in and out
of the tube (3) to completely drain the oil from the shock absorber.