
i-350 L5-3.5L (2006)
Apply a 5.5 mm (0.22 inch) bead of sealer GM P/N 12378521 (Canadian P/N 88901148) to the oil pan in the areas marked (1).
2. Apply a 3 mm (0.12 inch) bead of sealer GM P/N 12378521 (Canadian P/N 88901148) to the oil pan in the area marked (2).
3. Important: Use care not to allow the sealer to contact the oil pump pipe and screen assembly.
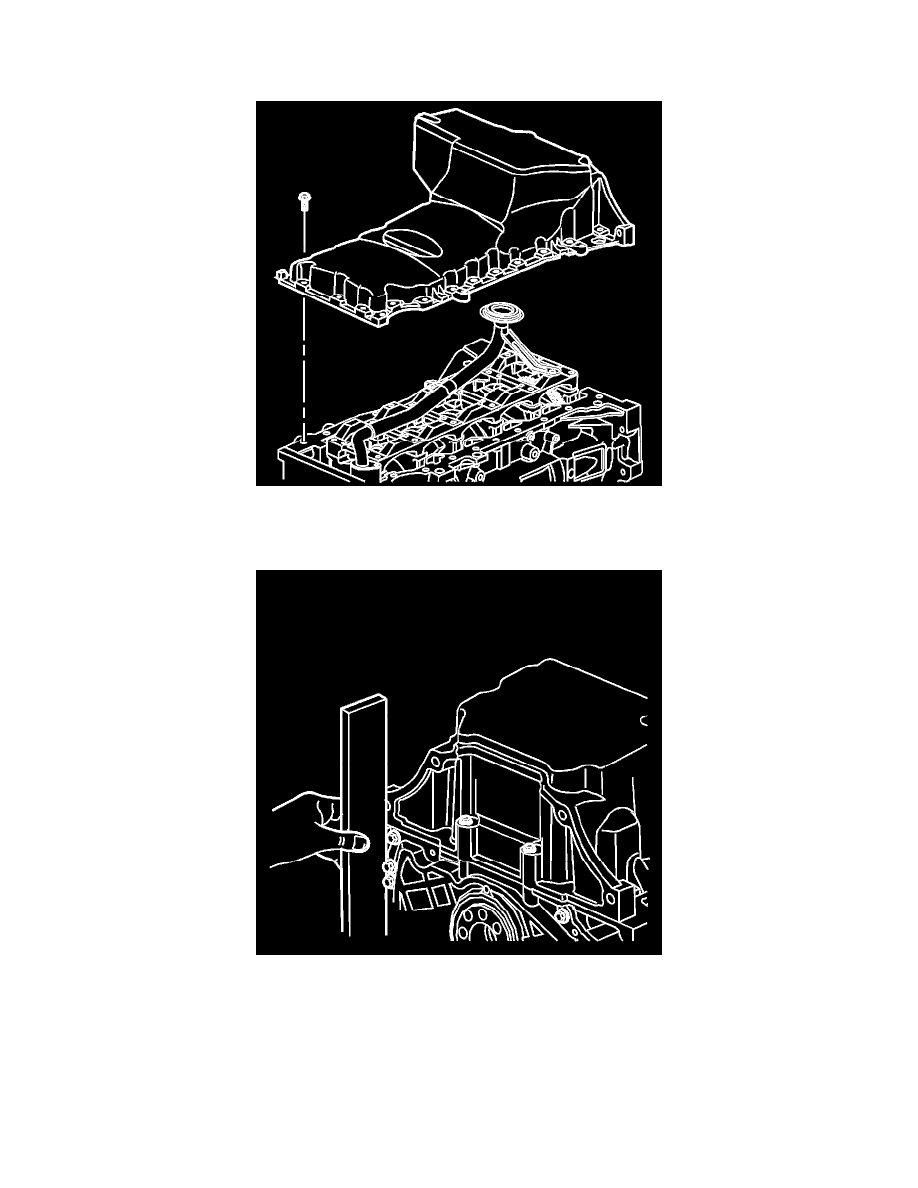
Position the oil pan to the engine block.
4. Important: The rear oil pan surface needs to be flush with the rear block surface.
Use the following applicable step to properly align the oil pan:
^
Transmission Removed Use a straight edge at the rear of the block and oil pan for proper alignment.
^
Transmission Installed Ensure the oil pan is positioned fully rearward against the transmission mounting surface.
5. Install the oil pan bolts.
6. Notice: Refer to Fastener Notice in Service Precautions.
Tighten the oil pan bolts.