
Rodeo 2WD V6-3.2L (2003)
Steps 1 - 2
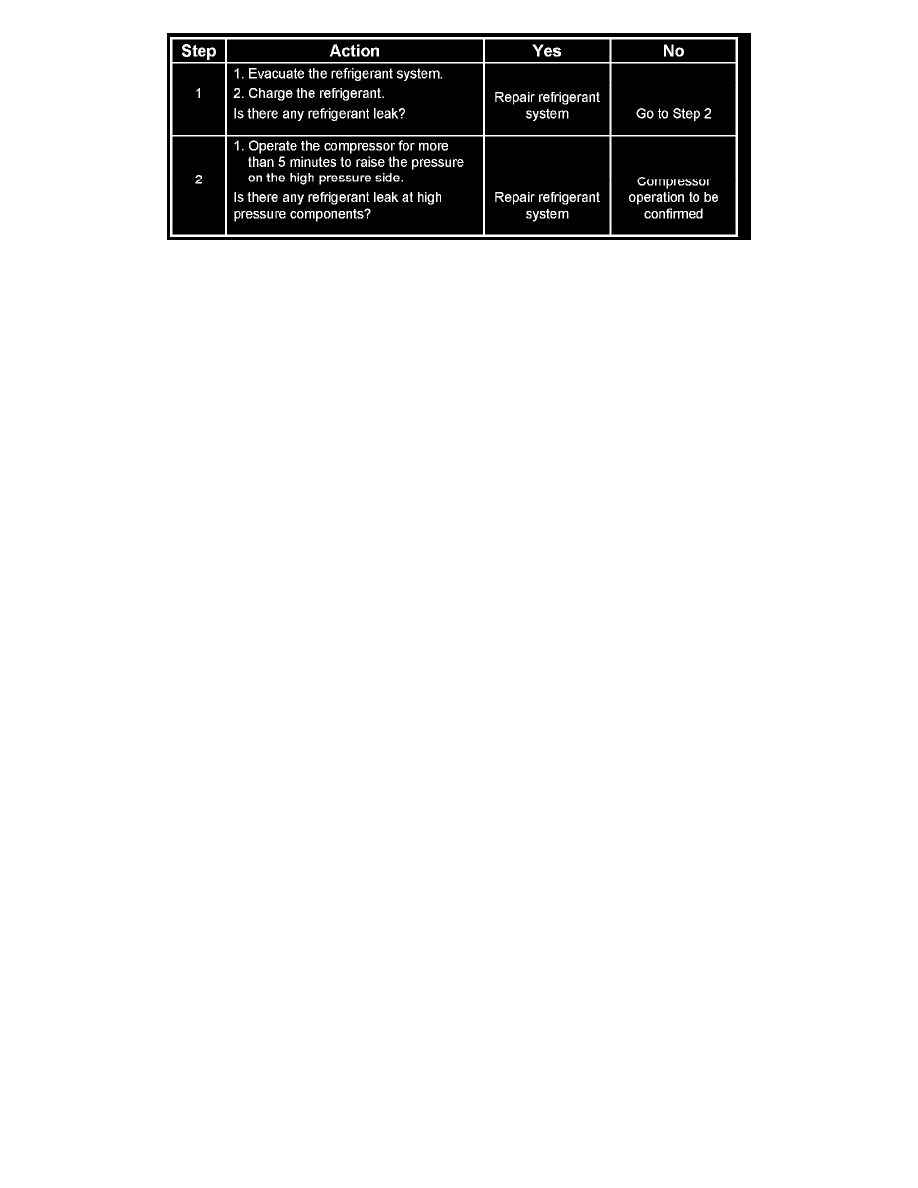
Inspection flow of refrigerant leak
Inspection Steps
Check the components of air-conditioner to see if there occurs any refrigerant leak along the flow of refrigerant.
NOTE:
-
To avoid refrigerant leak detection error, avoid refrigerant vapor and cigarette smoke presence when performing the inspection. Also, select a
location that is not susceptible to wind, in case refrigerant vapor is found it will not be blown off.
-
Inspection should be conducted chiefly on the pipe connections and sections where a marked oil contamination is found. When refrigerant is
leaking, oil inside is also leaking at the same time.
-
It is possible to visually check the leak from inside the cooling unit. Follow the method below when performing the inspection. Remove the drain
hose or resistor of the cooling unit, and insert a leak detector to see if there are signs of leakage.
High Pressure Side
1. Discharger section of compressor.
2. Inlet/outlet section of condenser.
3. Inlet/outlet section of receiver driver.
4. Inlet section of cooling unit.
Low Pressure Side
1. Outlet section of cooling unit.
2. Intake section of compressor.
Major Checking Points of Refrigerant Leak
Compressor
-
Pipe connection
-
Sealing section of shaft
-
Mating section or cylinder
Condenser
-
Pipe connection
-
Welds of condenser body
Receiver driver
-
Pipe connection
-
Attaching section of pressure switch
-
Section around the sight glass
Evaporator unit (cooling unit)
-
Pipe connections
-
Connections of expansion valve
-
Brazed sections of evaporator