
Rodeo LSE 4WD V6-3.2L (2000)
12.
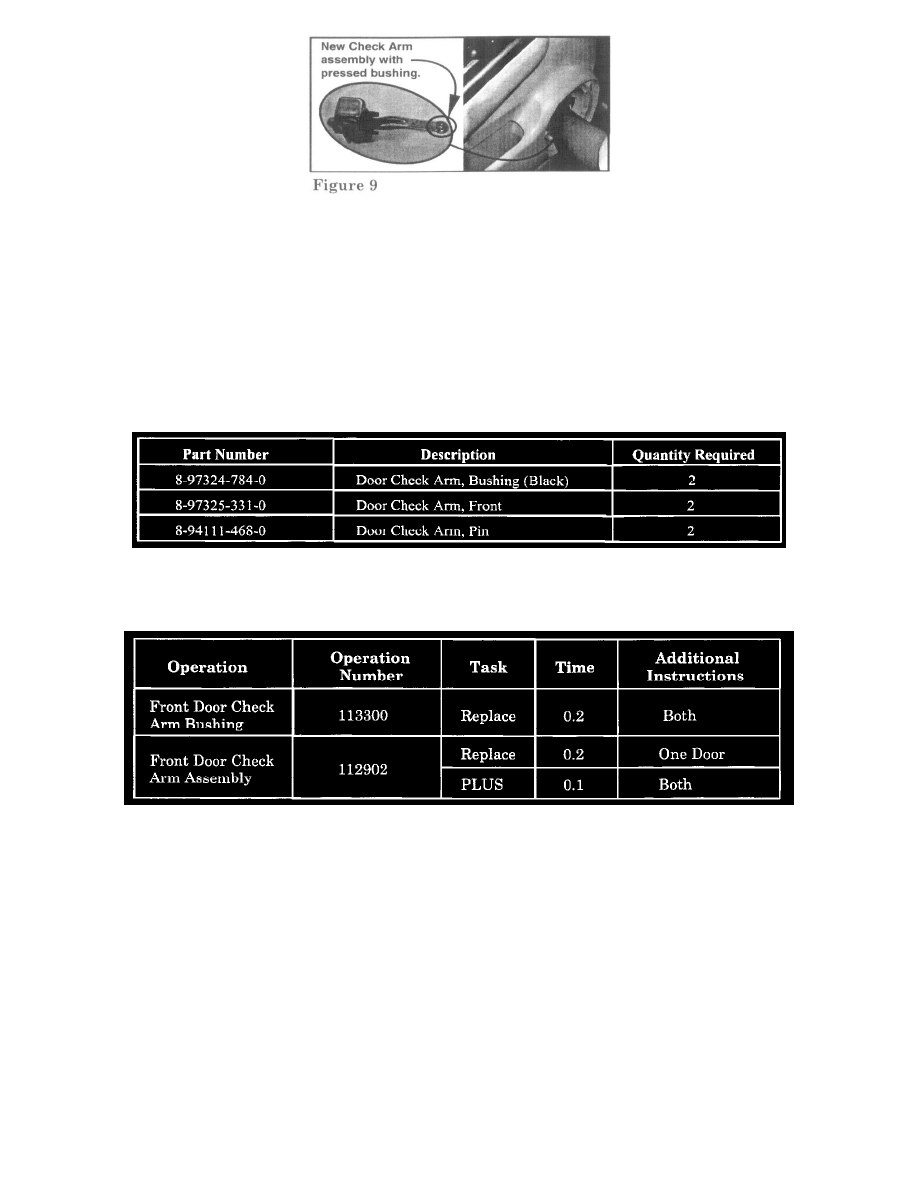
Install the new check arm assembly into place through the speaker opening. Reinstall the two Check Arm retaining nuts and tighten (torque: 5.1
lbs. ft. (6.9 NM) +/- 1.4 lbs. ft. (1.9 NM) (Figure 9).
13.
For check arm installation procedure, refer to steps 6 - 7.
NOTE:
Check pin for fit, if pin is damaged or does not fit tightly into place it will need to be replaced, otherwise the door popping sound will continue.
IMPORTANT:
Grease application is critical for proper operation on pressed bushing.
14.
Perform the service procedure on the remaining front door.
PARTS INFORMATION
WARRANTY CLAIM INFORMATION
Use the labor operations table as shown.
Labor Time includes administrative time allowance.
WARRANTY CLAIM SUBMISSION INFORMATION