
Rodeo LSE 4WD V6-3.2L (2000)
7. Remove front cowl cover.
8. Remove windshield support.
9. Remove upper moulding.
10. Remove windshield.
-
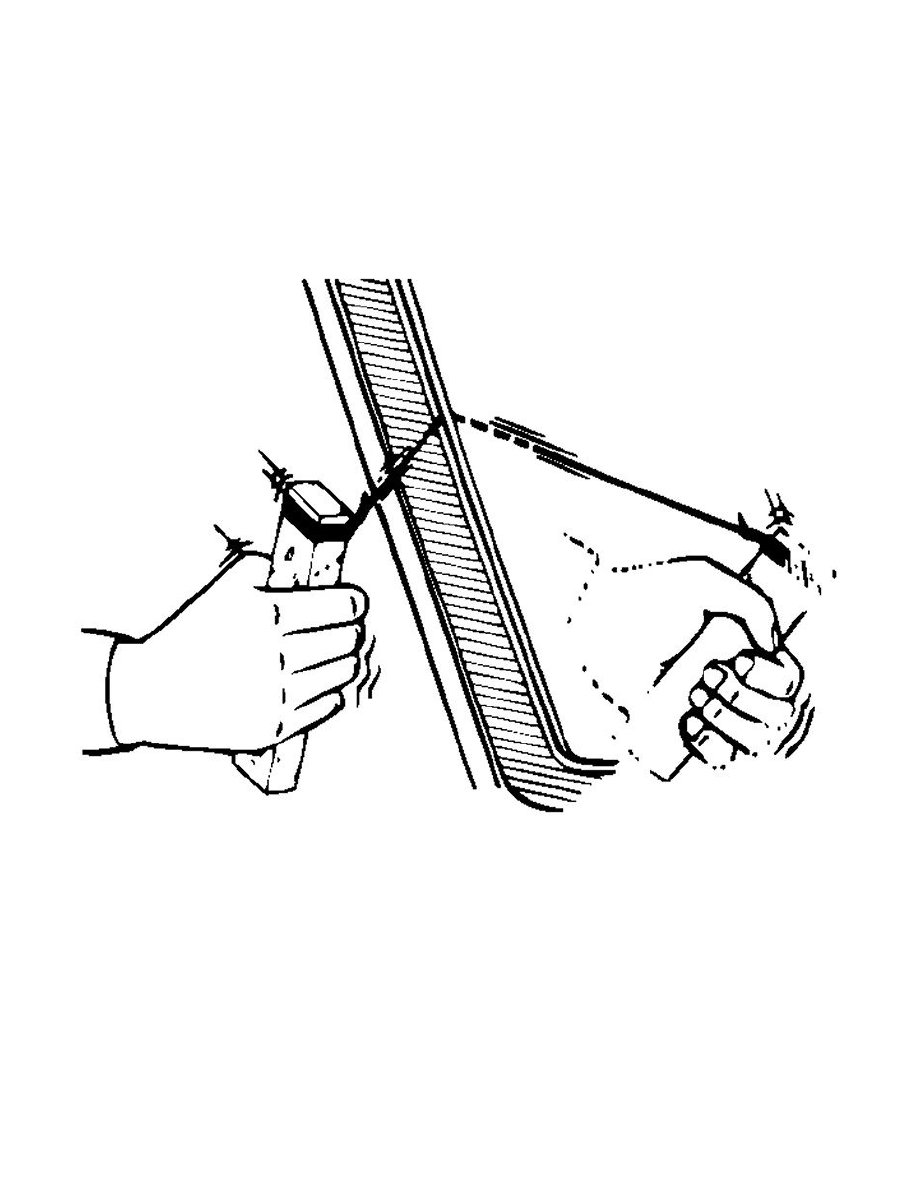
Use a knife to cut through part of the adhesive caulking material.
-
Secure one end of a piece of steel piano wire (0.02 inches in diameter) to a piece of wood that can serve as a handle.
-
Use a pair of needle nose pliers to insert the other end of the piano wire through the adhesive caulking material at the edge of the windshield
glass.
-
Secure the other end of the piano wire to another piece of wood.
-
With the aid of an assistant, carefully move the piano wire with a sawing motion to cut through the adhesive caulking material around the
entire circumference of the windshield glass.
-
Attach some cloth tape (1) on the body for protecting the painting surface.
-
Clean the remaining adhesive caulking material from the area of the body which holds the windshield.
Installation
To install, follow the removal steps in the reverse order, noting the following points:
1. Clean the bonding surfaces of both the windshield and body panel with a soft rag and white gasoline.
2. Install the spacer.
-
Attach spacers in ten locations as shown in the figure.
-
Always use new spacer.